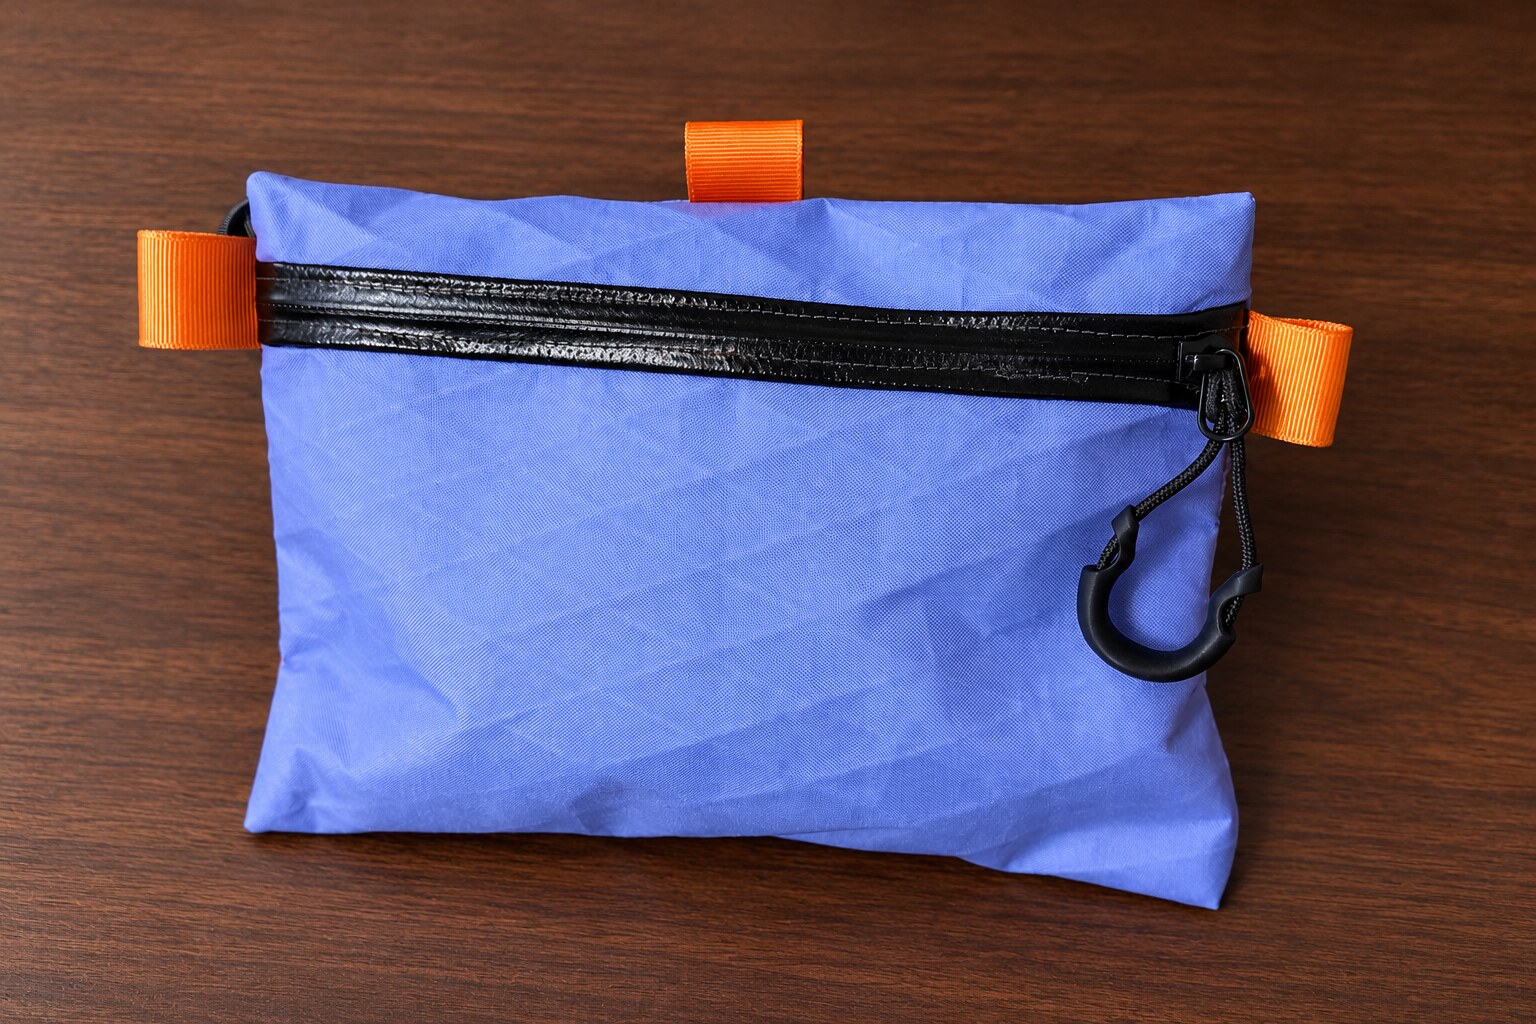
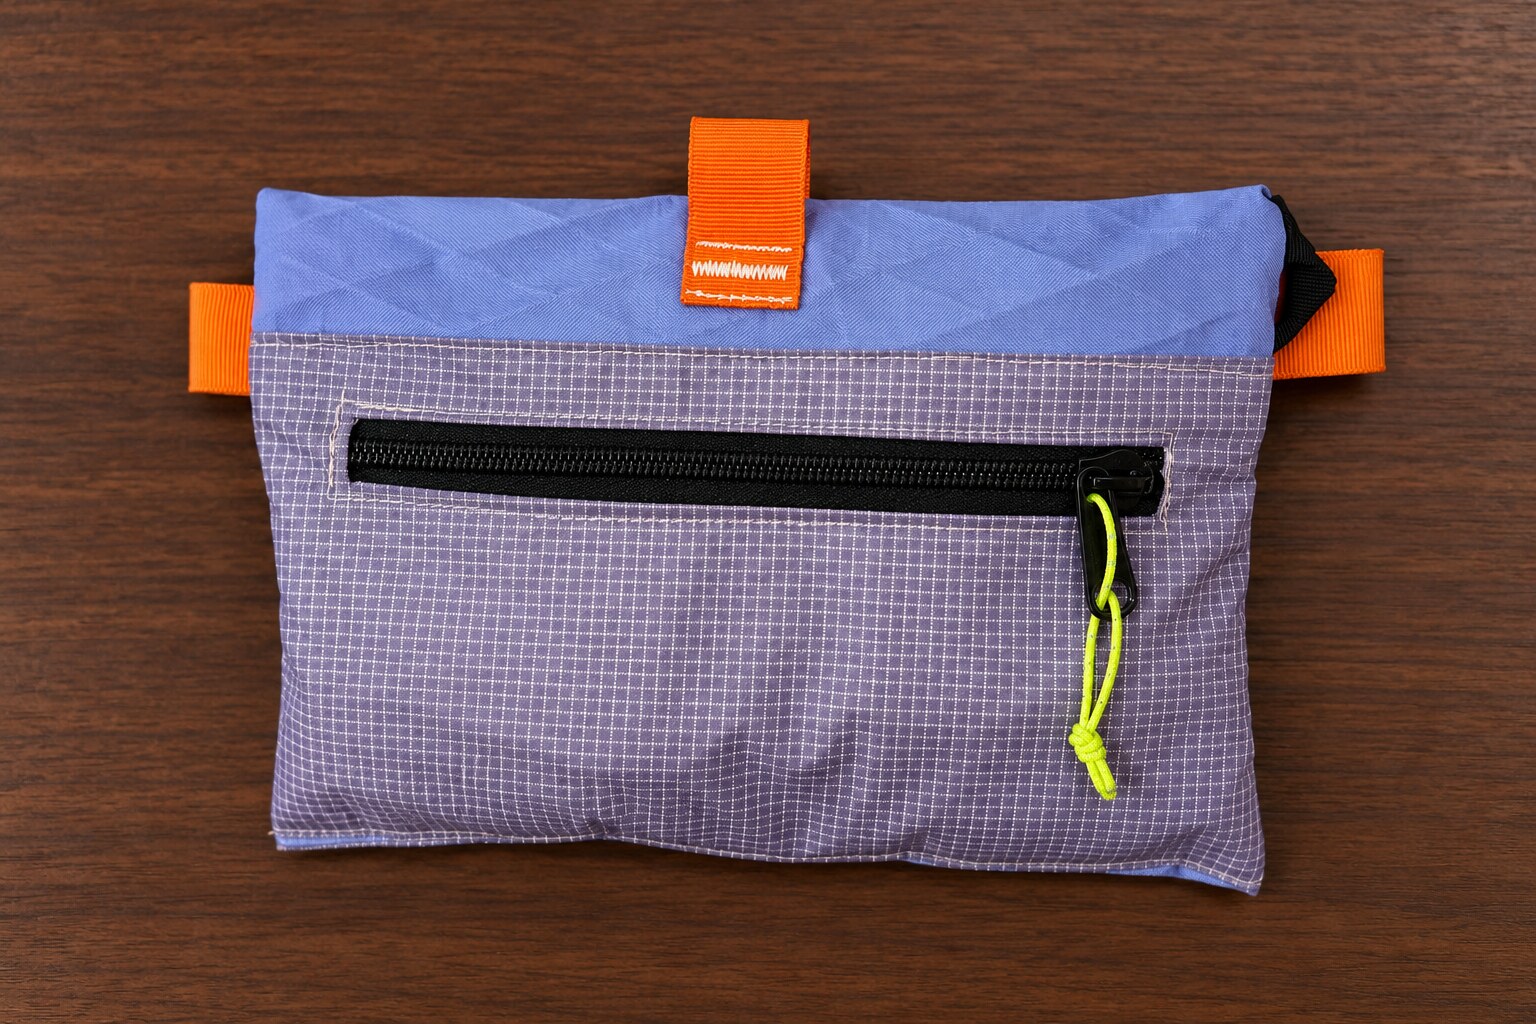
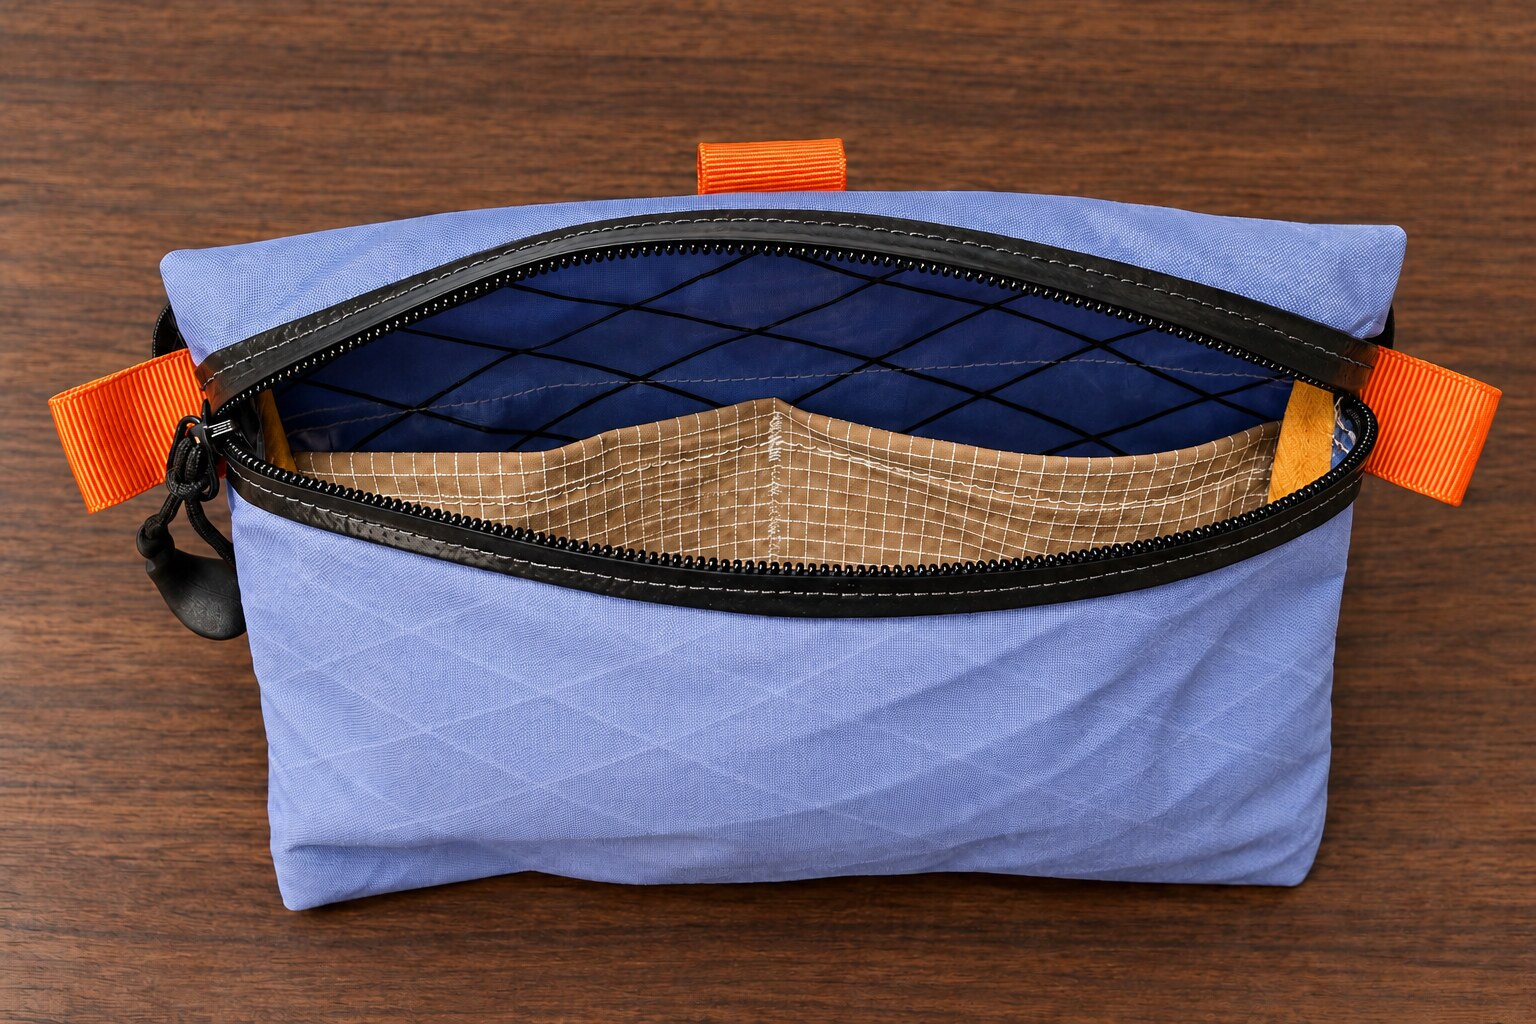
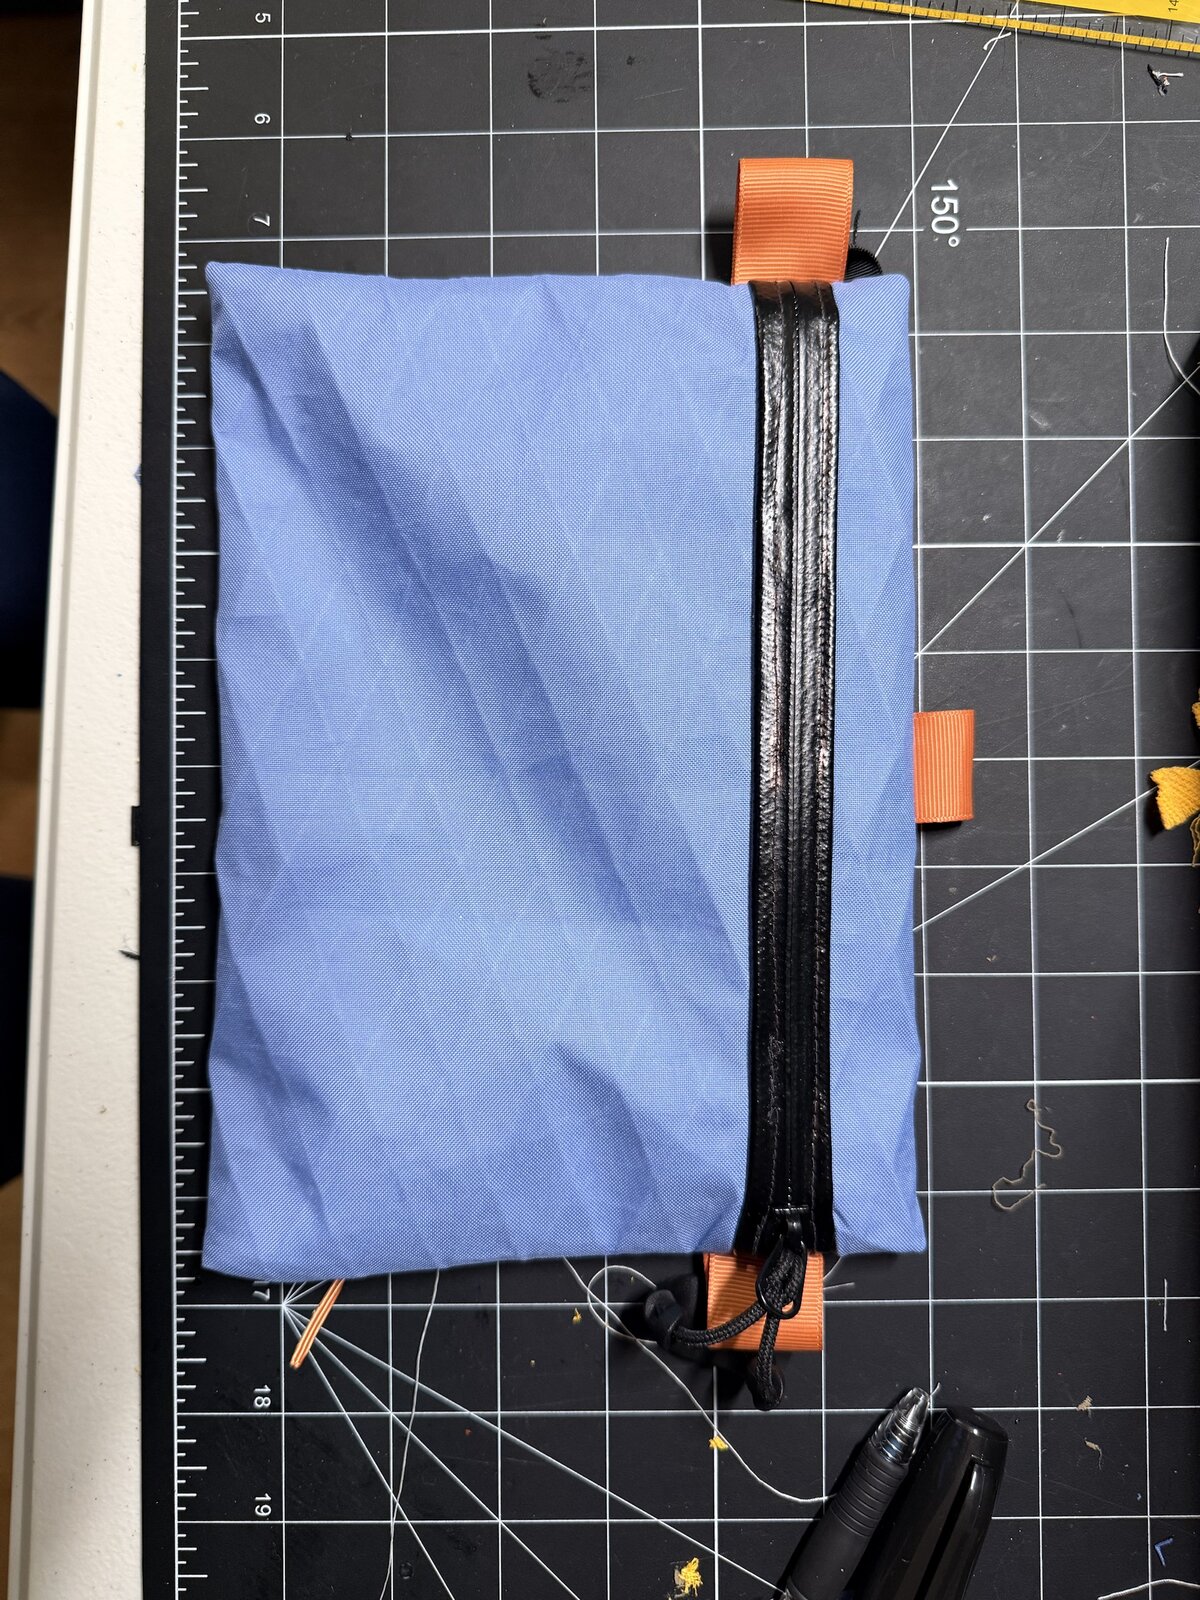
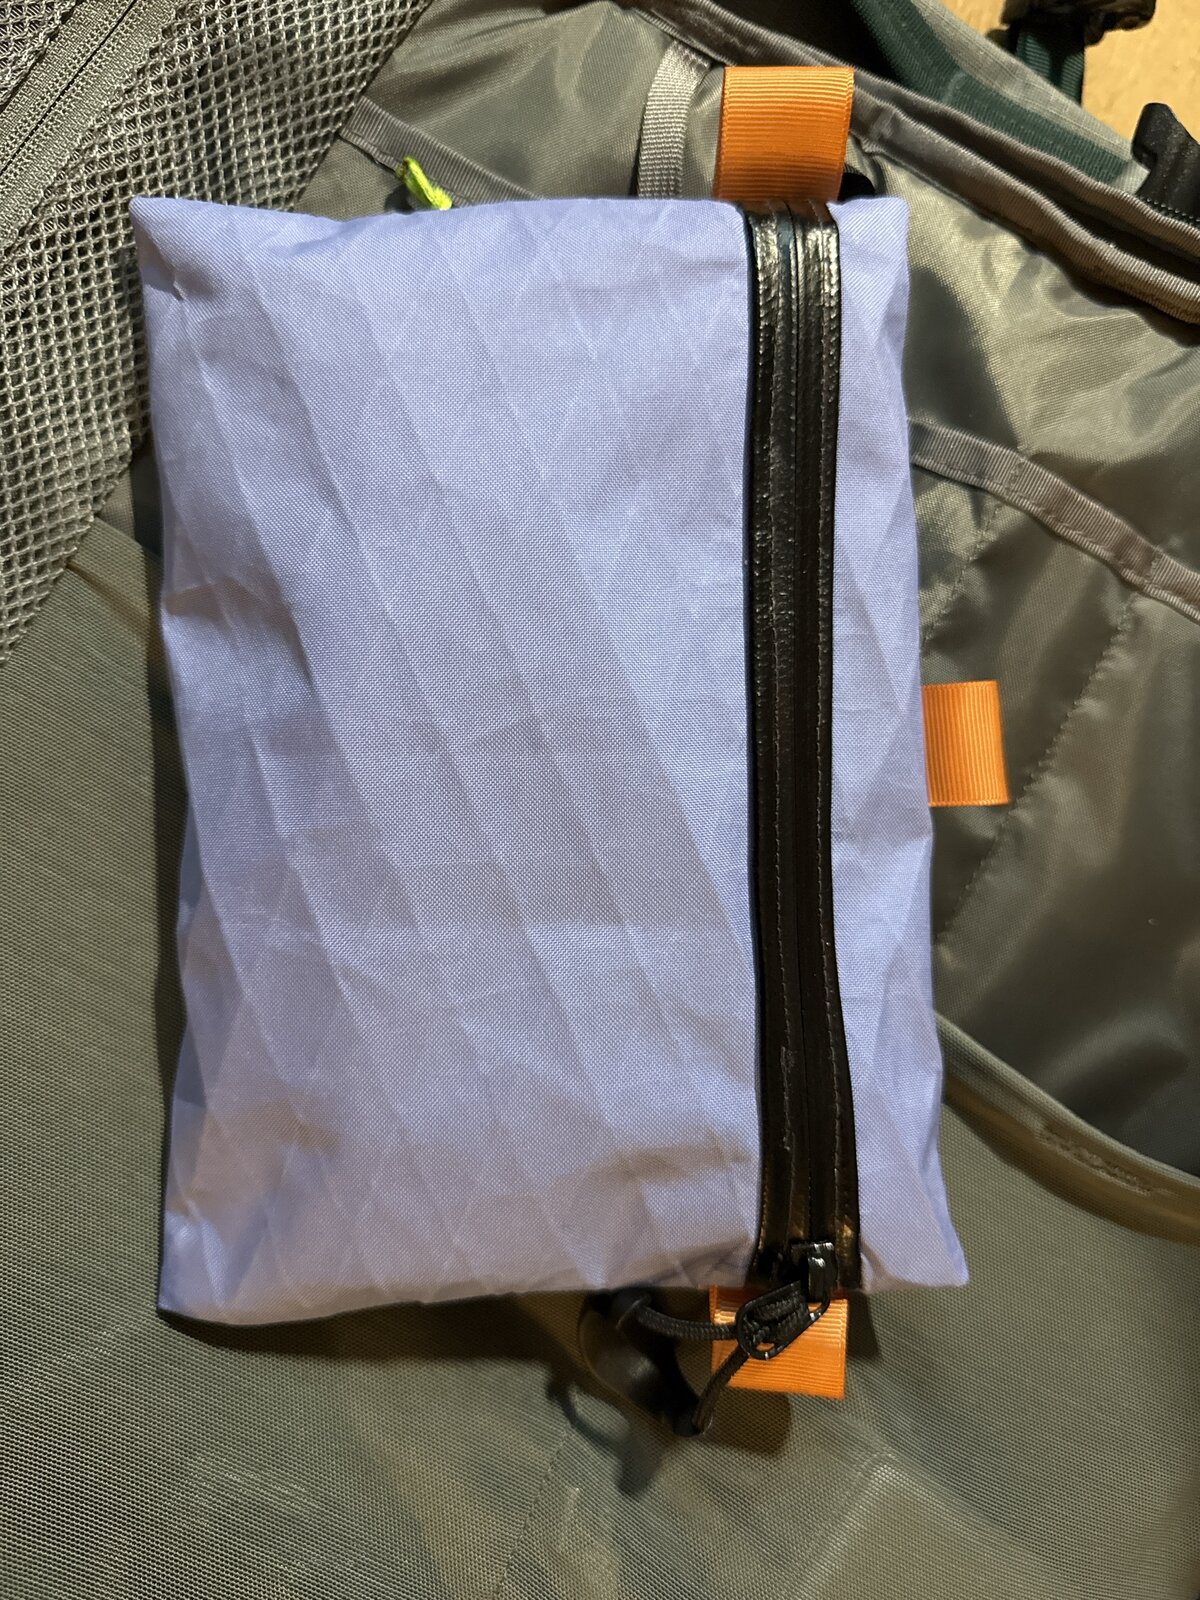
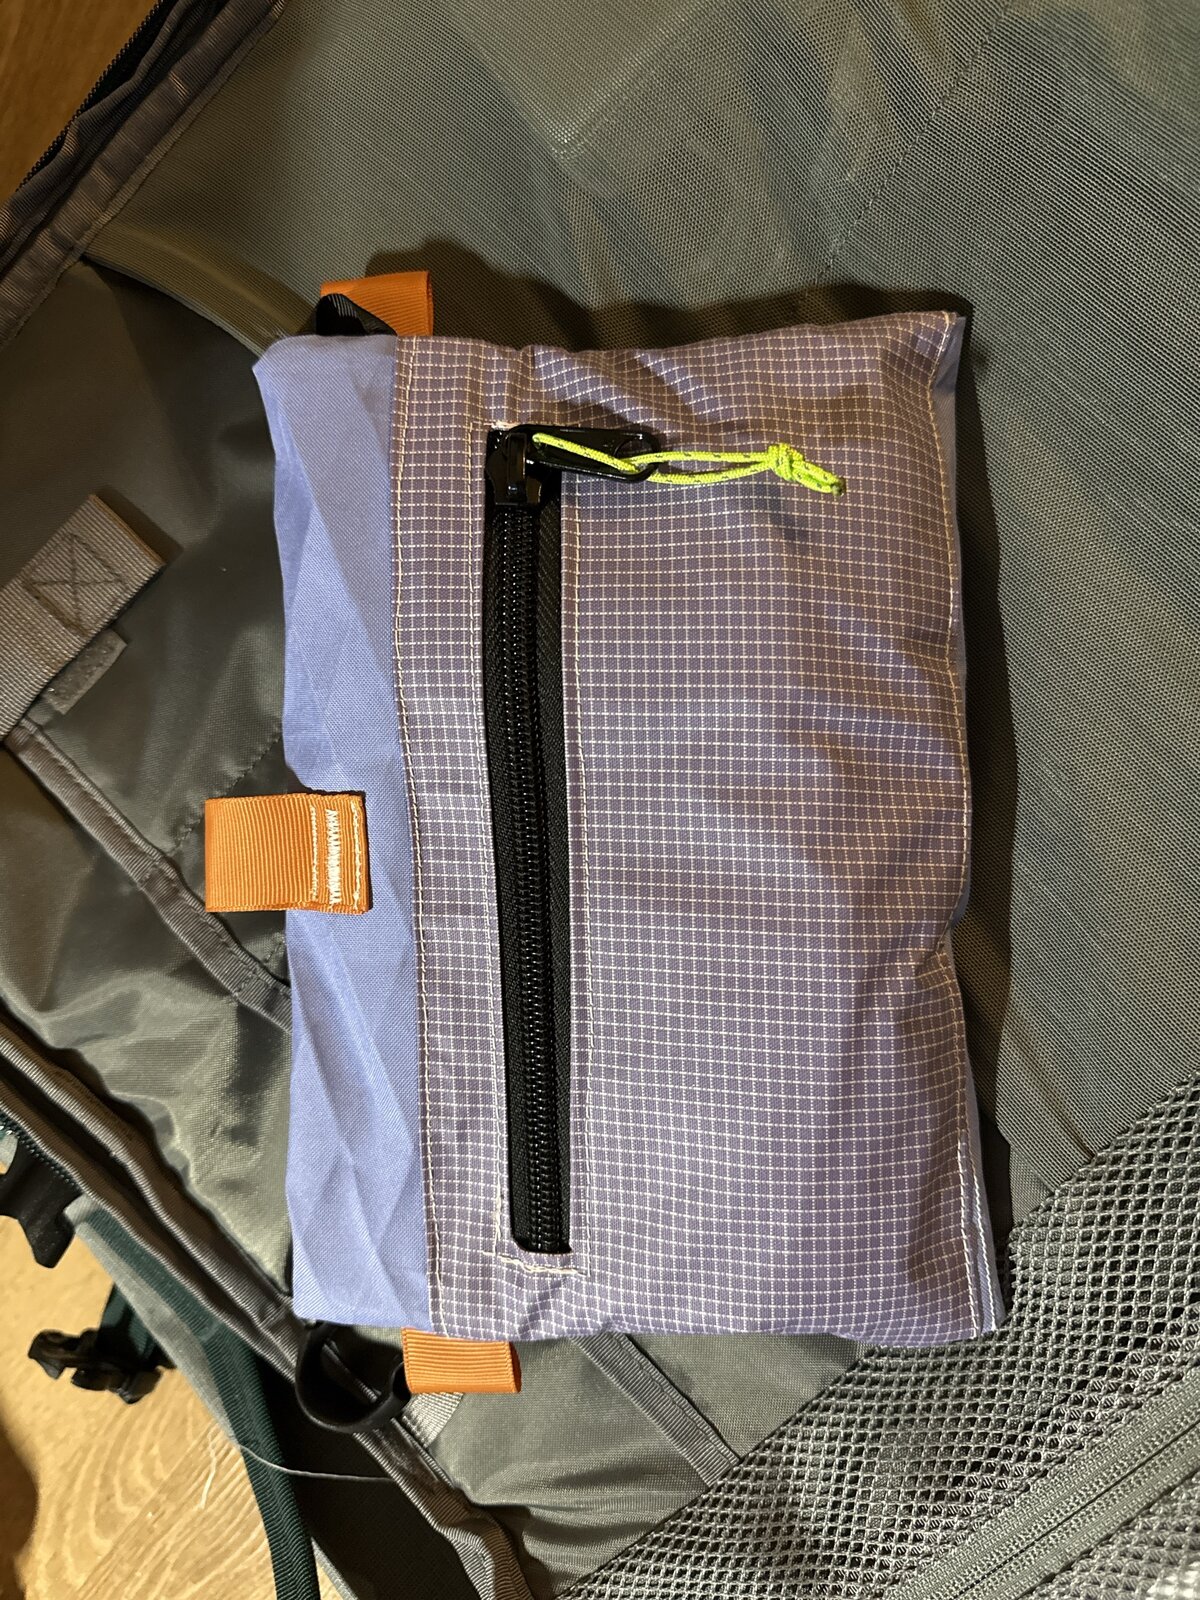
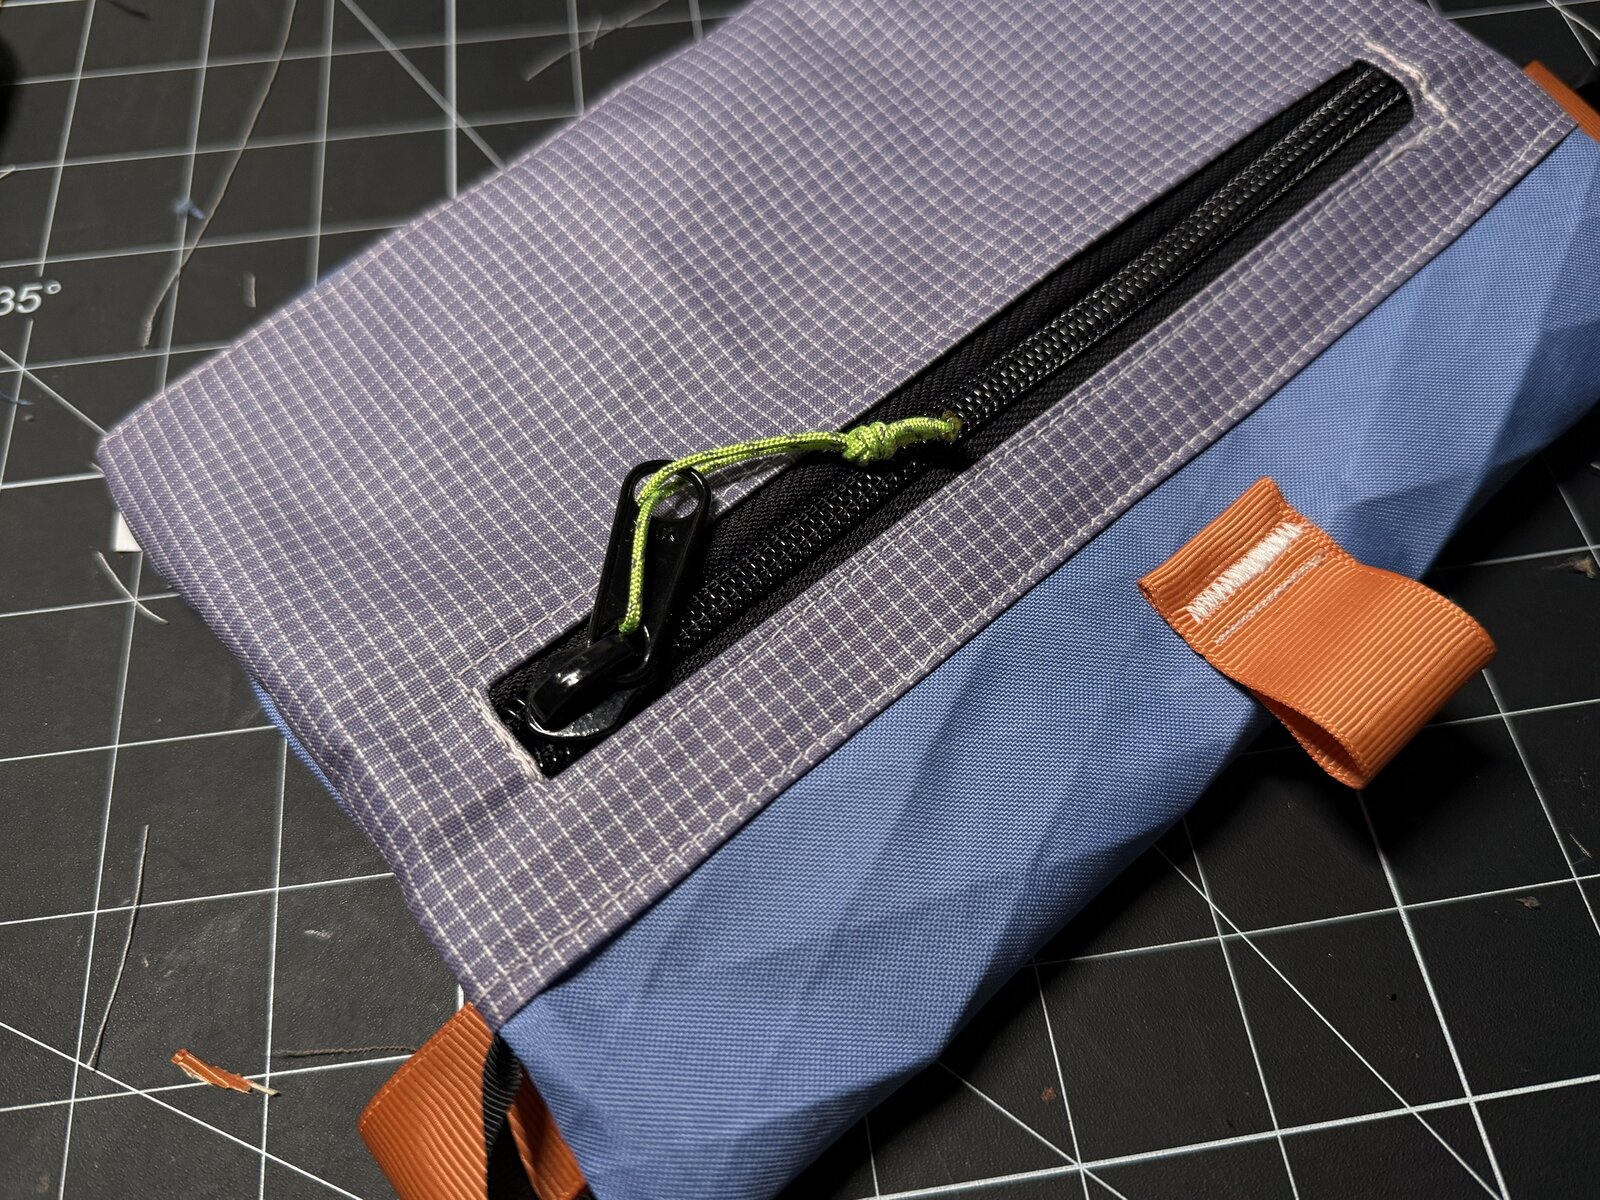
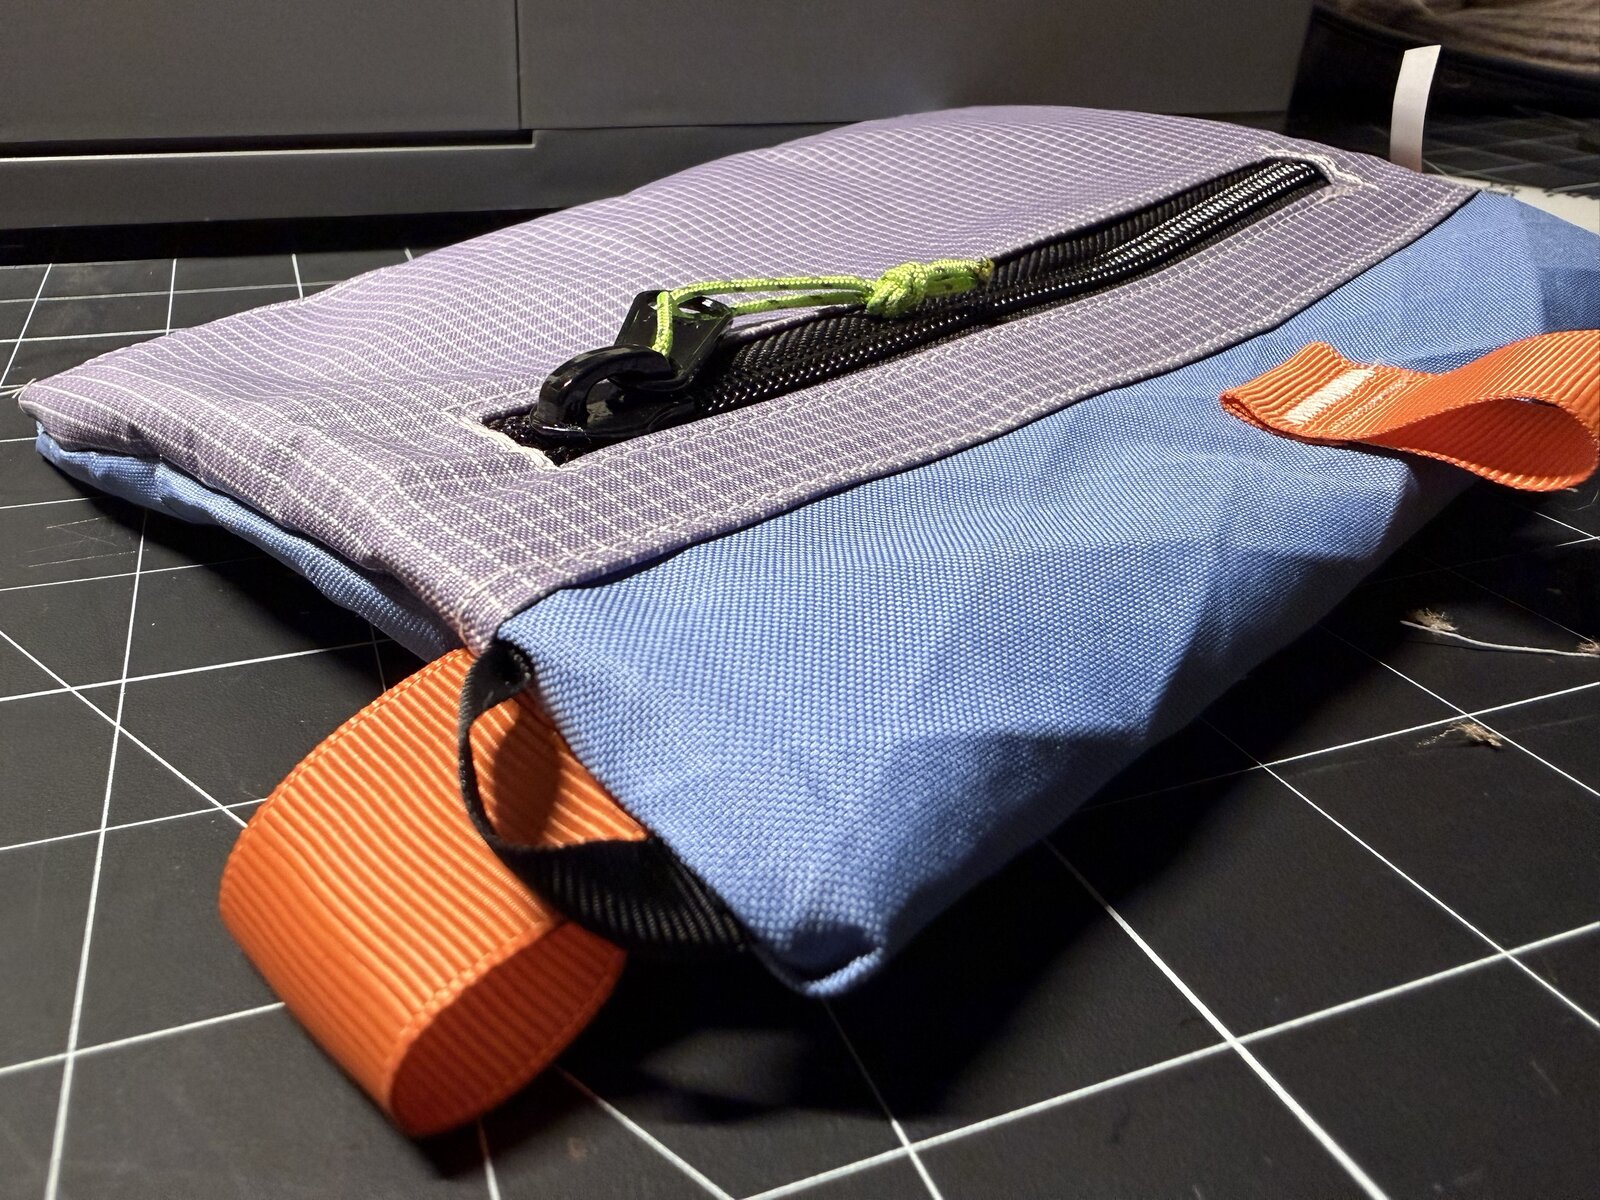
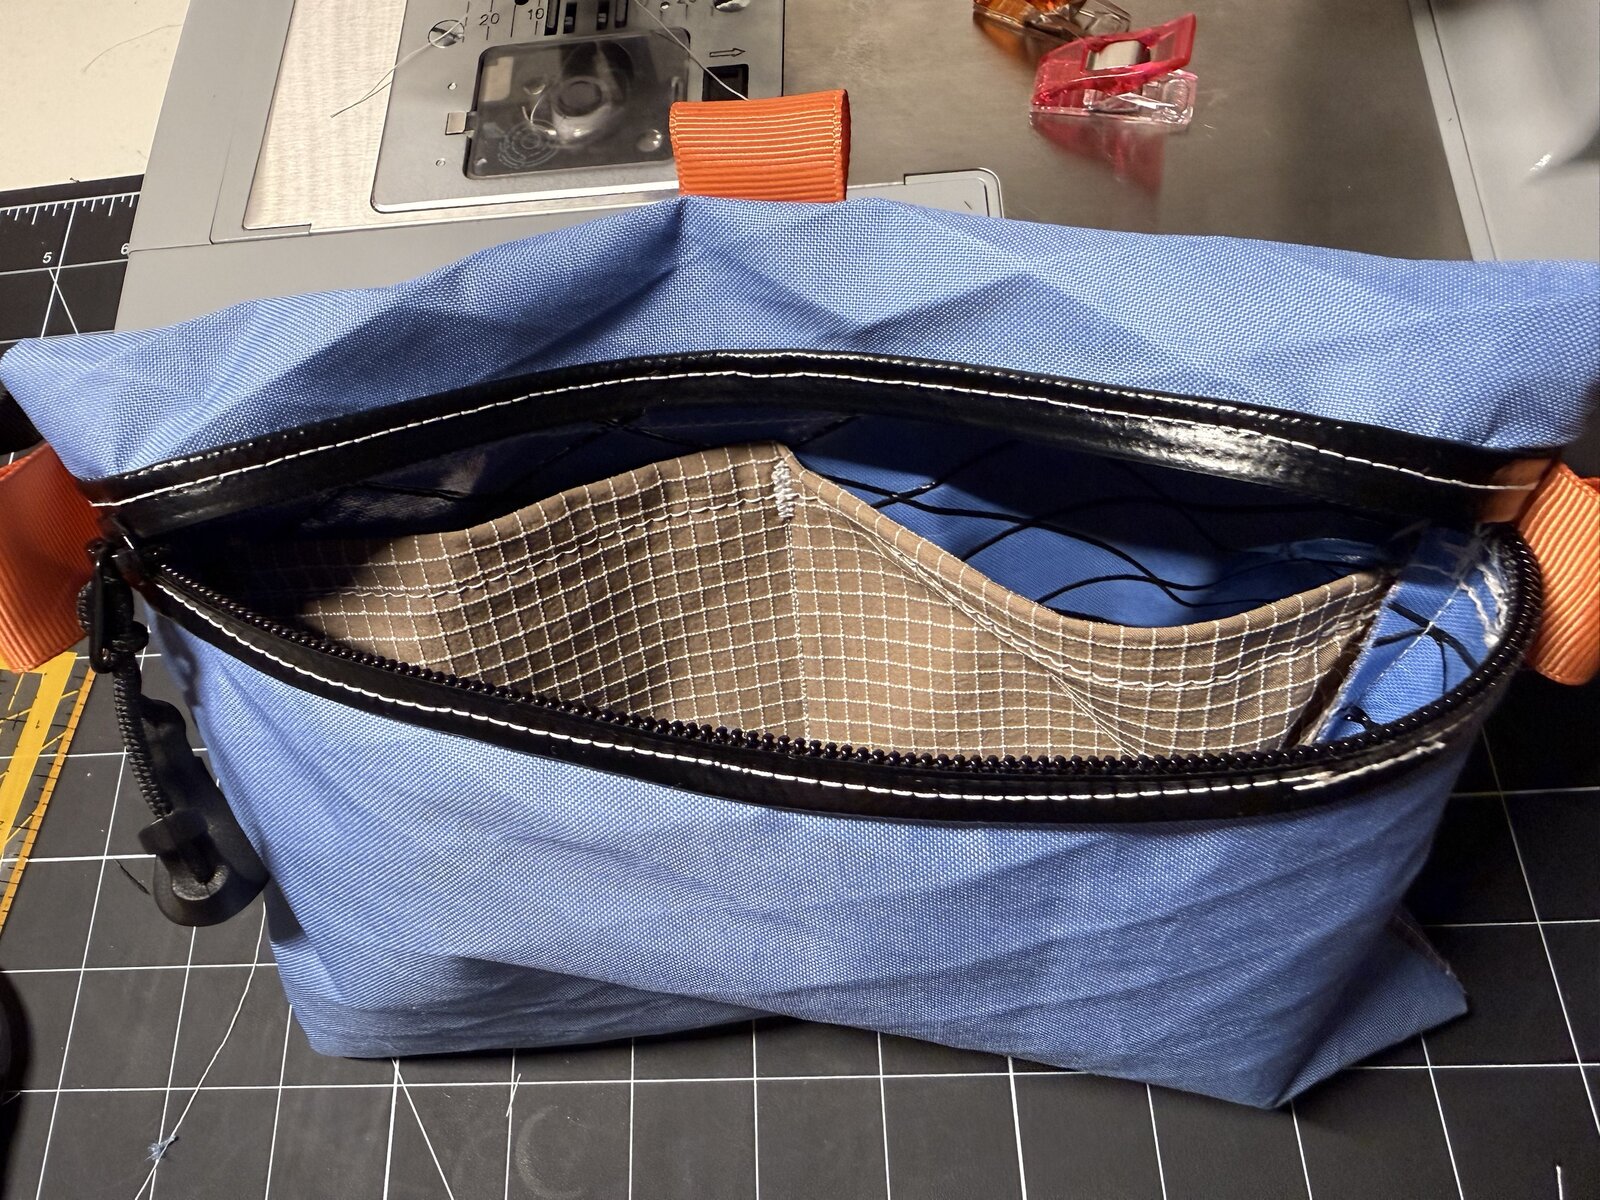
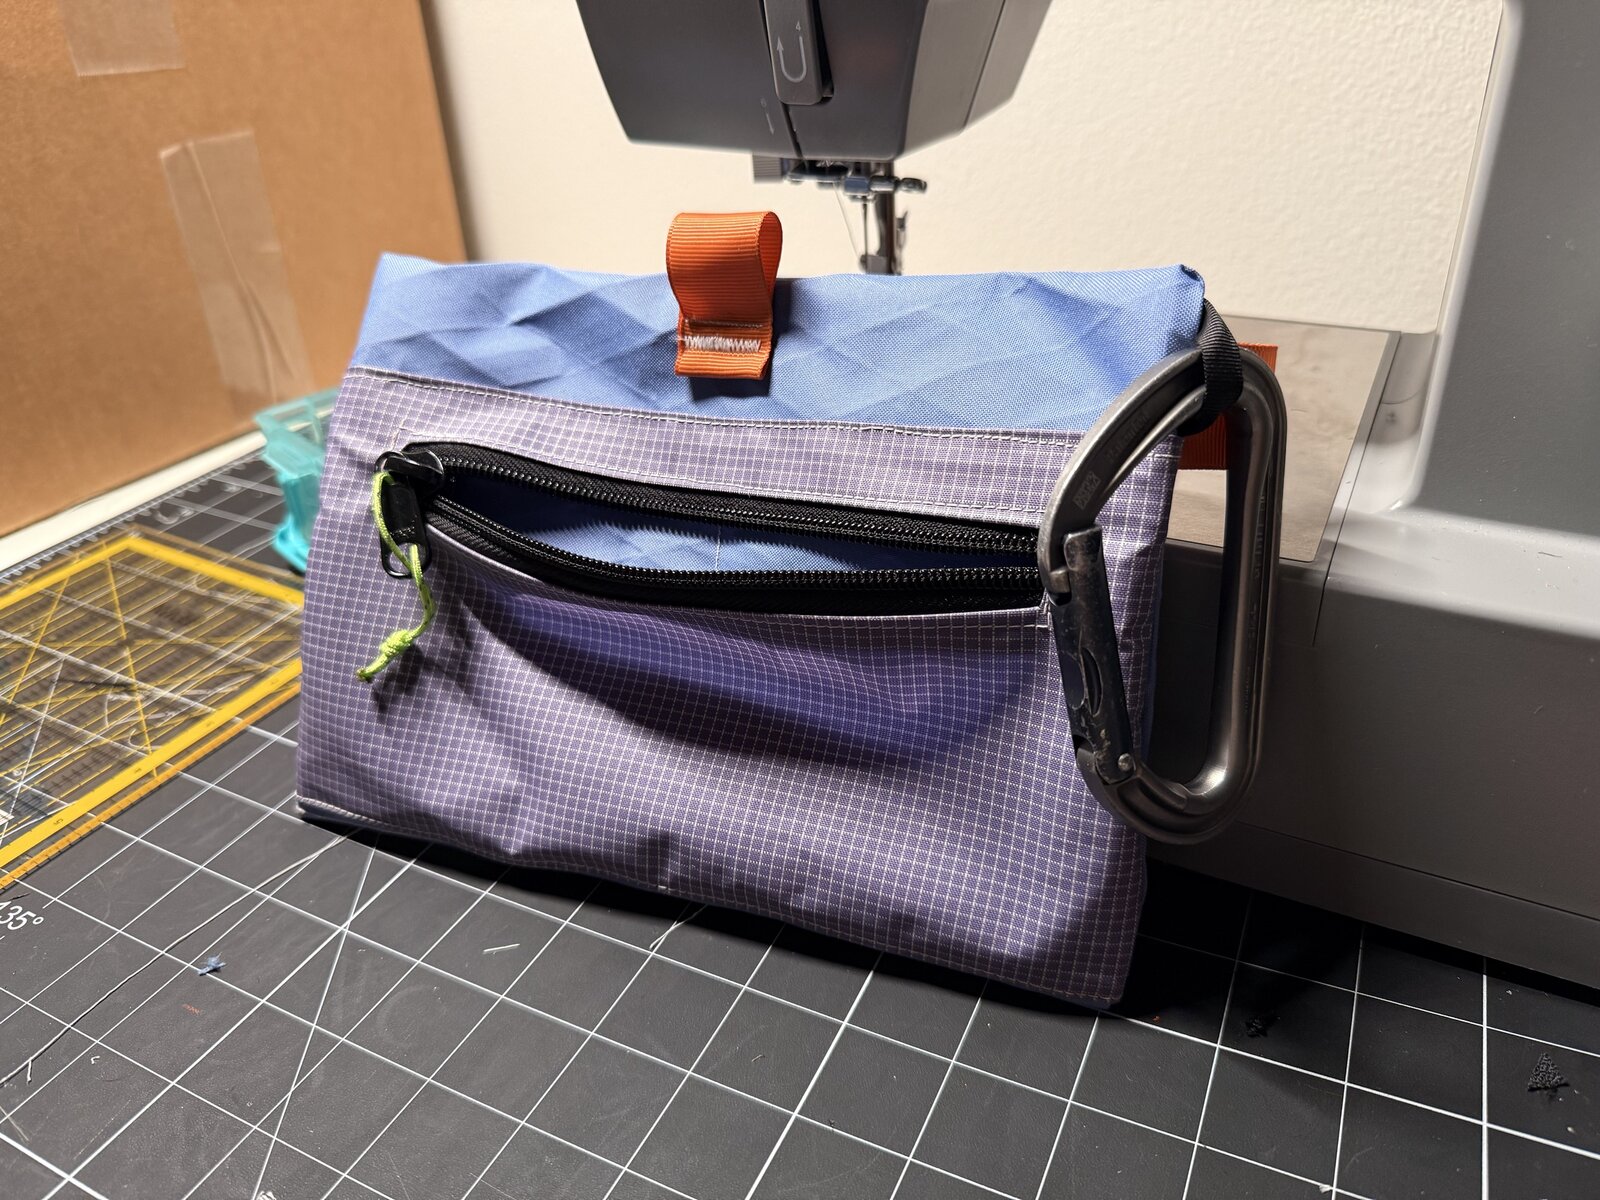
This pouch has four storage zones: two interior stretch-mesh pockets, a weatherproof main compartment, and an exterior zip pocket. The finished size is about 9¼″ wide × 6″ tall.
The body is XPAC RX30, with tensioned mesh pockets inside, a Gridstop zip pocket outside, and bound interior seams. It's weatherproof, not waterproof: stitched seams can still let water in.
Materials & cutting list
All measurements are in inches (″). Rectangles are listed as width × height.
| Part | Material / quantity | Cut size or specification |
|---|---|---|
| Body | XPAC RX30 / 1 | 10″ × 13″ |
| Interior pockets | Venom Stretch Mesh Eco MAX / 1 | 9¾″ × 5¾″ |
| Exterior pocket | 210D Venom Gridstop Eco / 1 | 11″ × 5½″ |
| Main zipper | YKK Uretek reverse coil #5 + slider | 10″ zipper chain |
| Pocket zipper | Standard coil #5 + slider | 9″ of zipper chain for an approx. 8″ window |
| Orange loops | 1″-wide grosgrain / 3 pieces | Approx. 3″ long each |
| Attachment loop | ⅜″-wide black grosgrain / 1 piece | Approx. 2½″ long; used in this build, but I recommend leaving it out |
| Seam binding | Bias tape / 2 lengths | 1″ wide; cut approx. 7″ long each and trim after sewing |
| Finishing | Gutermann MARA 70 thread, black and white; zipper pulls | Maxpedition pulls preferred |
The main zipper is Uretek; the Gridstop pocket zipper is standard, non-waterproof coil. Match the sliders to the zippers: a #5 reverse-coil slider for the Uretek and a #5 standard-coil slider for the pocket.
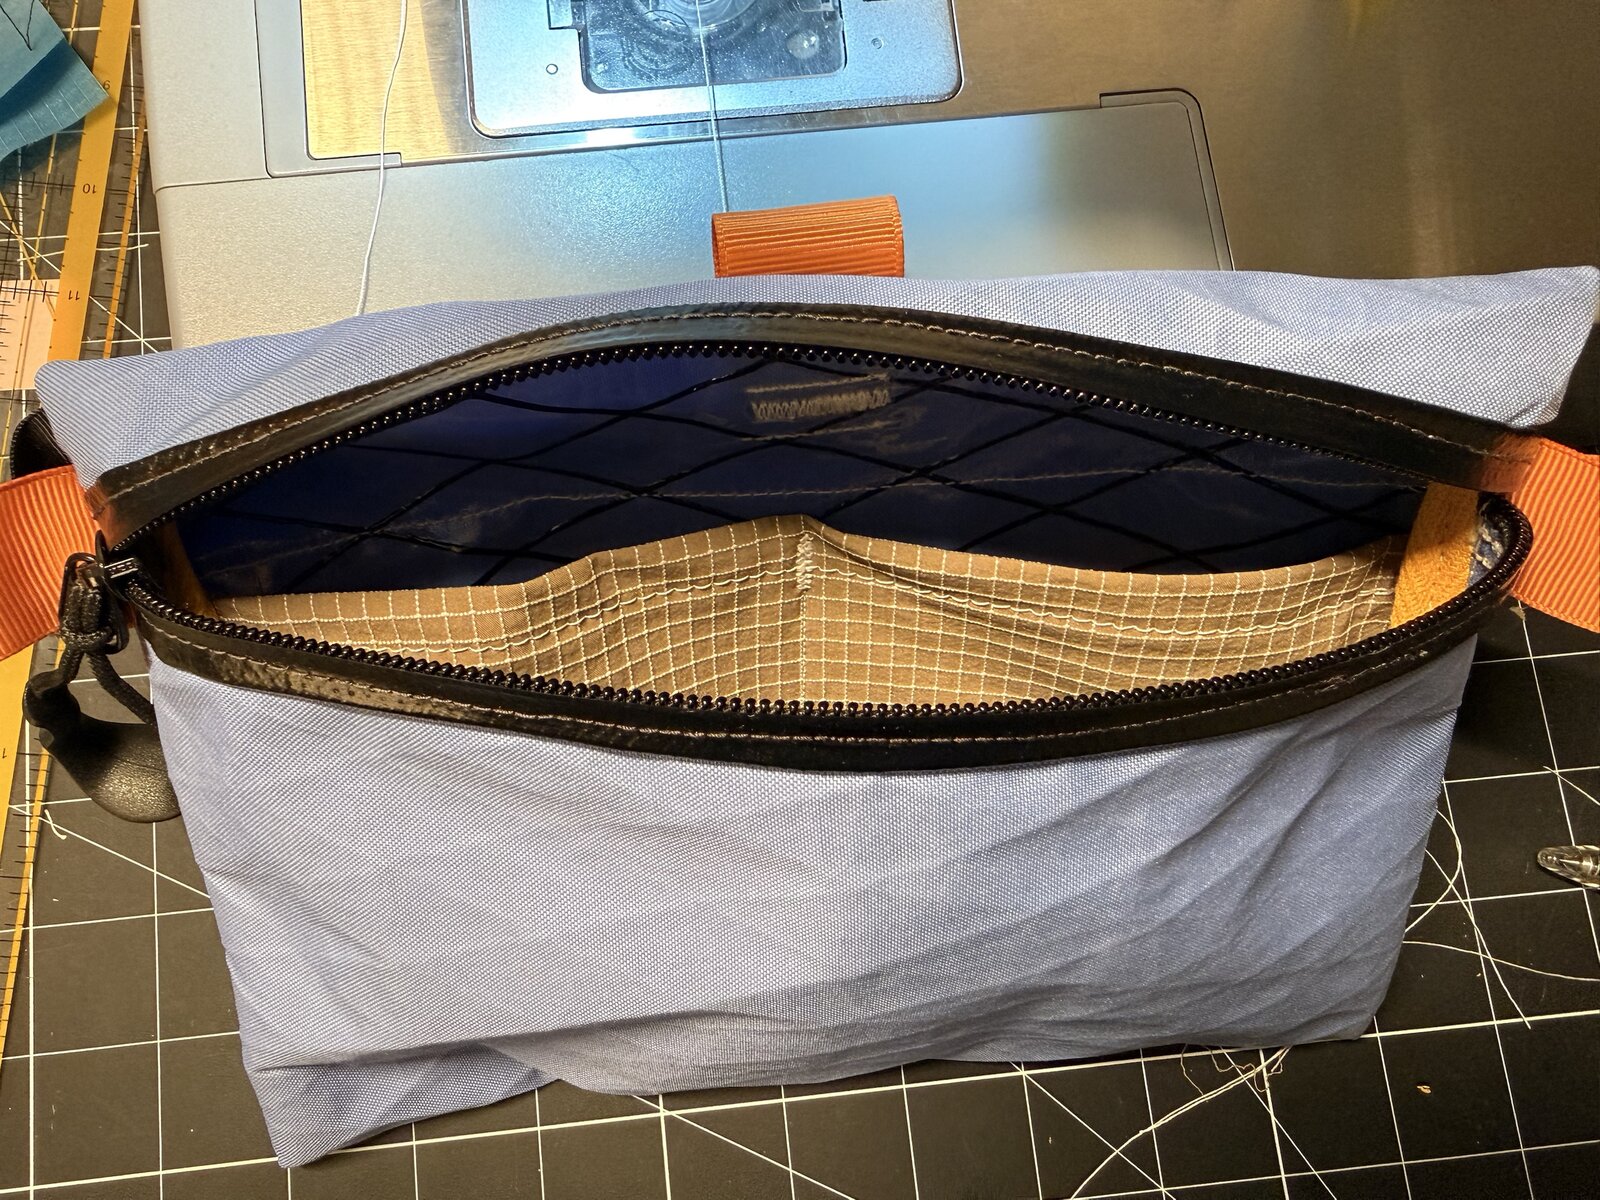
The finished pouch
Tools & setup
Sewing machine, zipper foot, scissors or rotary cutter, cutting mat, ruler, fabric marker, double-sided sewing tape and Wonder Clips. Optional: cord pulls and a carabiner.
Use a 90/14 needle and Gutermann MARA 70 thread, black and white as needed. General stitch length is 2–3 mm, except for the bartack settings in Step 4.
Use double-sided sewing tape inside folded hems to hold them while you sew. Add clips to support layered edges, and take them out before they reach the foot. Test your stitching on scraps. Use ⅜″ side-seam allowances when closing the pouch.
Prepare the mesh pocket
1. Cut and orient the fabric
Cut the body and pocket rectangles. The plain blue face of the XPAC RX30 is the exterior; the shiny face with the bold black Xs goes on the inside. Keep the mesh relaxed while you measure and cut.
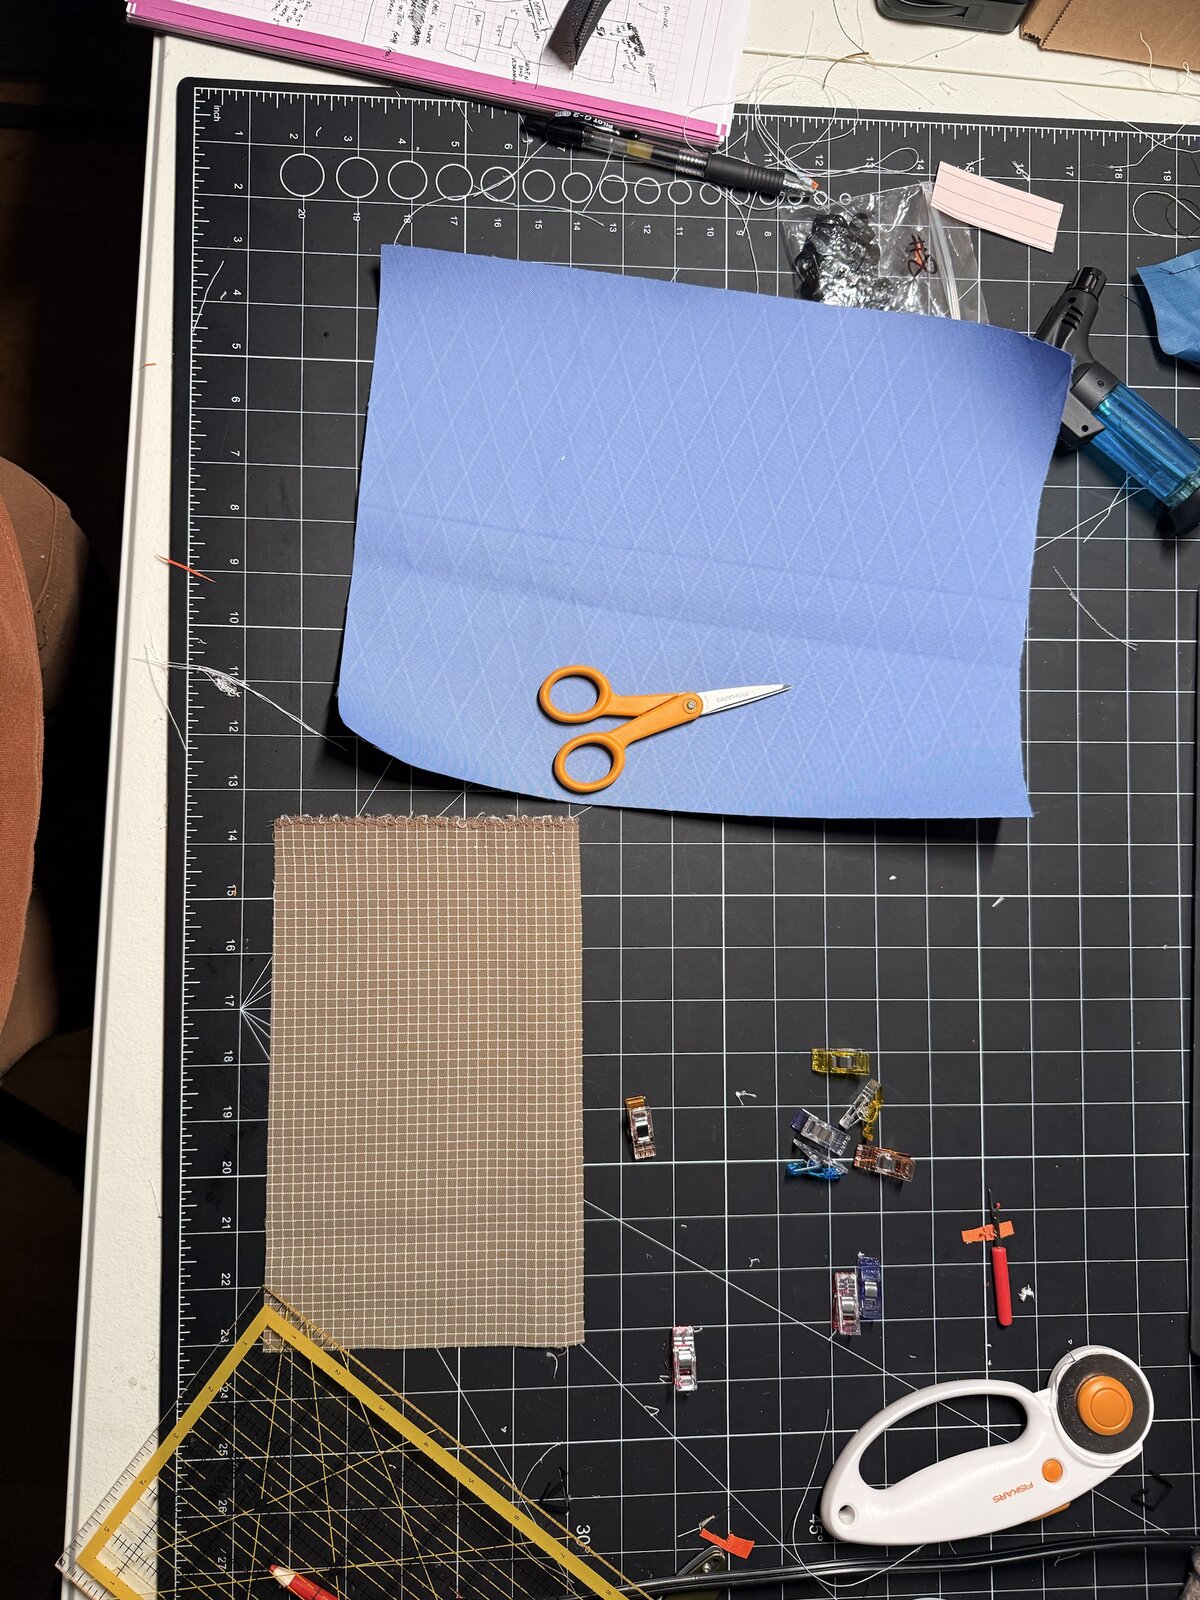
2. Fold the pocket opening
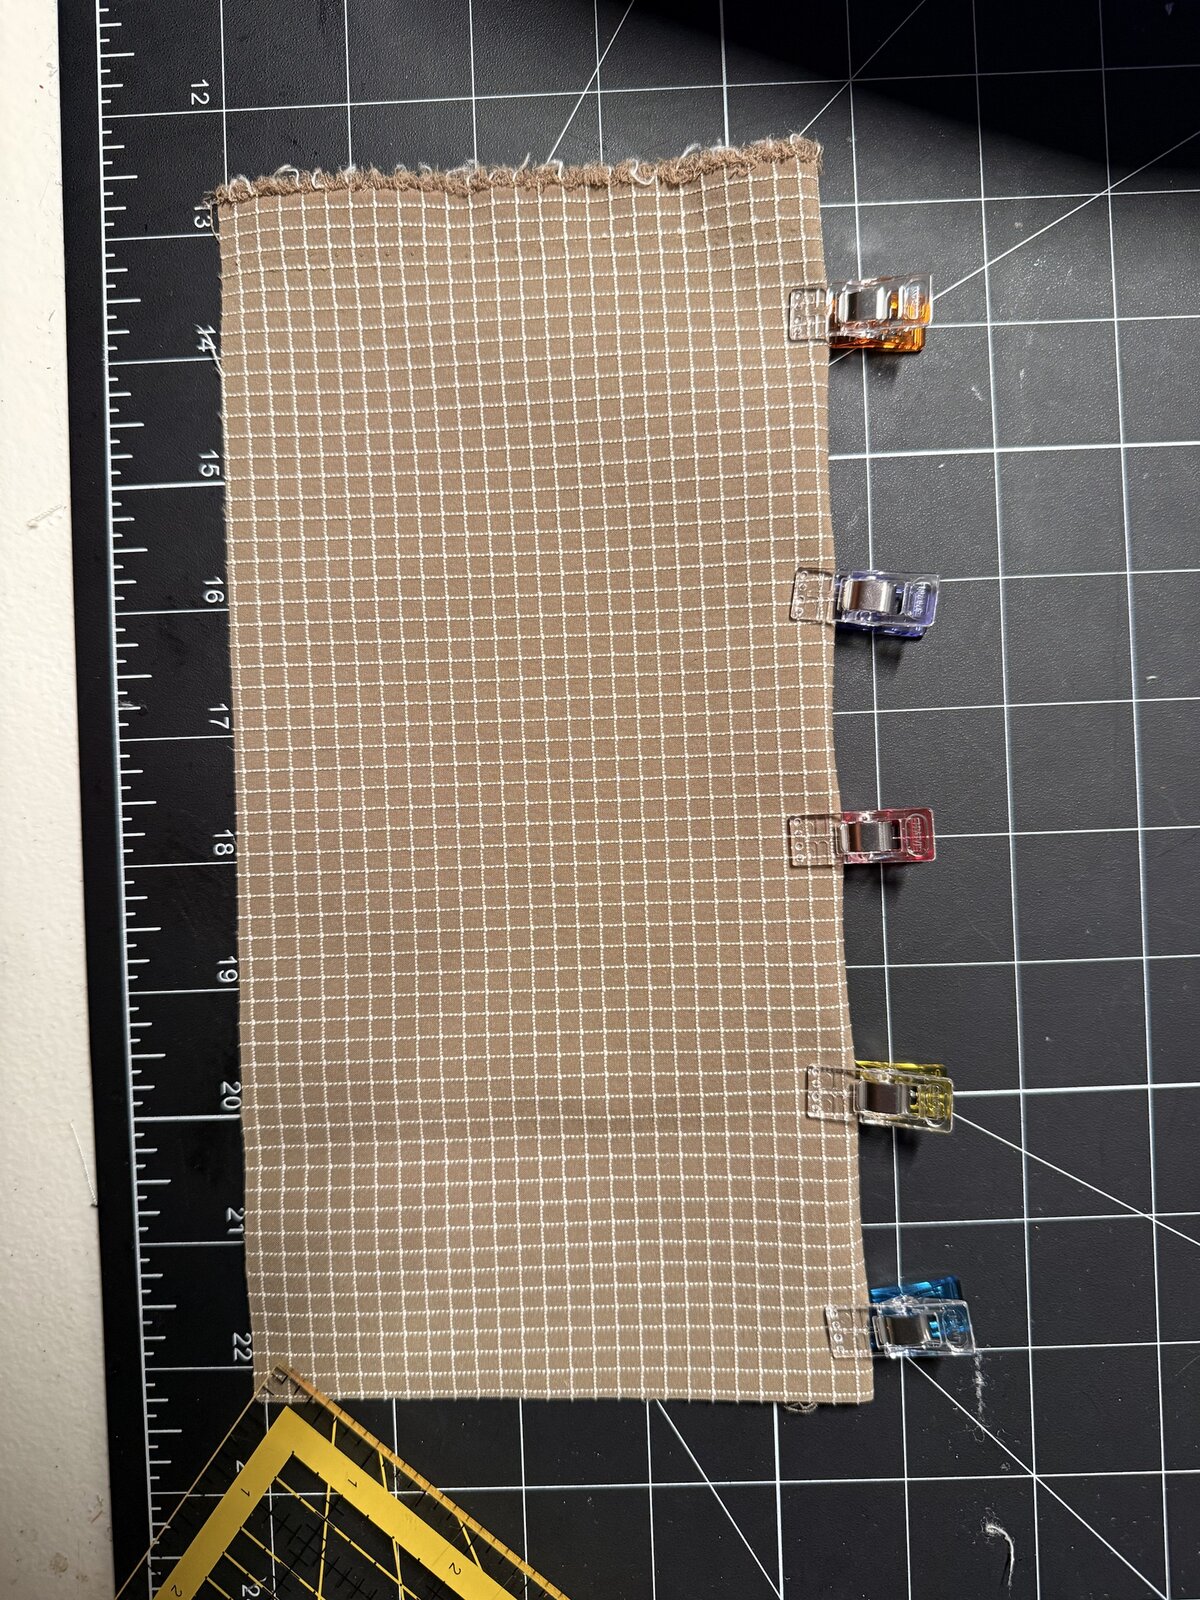
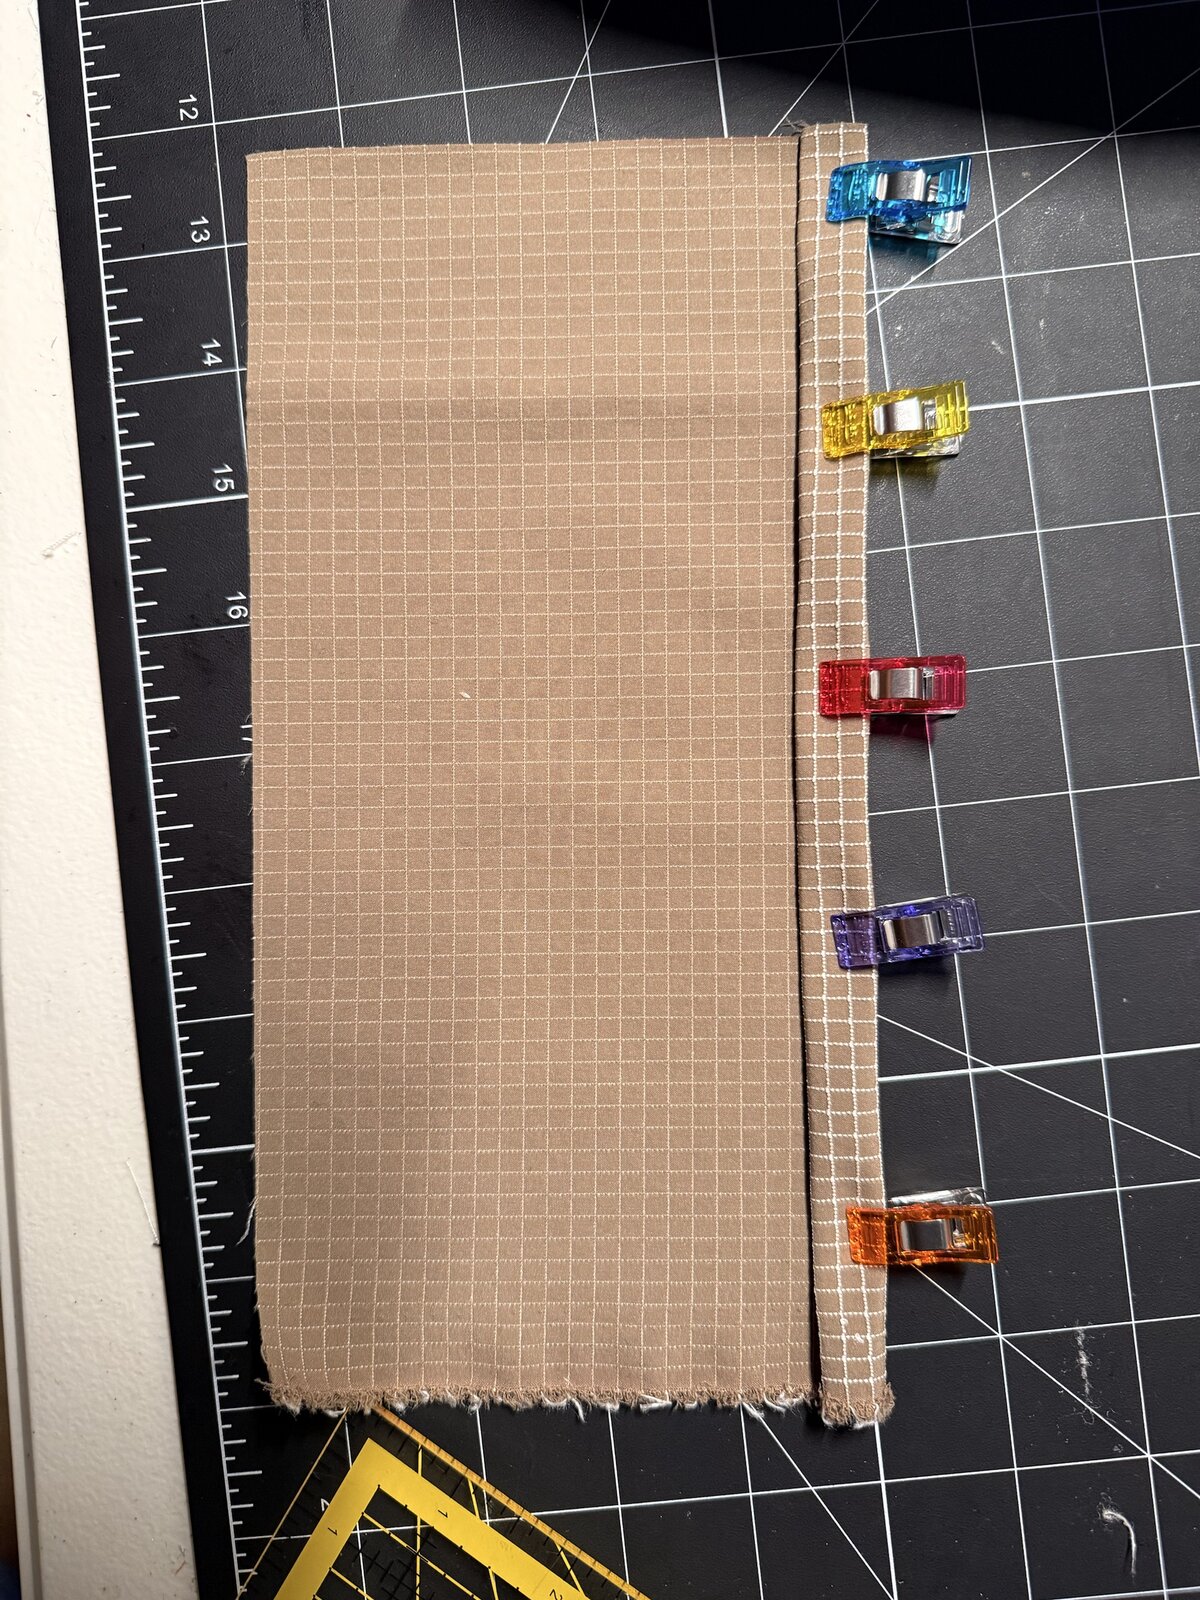
Along one 9¾″-long mesh edge, fold ½″ toward the wrong side, then fold another ½″ to enclose the raw edge. Hold the fold with double-sided sewing tape and secure it with clips. This uses 1″ of the cut height.
3. Sew the hem
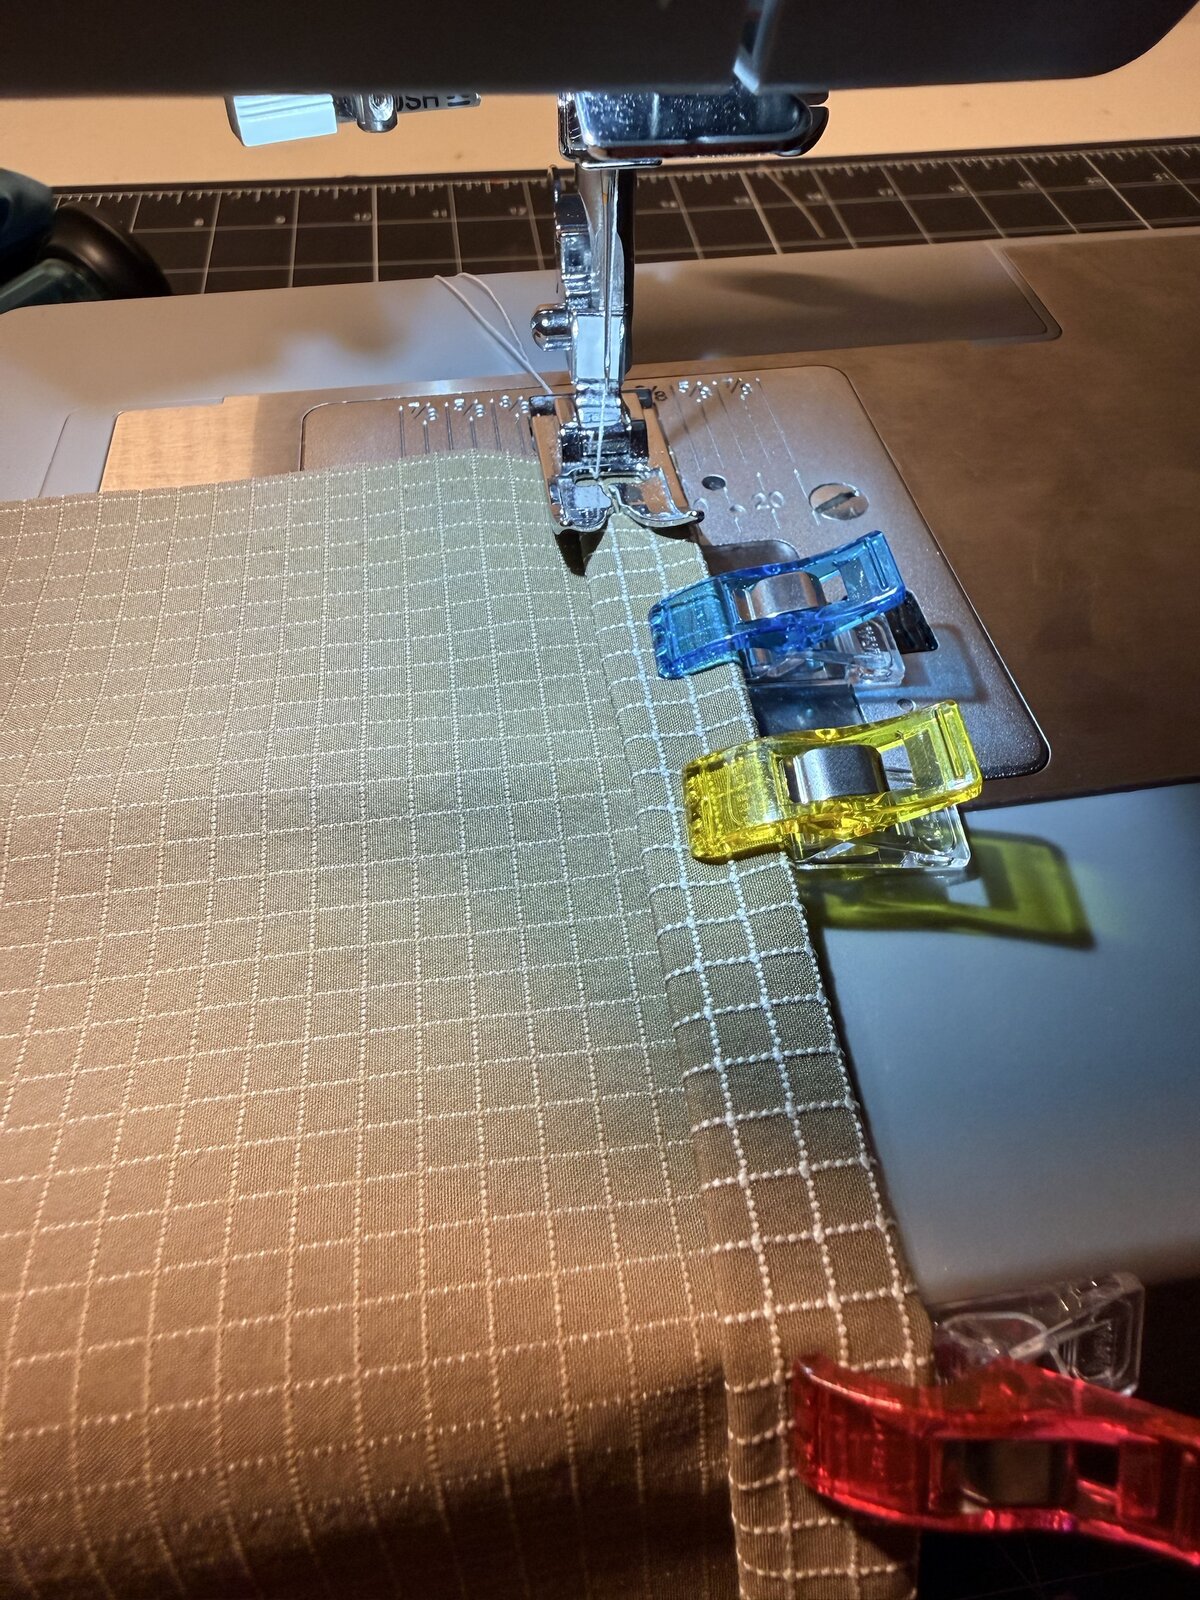
Stitch close to the inner folded edge, catching all layers. Guide the mesh through without stretching it. Secure the ends and trim the thread tails.
Add the decorative bartack
4. Mark and bartack the center
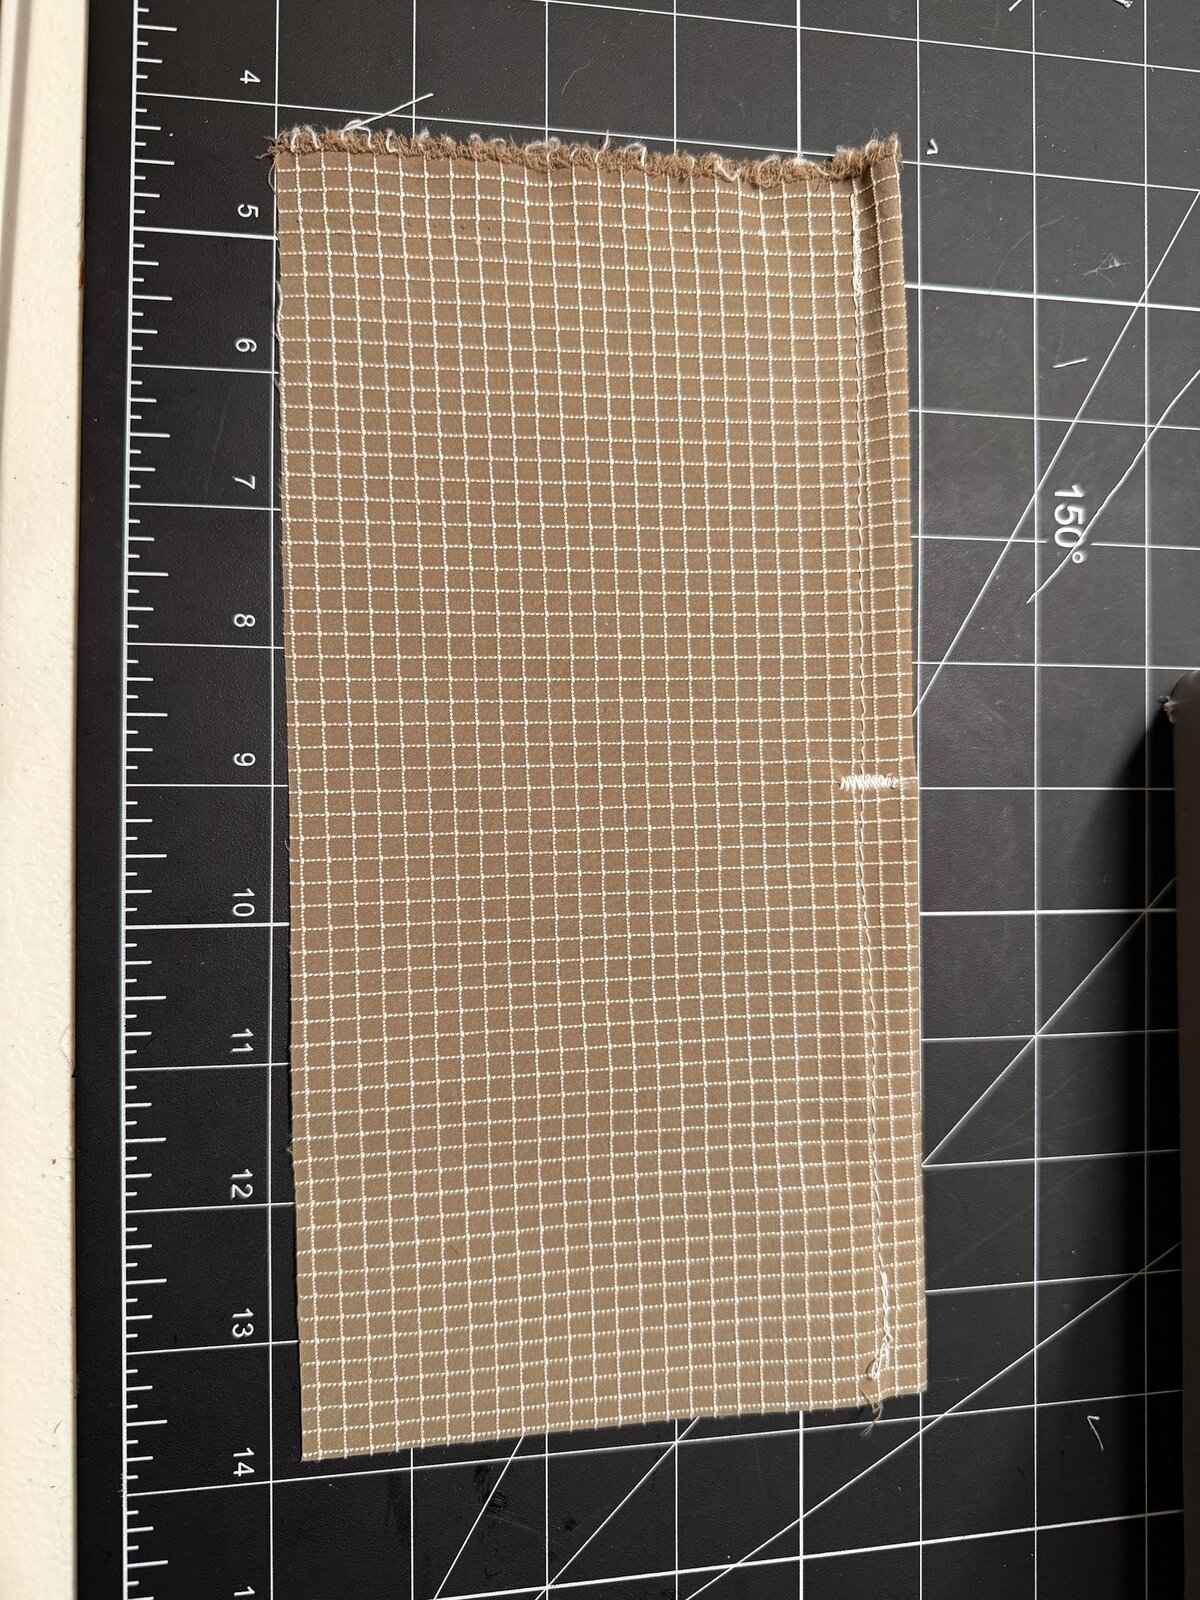
Mark the midpoint of the hemmed opening, 4⅞″ from either side of the 9¾″-wide mesh panel. Before attaching the mesh to the RX30, sew a short bartack across the folded hem, perpendicular to the opening. Keep the mesh relaxed so the hem stays flat.
A bartack is a short, dense zigzag bar. At this stage it only goes through the mesh hem. It's there for looks; the seam that divides the pocket comes later. My settings on a Singer 4452 Heavy Duty:
| Setting | Value |
|---|---|
| Stitch | Zigzag |
| Needle position | Centered |
| Stitch length | 1 |
| Stitch width | 4 |
| Tension | 5 |
Test the settings on a folded mesh scrap first.
Attach & divide the interior pocket
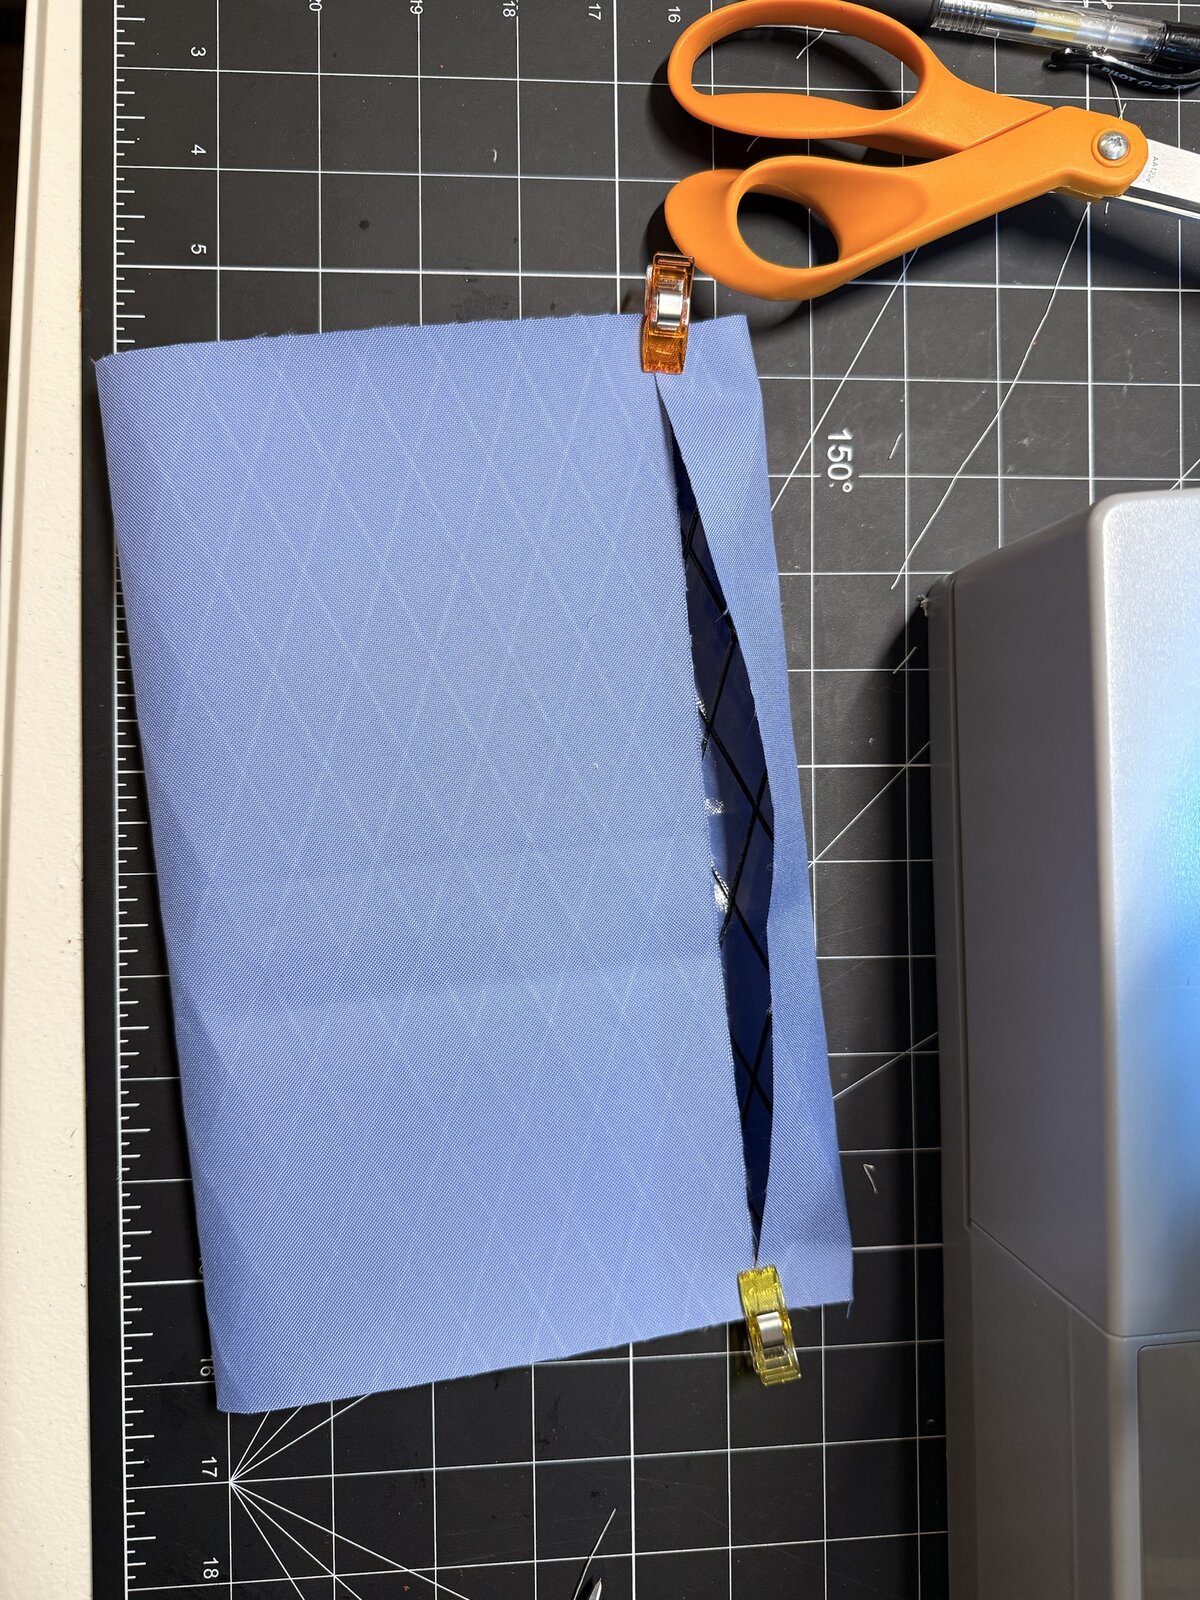
5. Crease the bag bottom
This step decides where the main zipper sits on the finished pouch. The crease sets the bottom of the pouch and the height of each wall. Lay the RX30 flat and fold it in half, bringing the top and bottom edges (the two 10″-wide edges) together so they touch. Line them up evenly, then press a firm crease along the fold with your fingers. This crease is the bottom of the bag, and it shows you where to sew the bottom of the mesh pocket. Unfold the body.
The final zipper offset at the top is set by eye in Step 18. I aimed for about 1″ of clearance between the zipper and the top fold.
6. Position the mesh panel
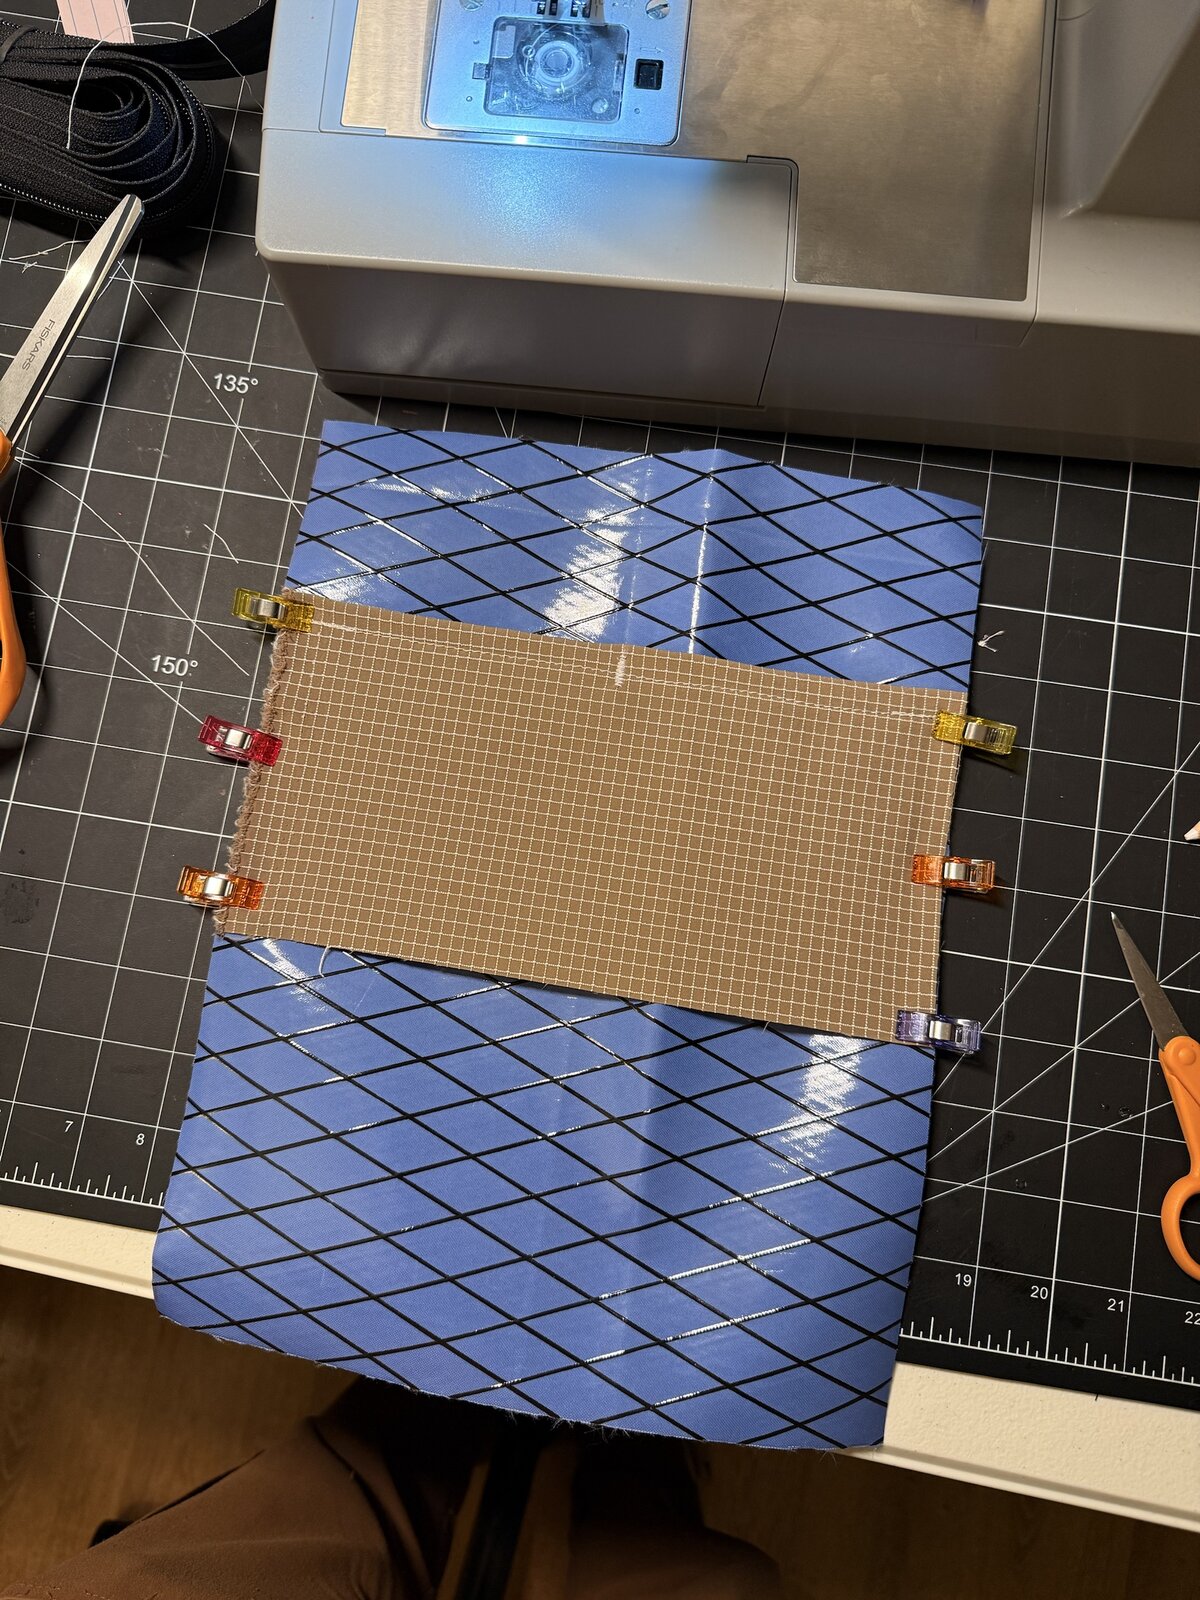
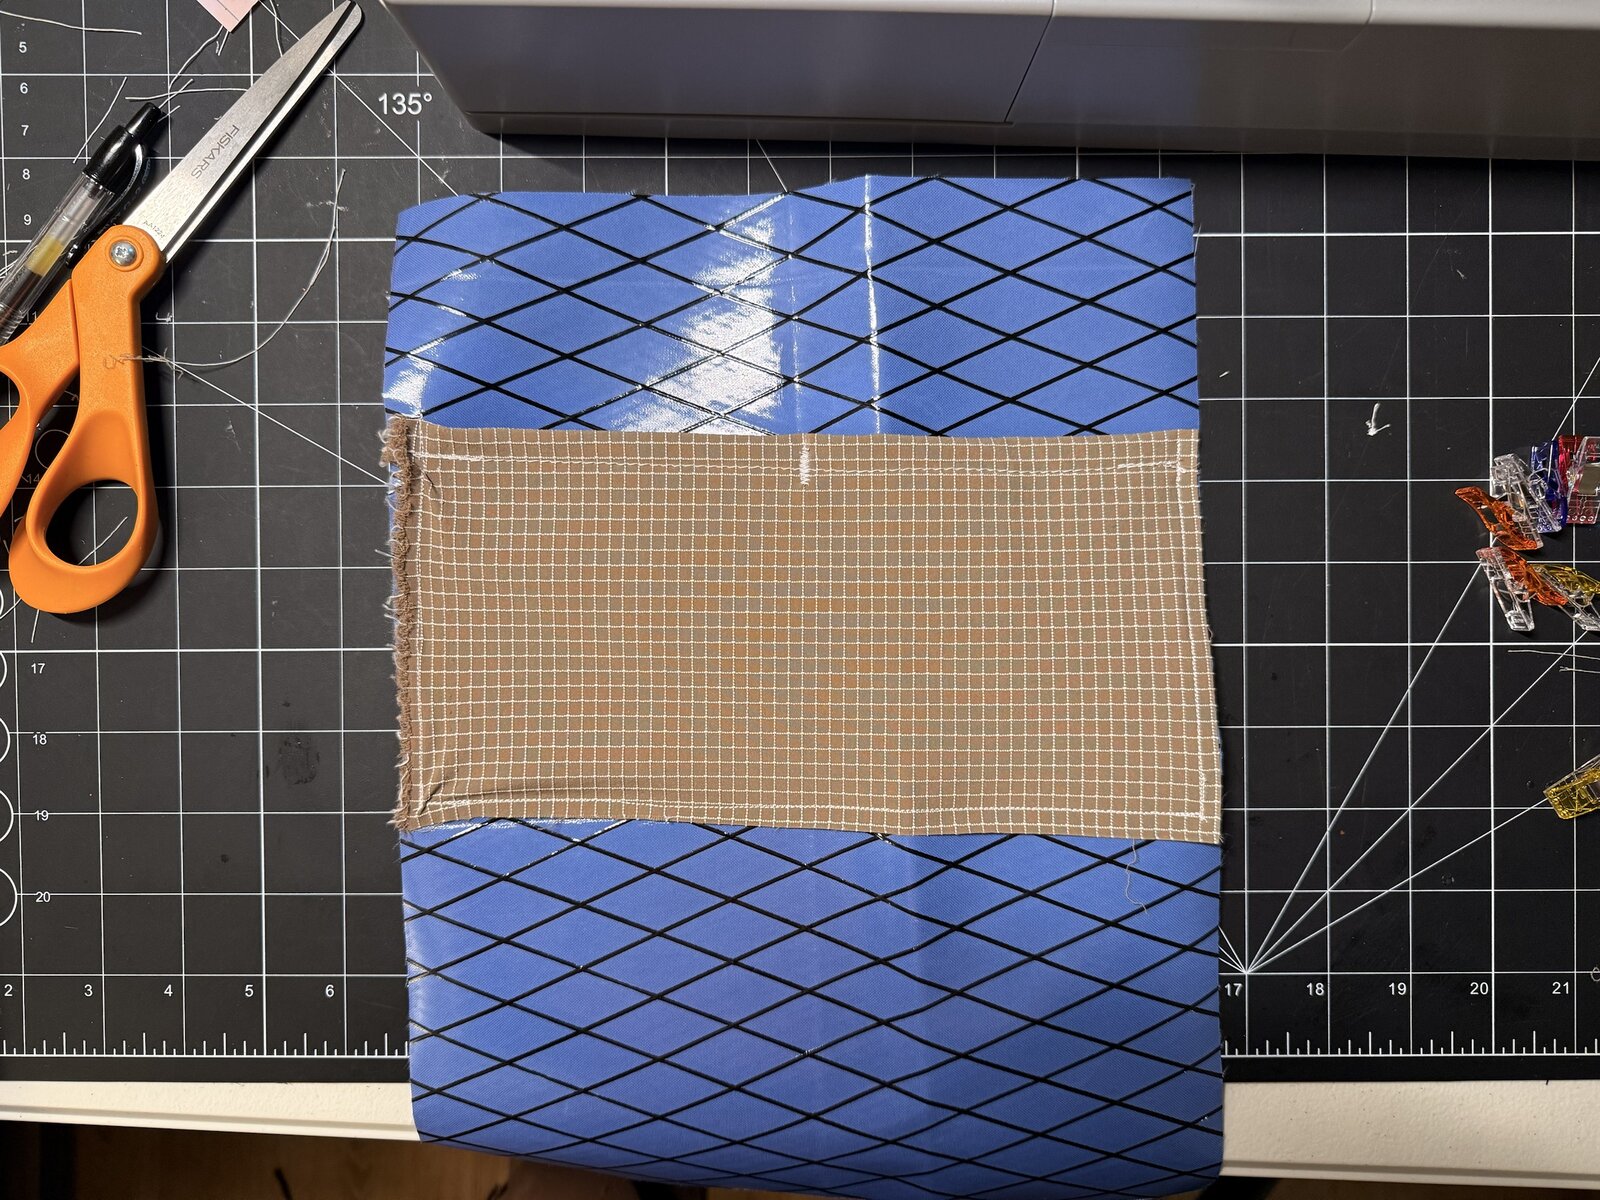
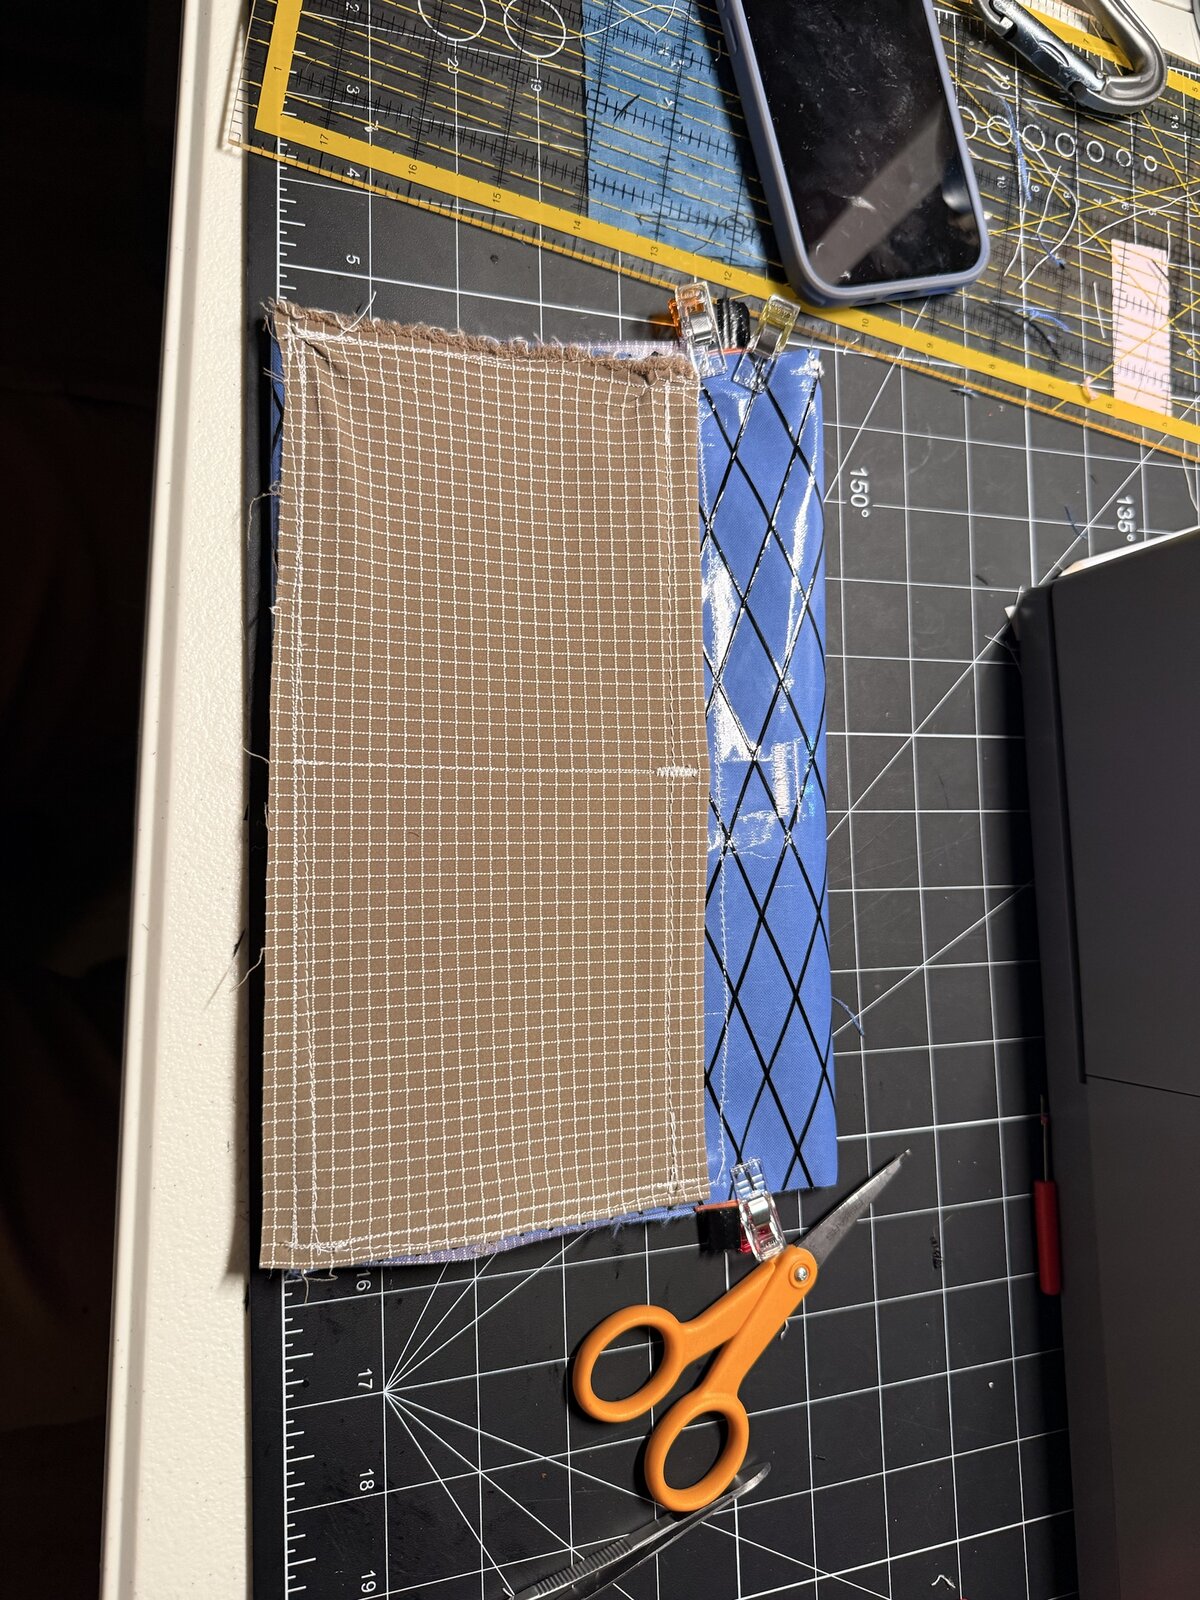
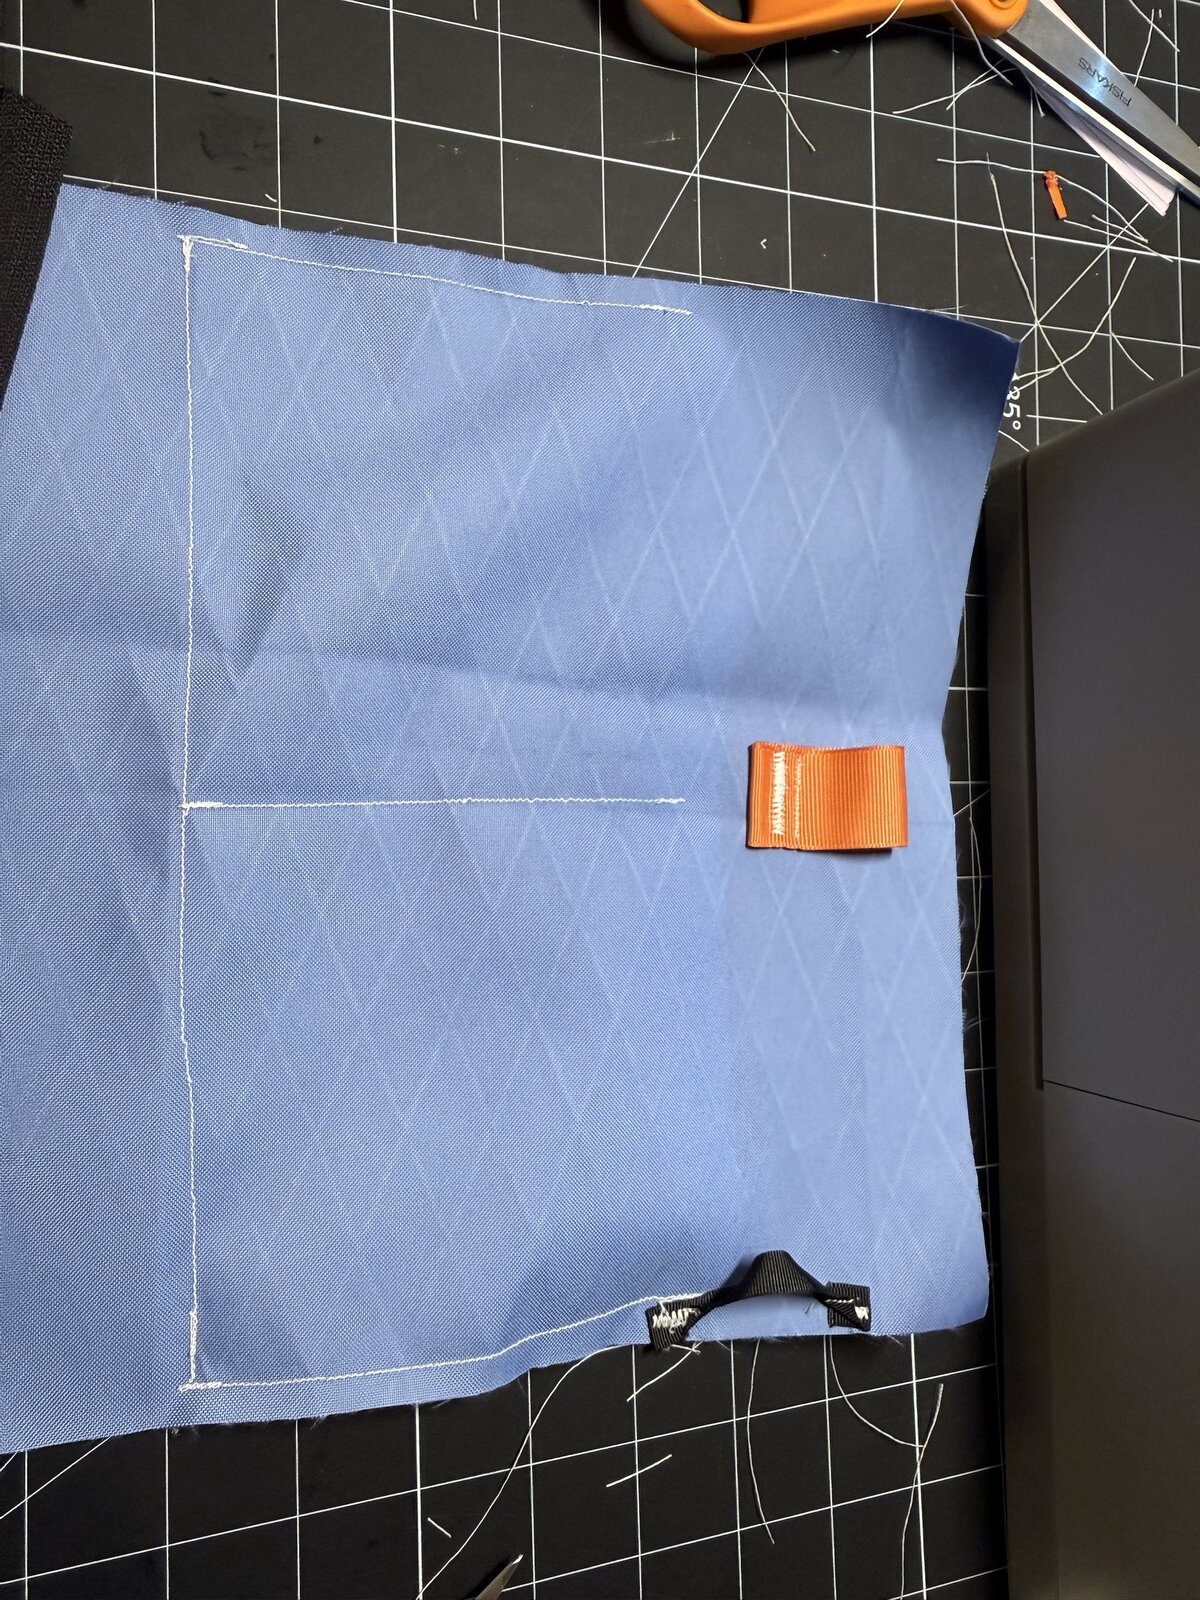
Lay the RX30 inside face up. Pick the half of the body that will become the back wall of the pouch: the wall that will carry the Gridstop patch on the outside. Mount the mesh on the inside of that back wall. With the finished pouch open in front of you, that's the far wall, not the near one. Center the mesh across the back wall with its raw bottom edge on the crease from Step 5, and point the hemmed opening toward the top. Stretch the mesh evenly across the body as you install it. That tension helps the finished pockets hold their contents instead of hanging loose. Keep the RX30 flat.
7. Create the pocket base
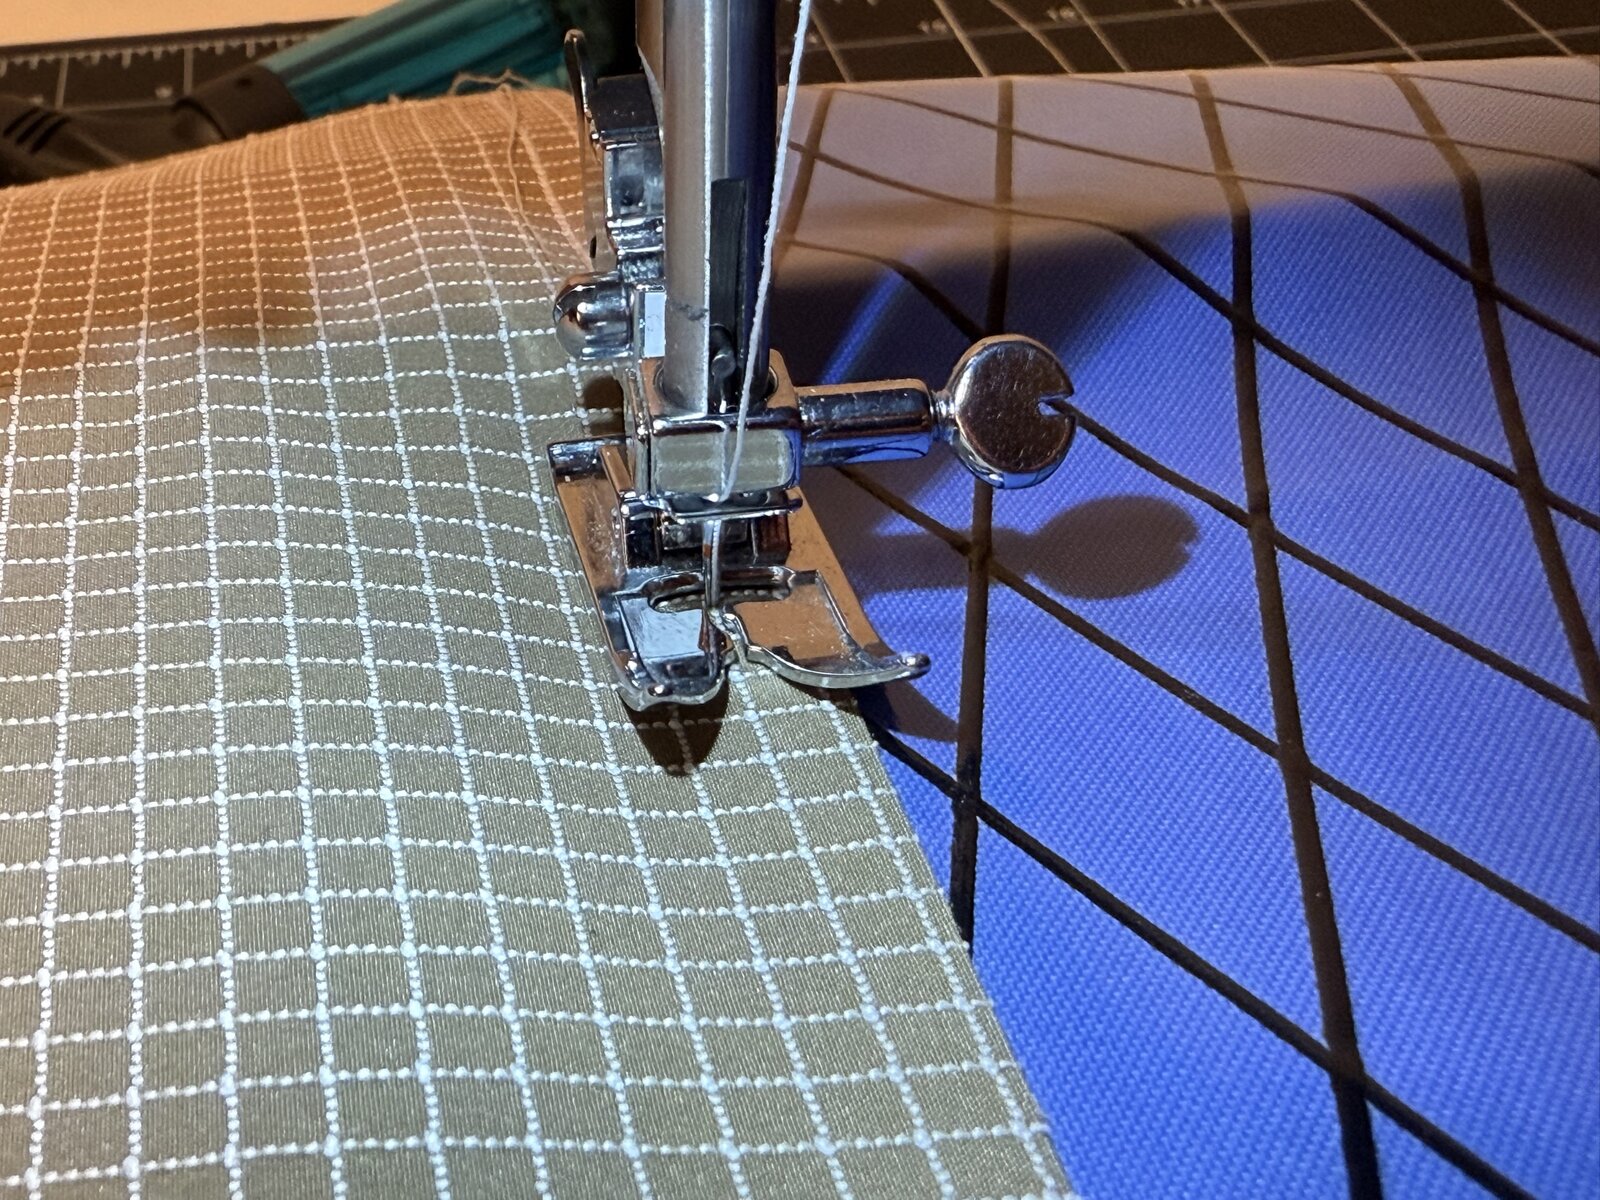
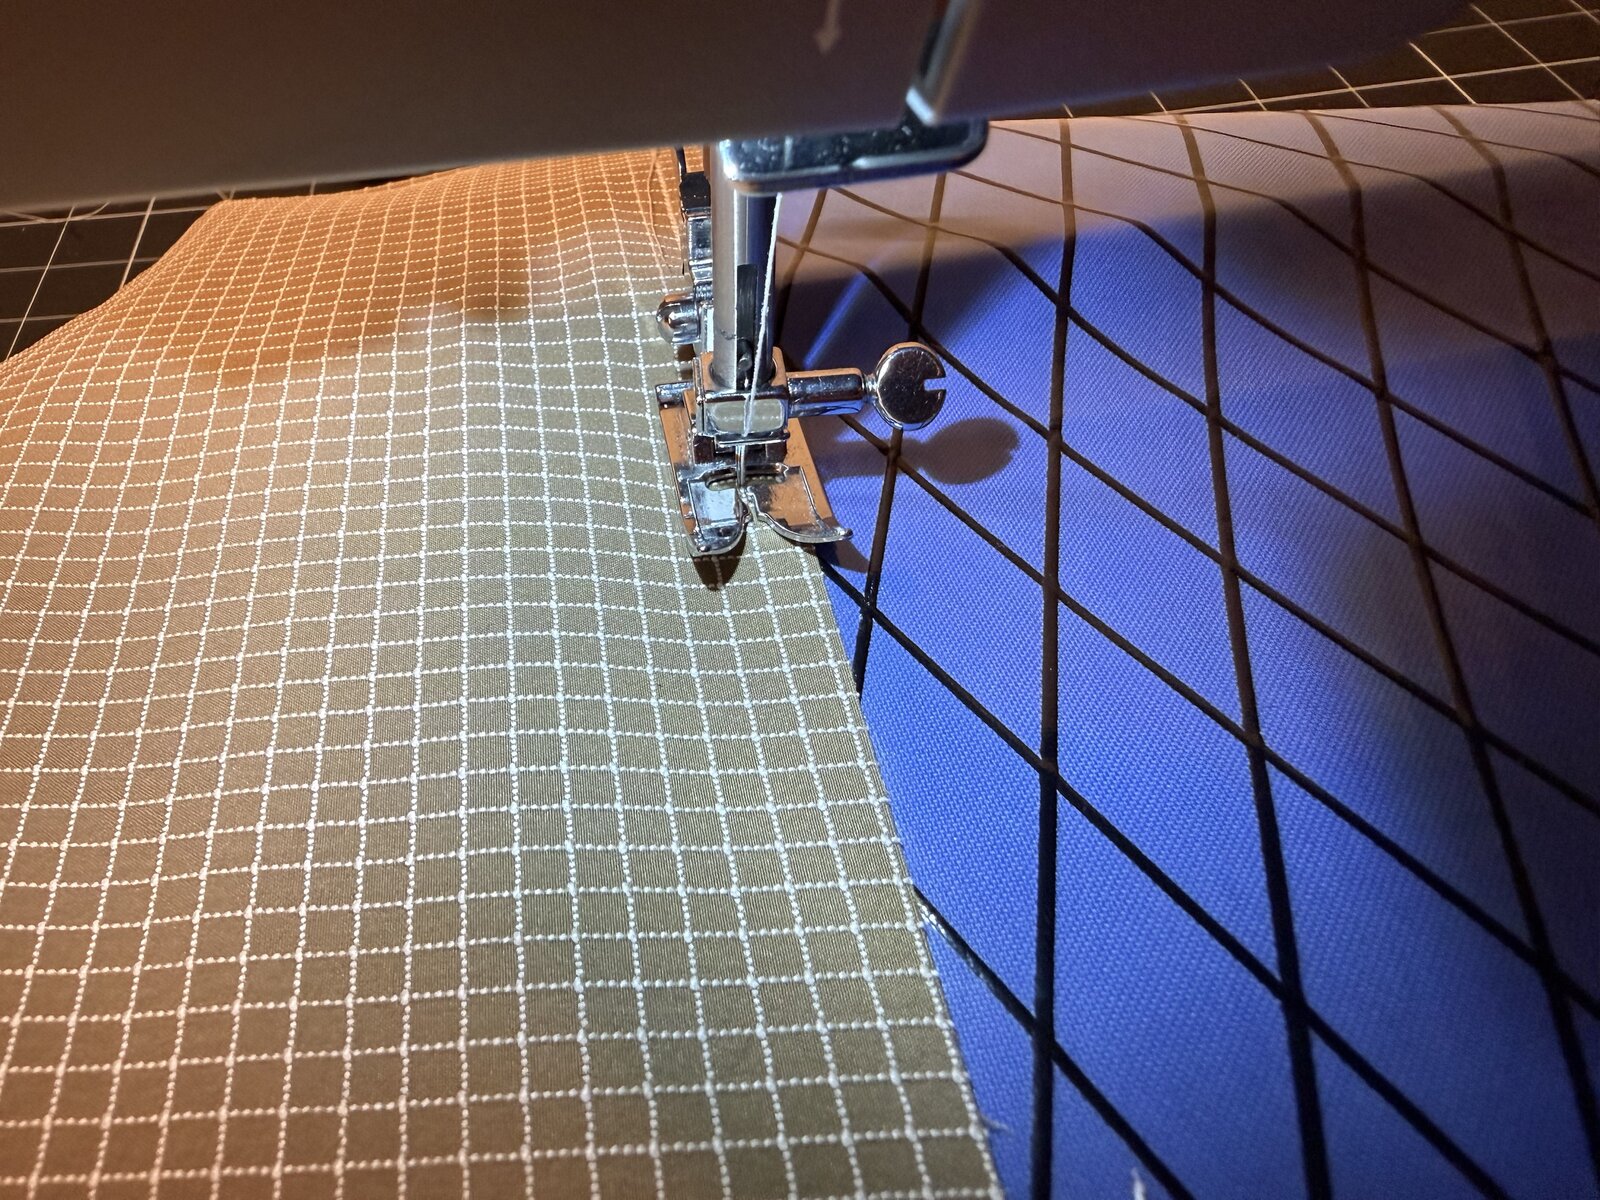
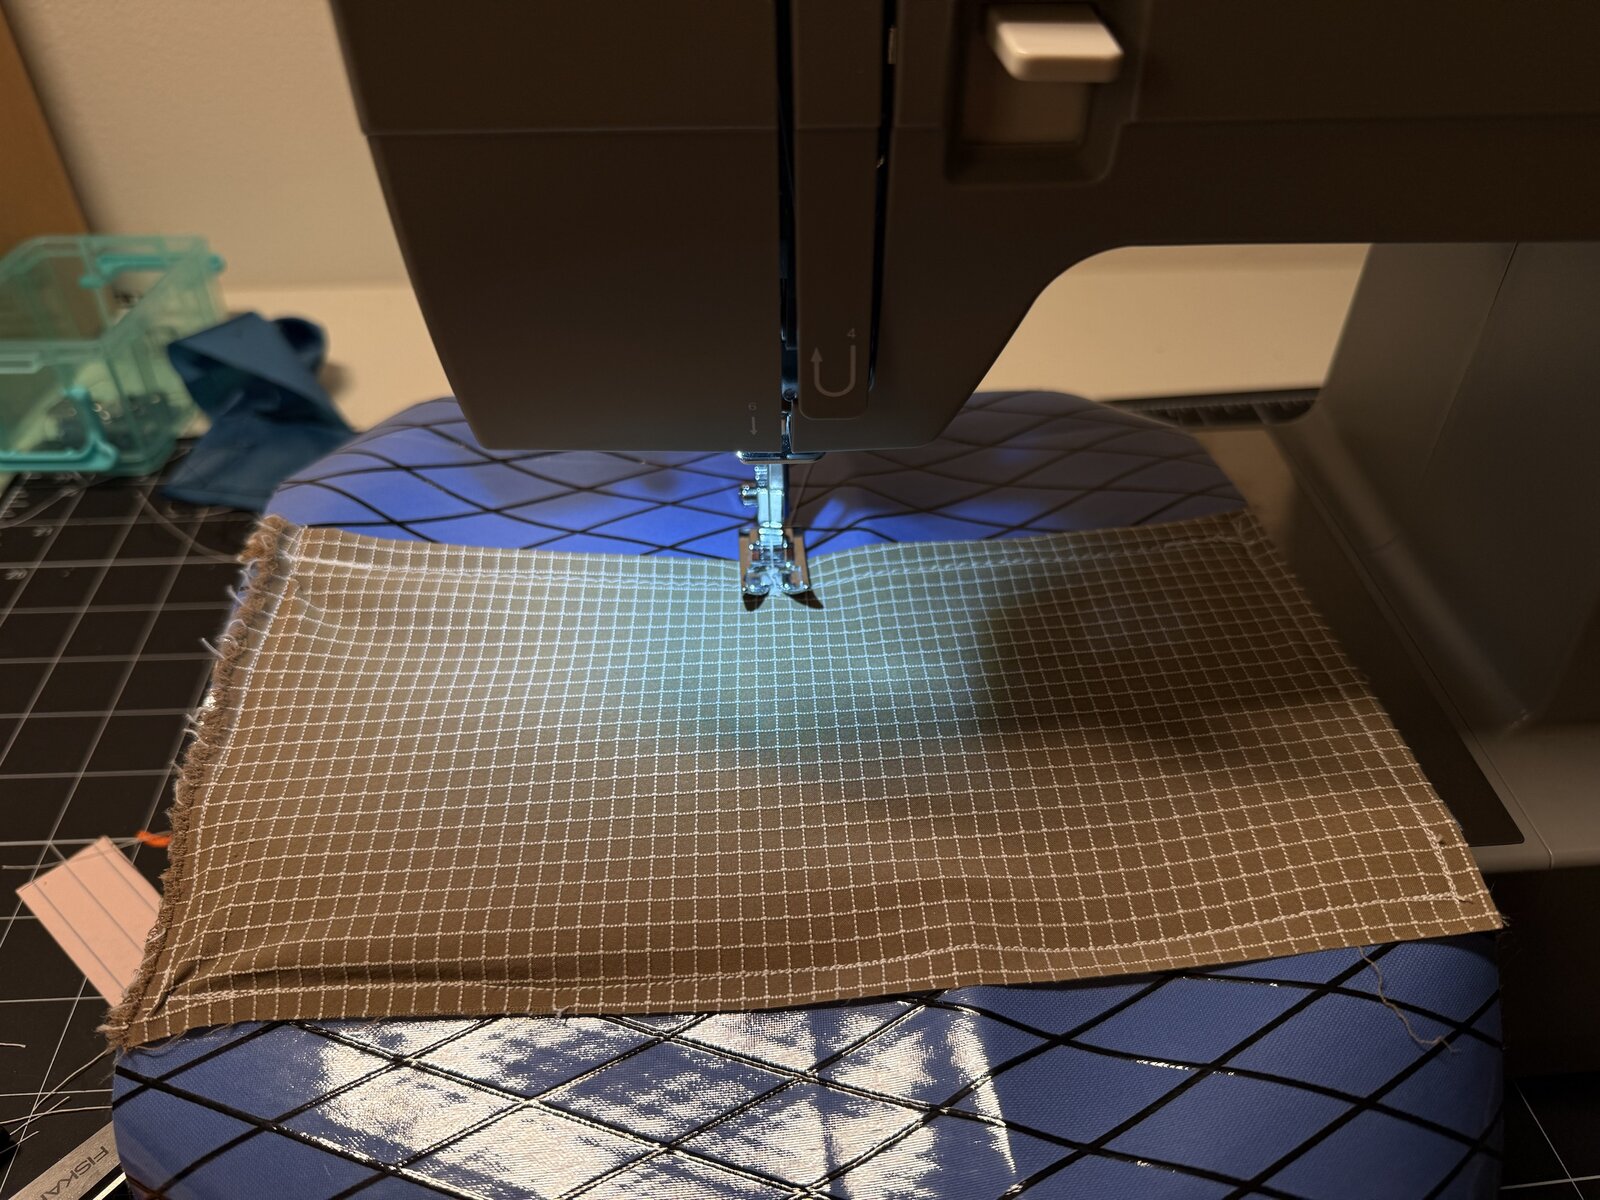
Leave the bottom edge of the mesh unfolded. Clip the bottom edge while keeping the stretch even across the width, then clip the sides. Sew the bottom, then the sides, to form the pocket base. Sew in the direction you want the mesh to pull, and keep the tension even without puckering the RX30. Leave the hemmed top open.
8. Sew the divider
Mark the divider in line with the decorative bartack from Step 4. Sew from the opening to the bottom through the mesh and the RX30. Secure both ends and reinforce the stitching at the opening. This splits the pocket into two compartments.
Add loops & the main zipper
9. Attach the center and black loops
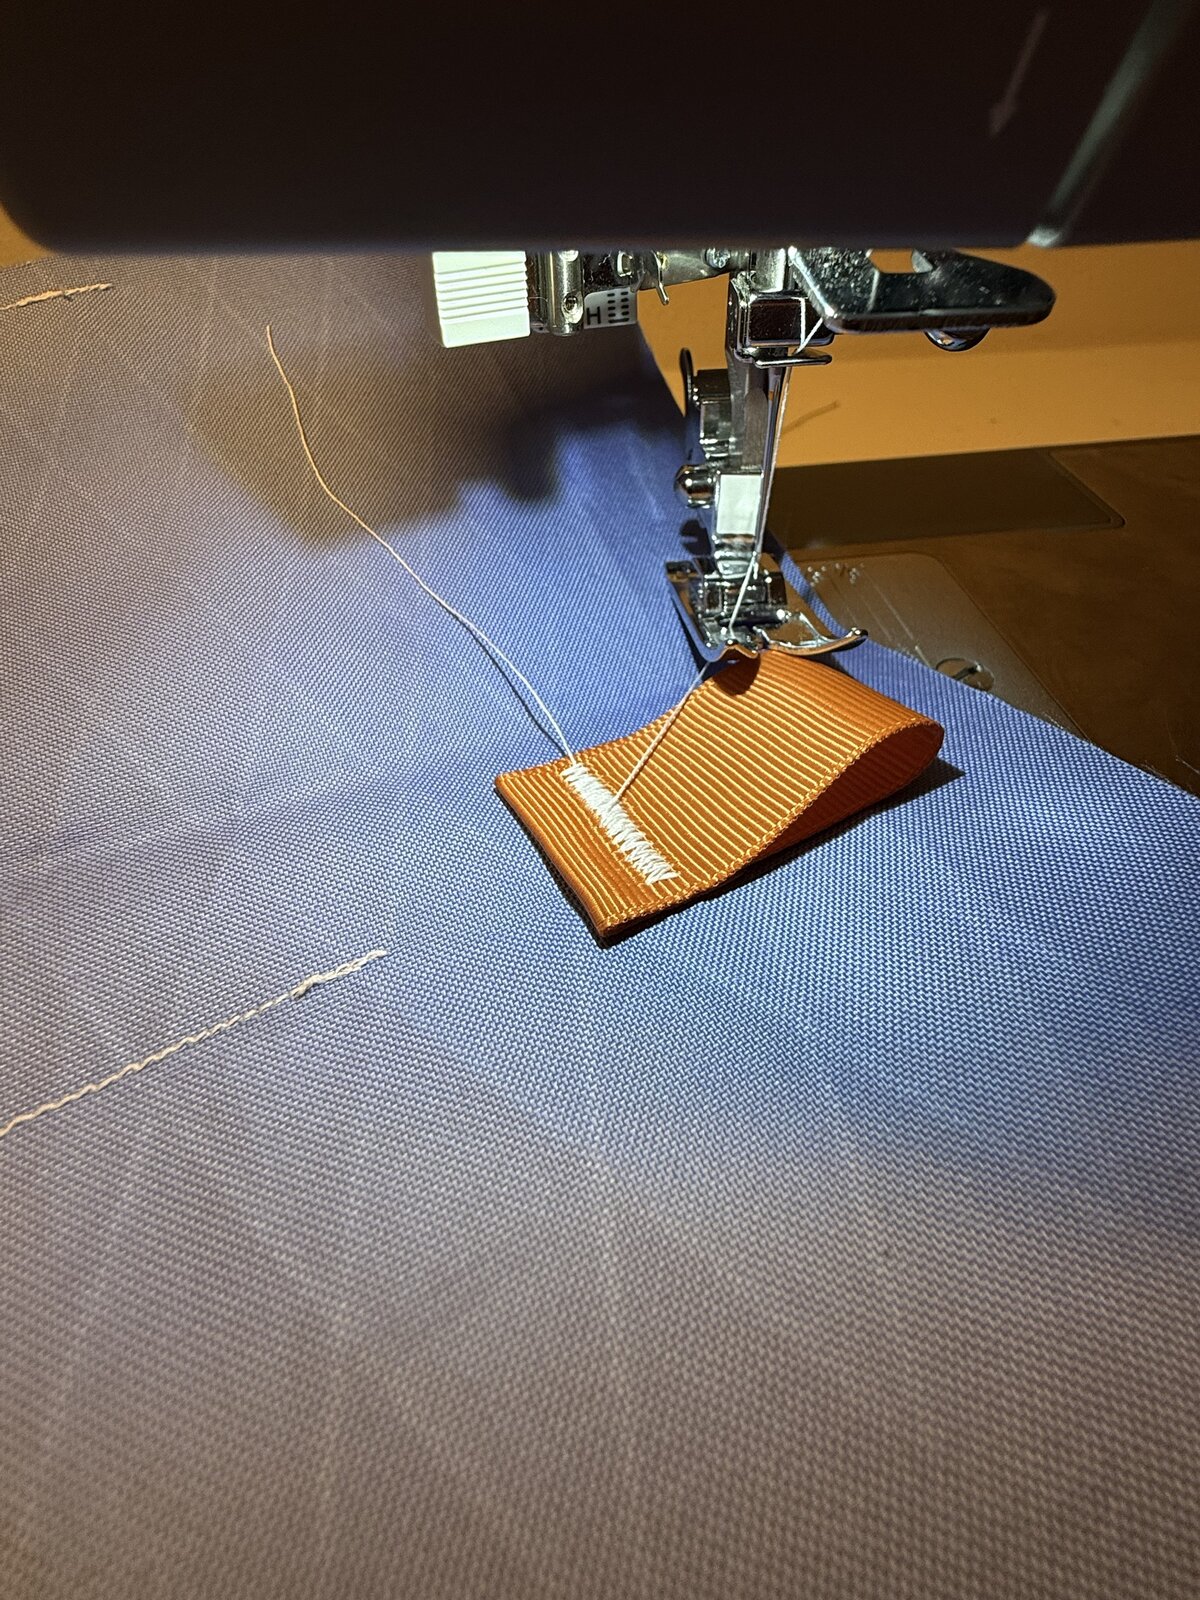
Fold a piece of 1″-wide orange grosgrain, roughly 3″ long, into a loop, tucking the cut ends inside its base. Attach it to the plain blue outside face of the back wall, above where the patch pocket will go, and reinforce across the base.
Design note: I recommend leaving out the black attachment loop if you make this design. This build has one, but it takes up room and I'd drop it from the next version. If you include it anyway, cut about 2½″ of ⅜″-wide black grosgrain, give it two twists before bringing the ends together, and attach it near a side edge. Treat it as light-duty only.
10. Sew the main zipper halves
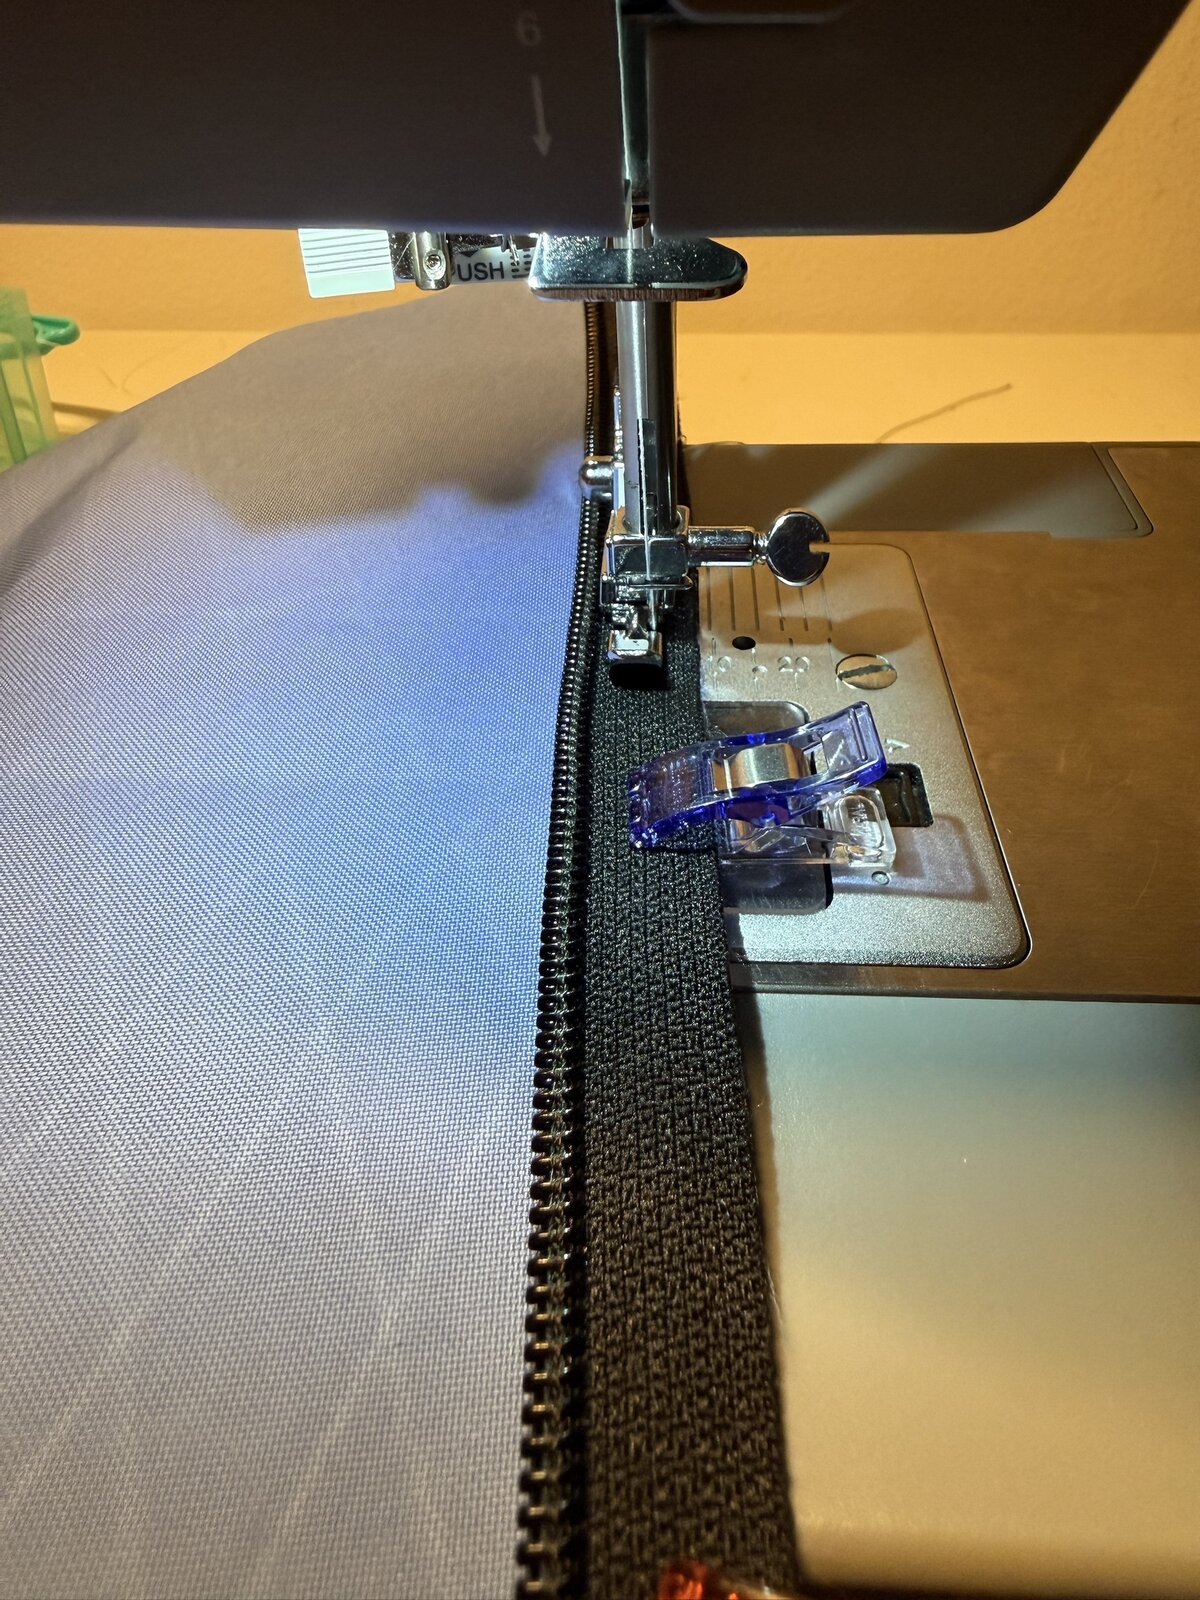
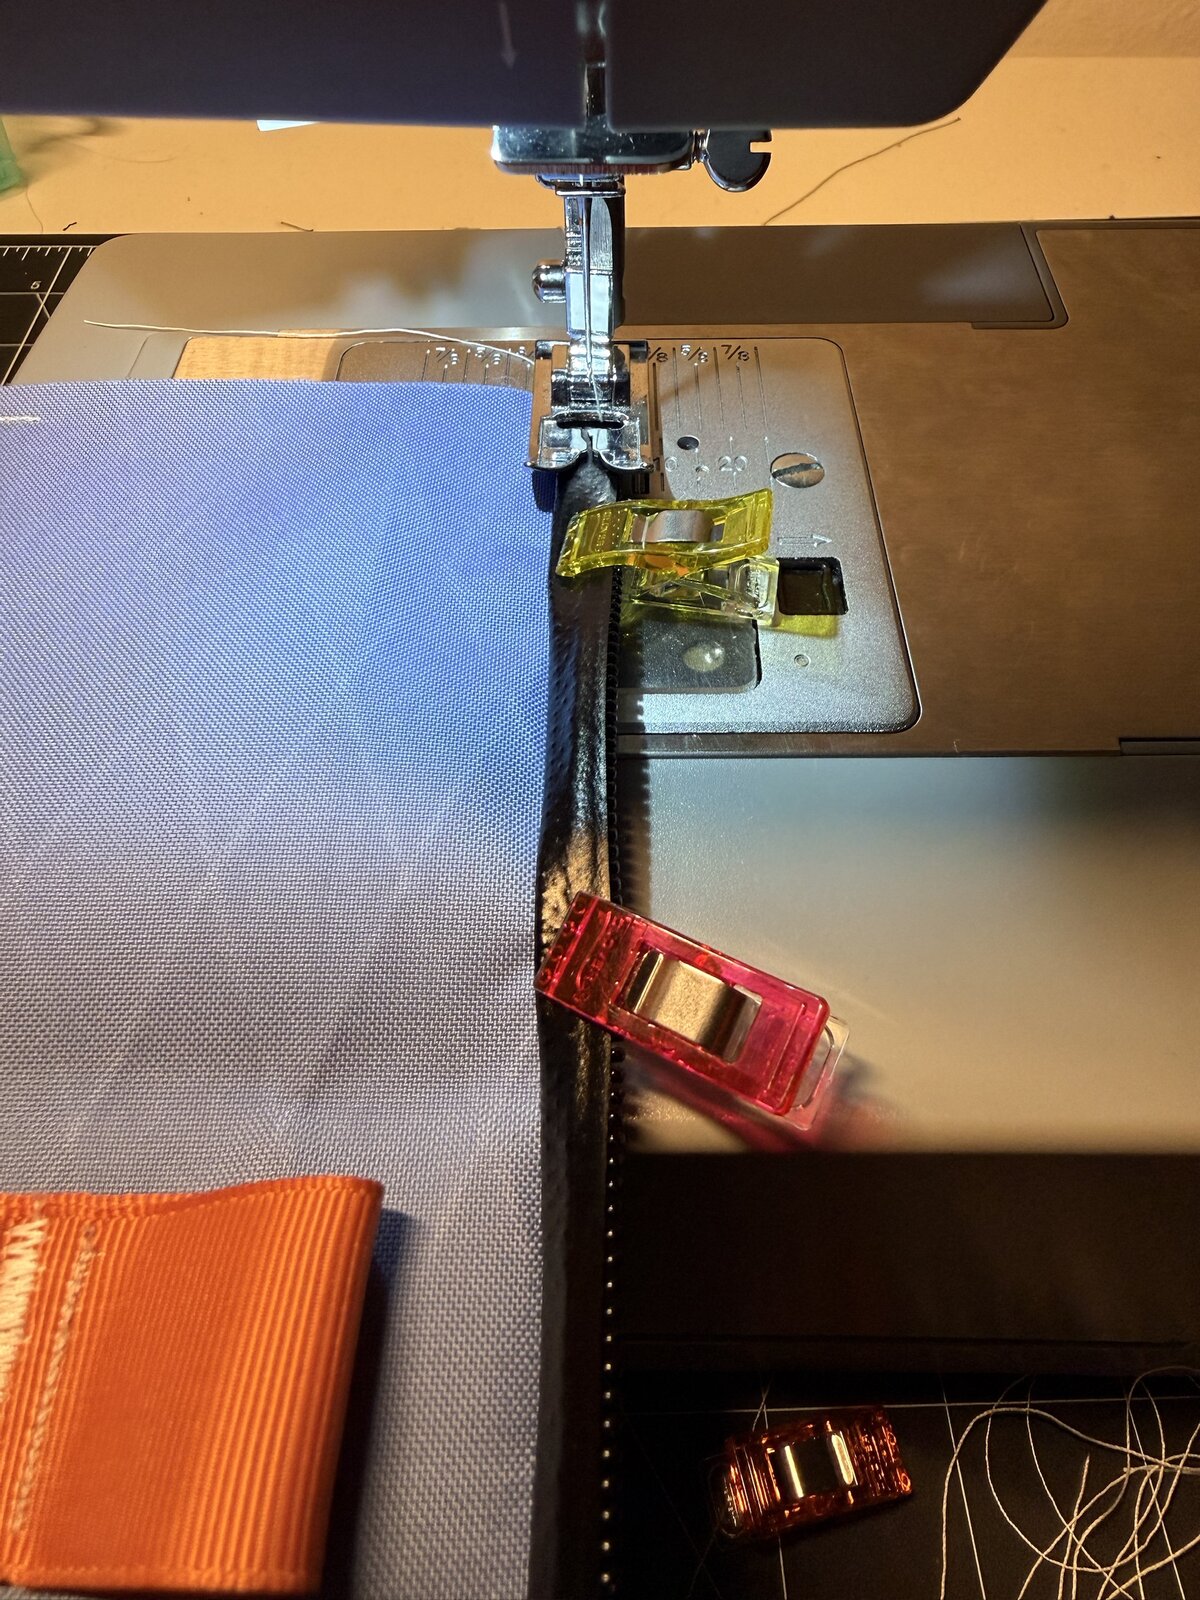
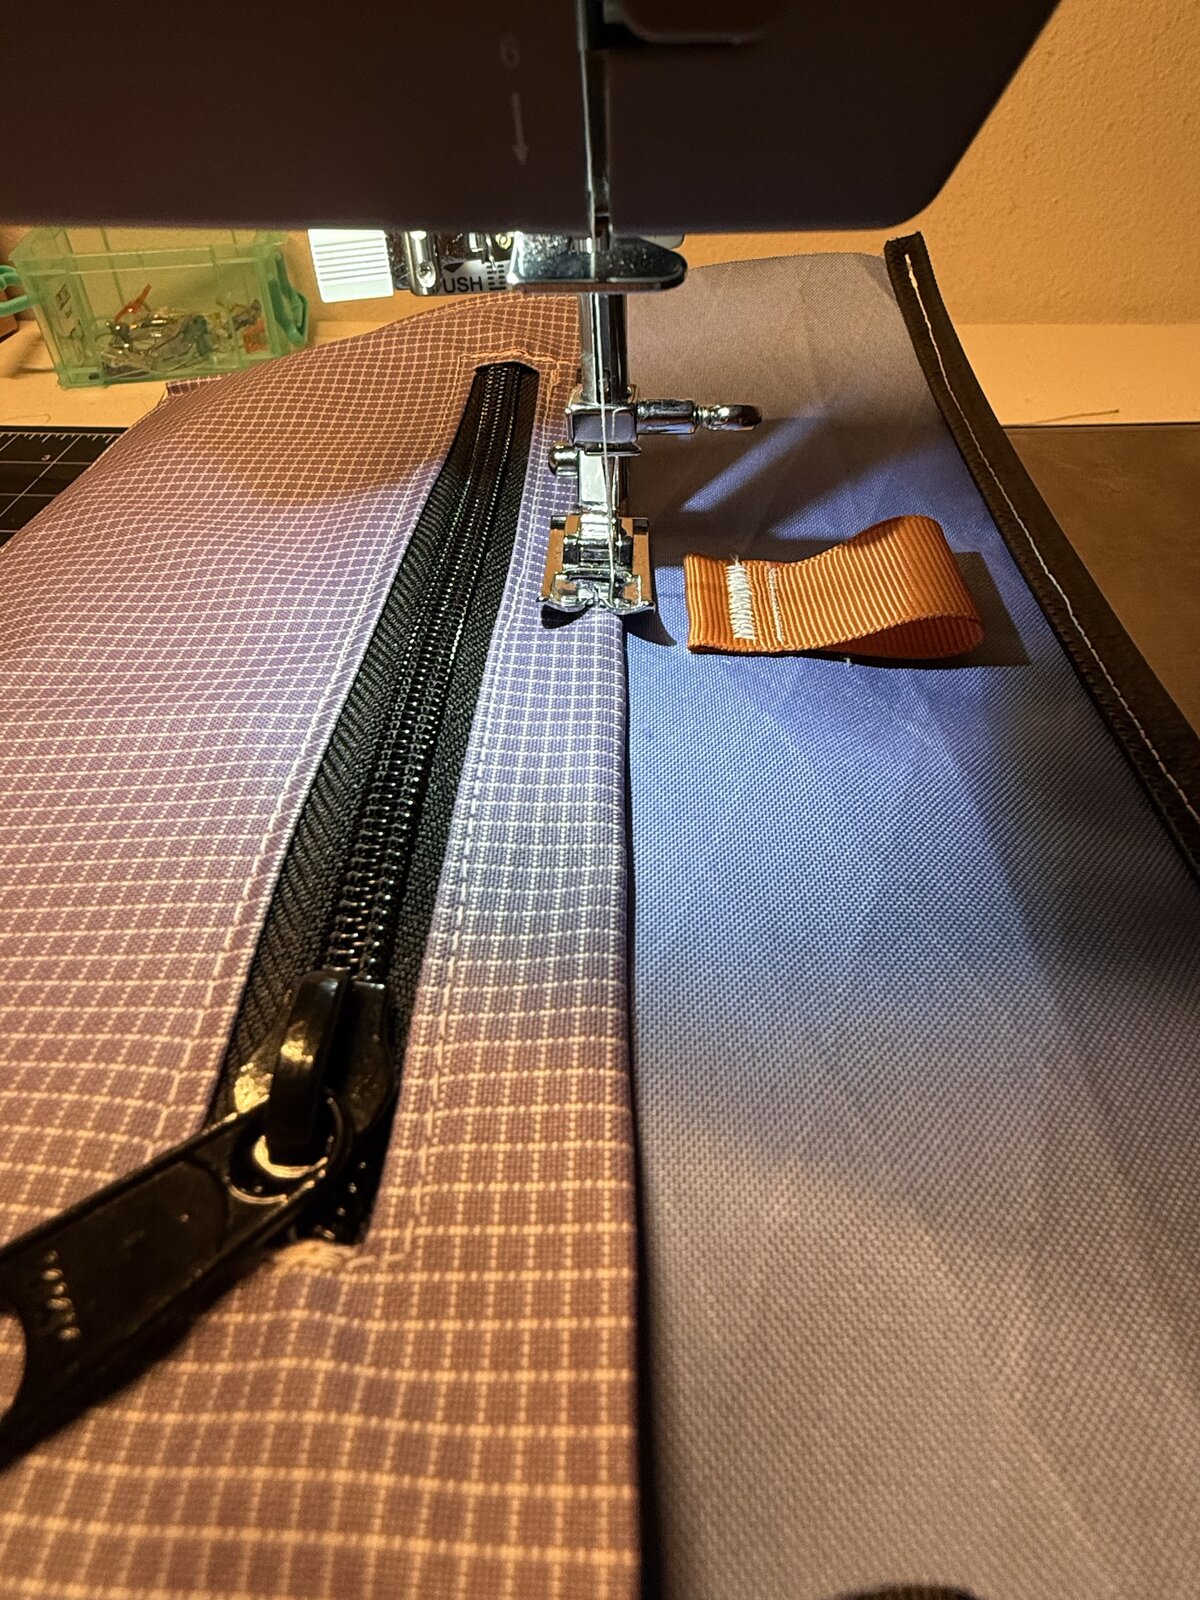
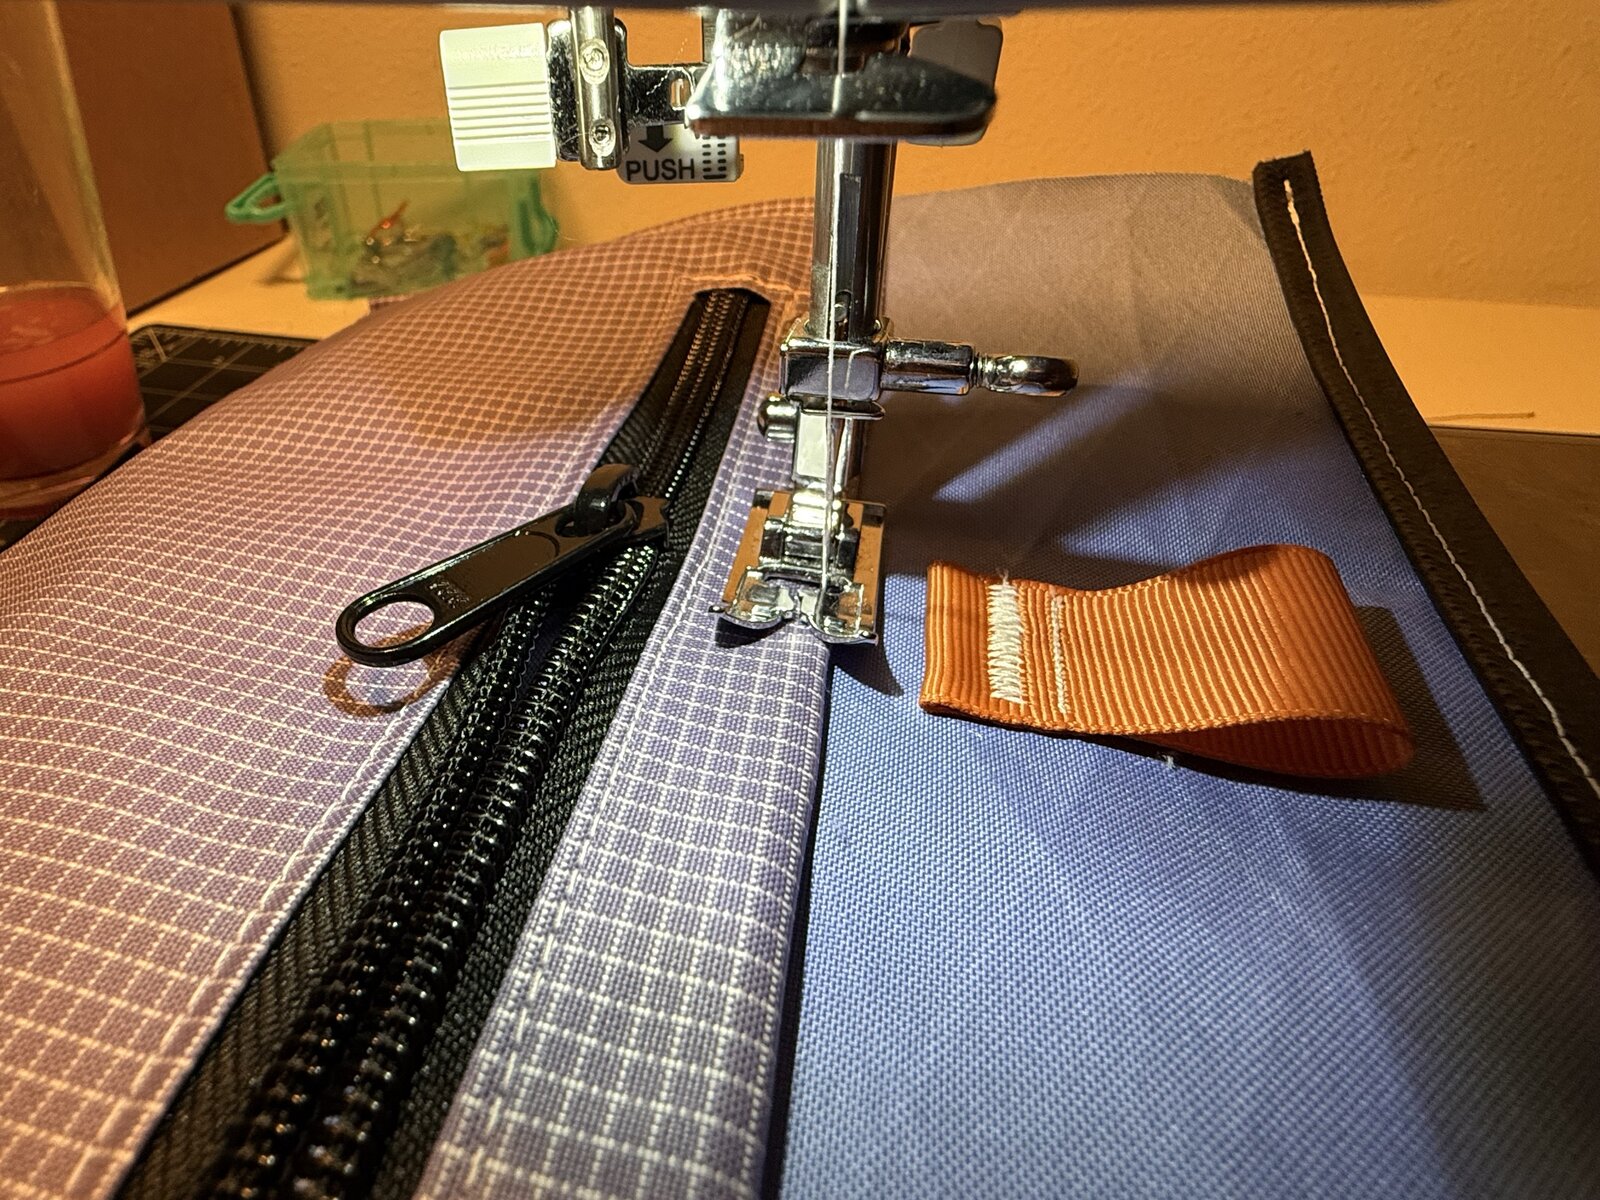
Clip one zipper half to each 10″-wide body edge. For the first seam, lay the zipper half with its fabric edge against the plain blue face and the coil pointing toward the panel. Sew parallel to the coil using a zipper foot. Turn the zipper outward, fold the fabric away, and topstitch to keep it clear of the coil. Check that the two halves join without twisting. Leave the main slider off for now; it goes on in Step 18, right before the side seams are sewn.
The two side loops go in later, when you close the side seams.
Make the patch-pocket window
11. Fold the perimeter
Start with the 11″ × 5½″ Gridstop rectangle. Turn about ½″ under at each side and about ¼″ at the top and bottom. Hold the folds with double-sided sewing tape and dry-fit the patch over the interior-pocket seam lines.
12. Mark and cut the zipper window
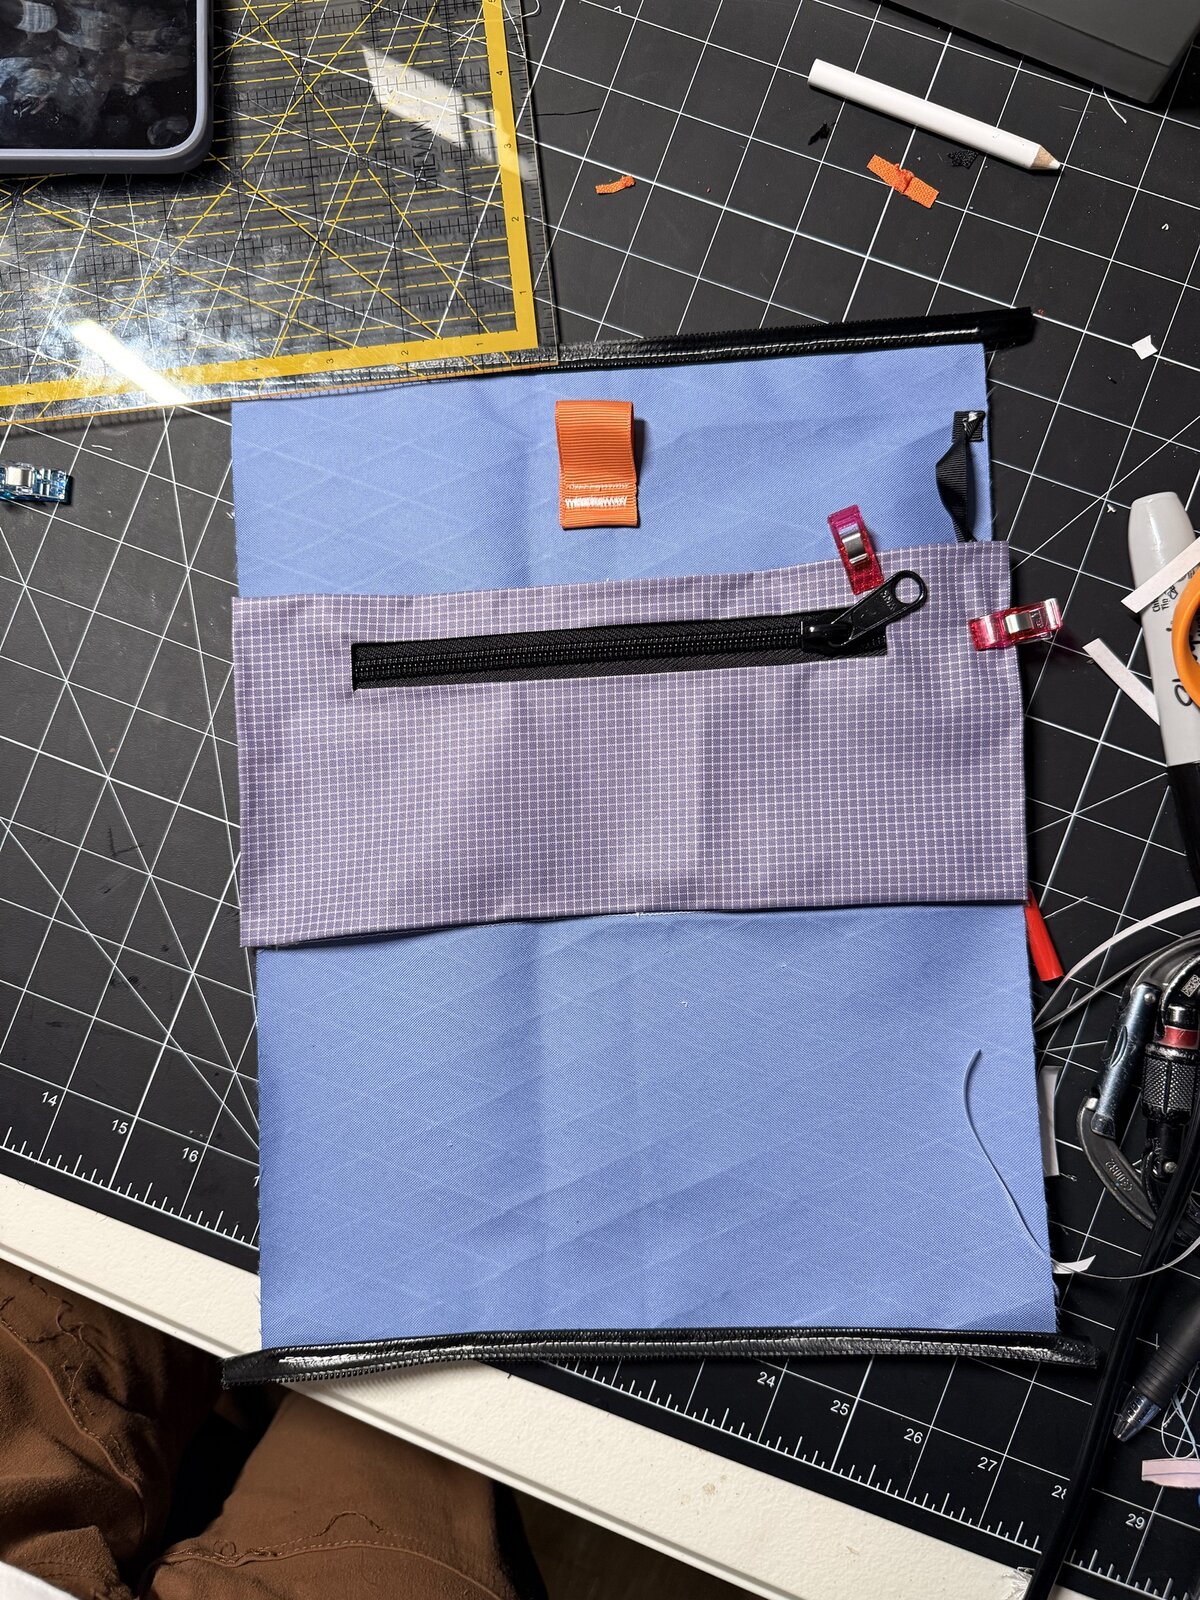
Place a rectangular opening near the upper edge. Before cutting, lay the #5 pocket zipper behind the marked opening and size the window to the zipper. The coil should be exposed, the slider should be able to travel, and enough of the zipper's fabric edge should remain on all sides for topstitching. I used a window about 8″ long on this pouch. Leave fabric beyond both ends. Mark a center slit with diagonal branches to each corner, then cut along these lines without cutting past the corners.
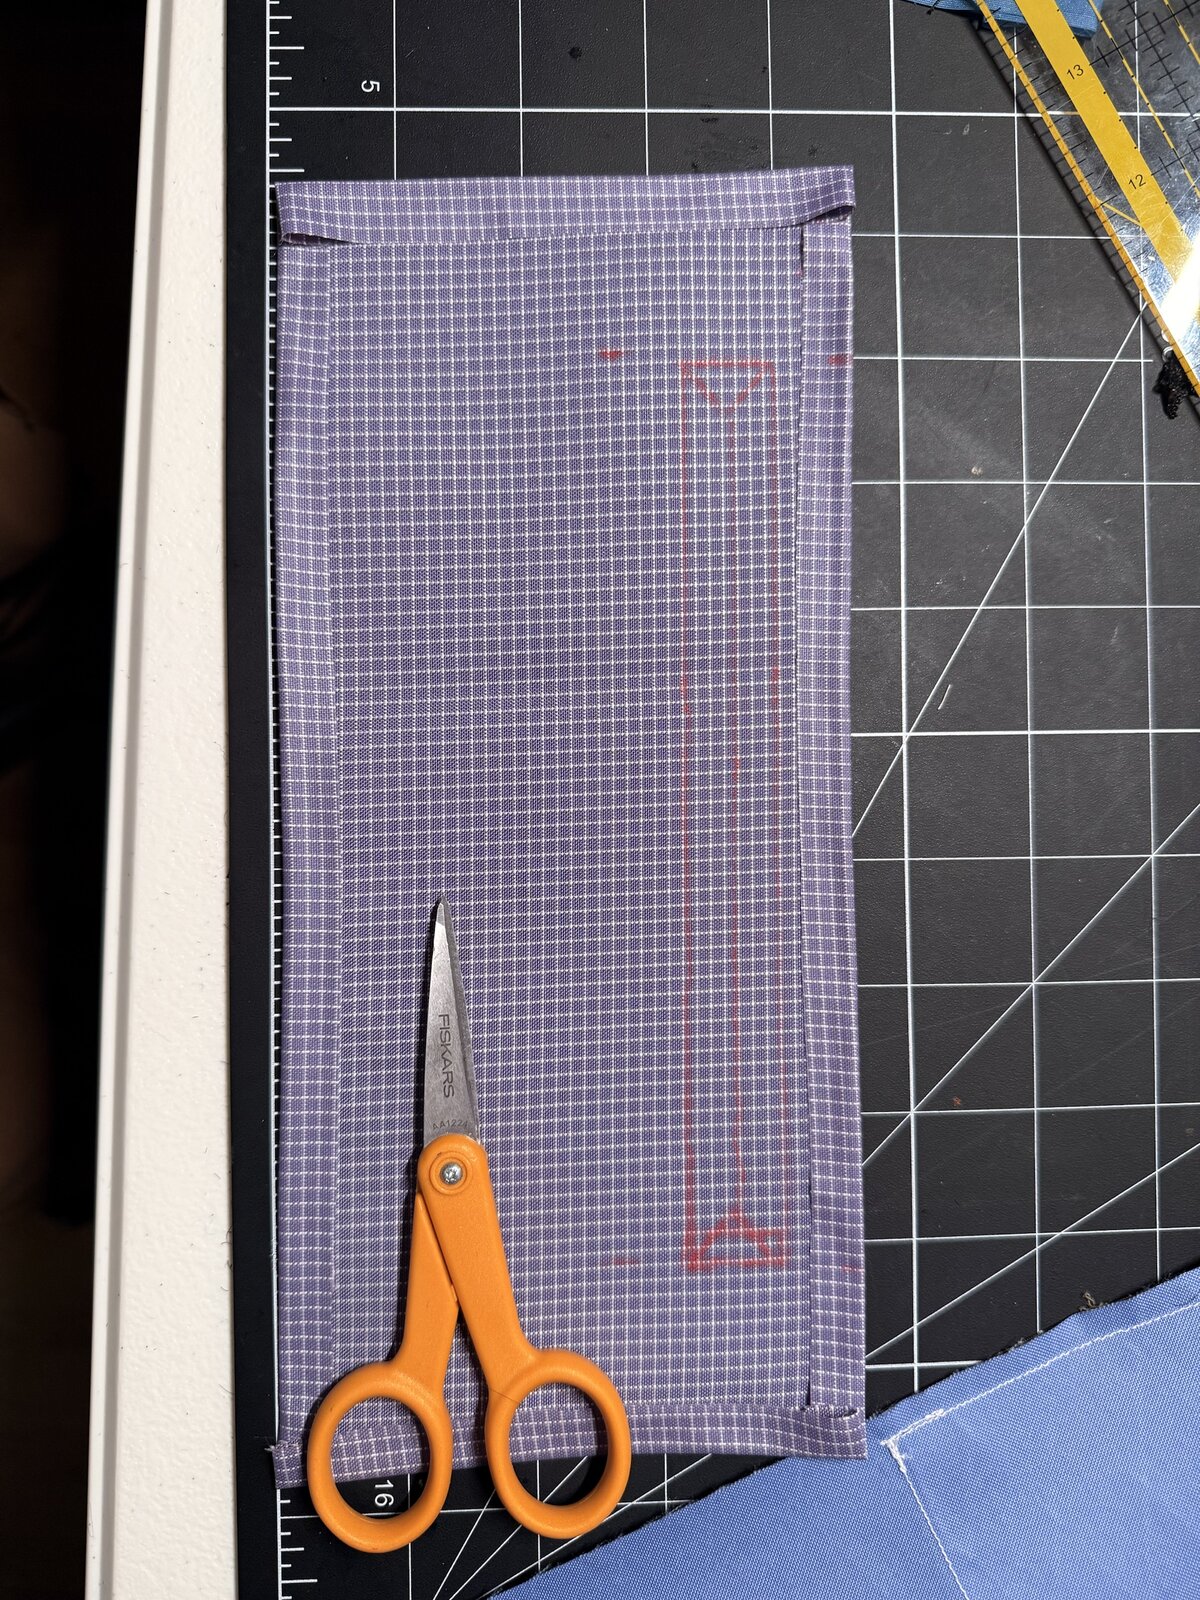
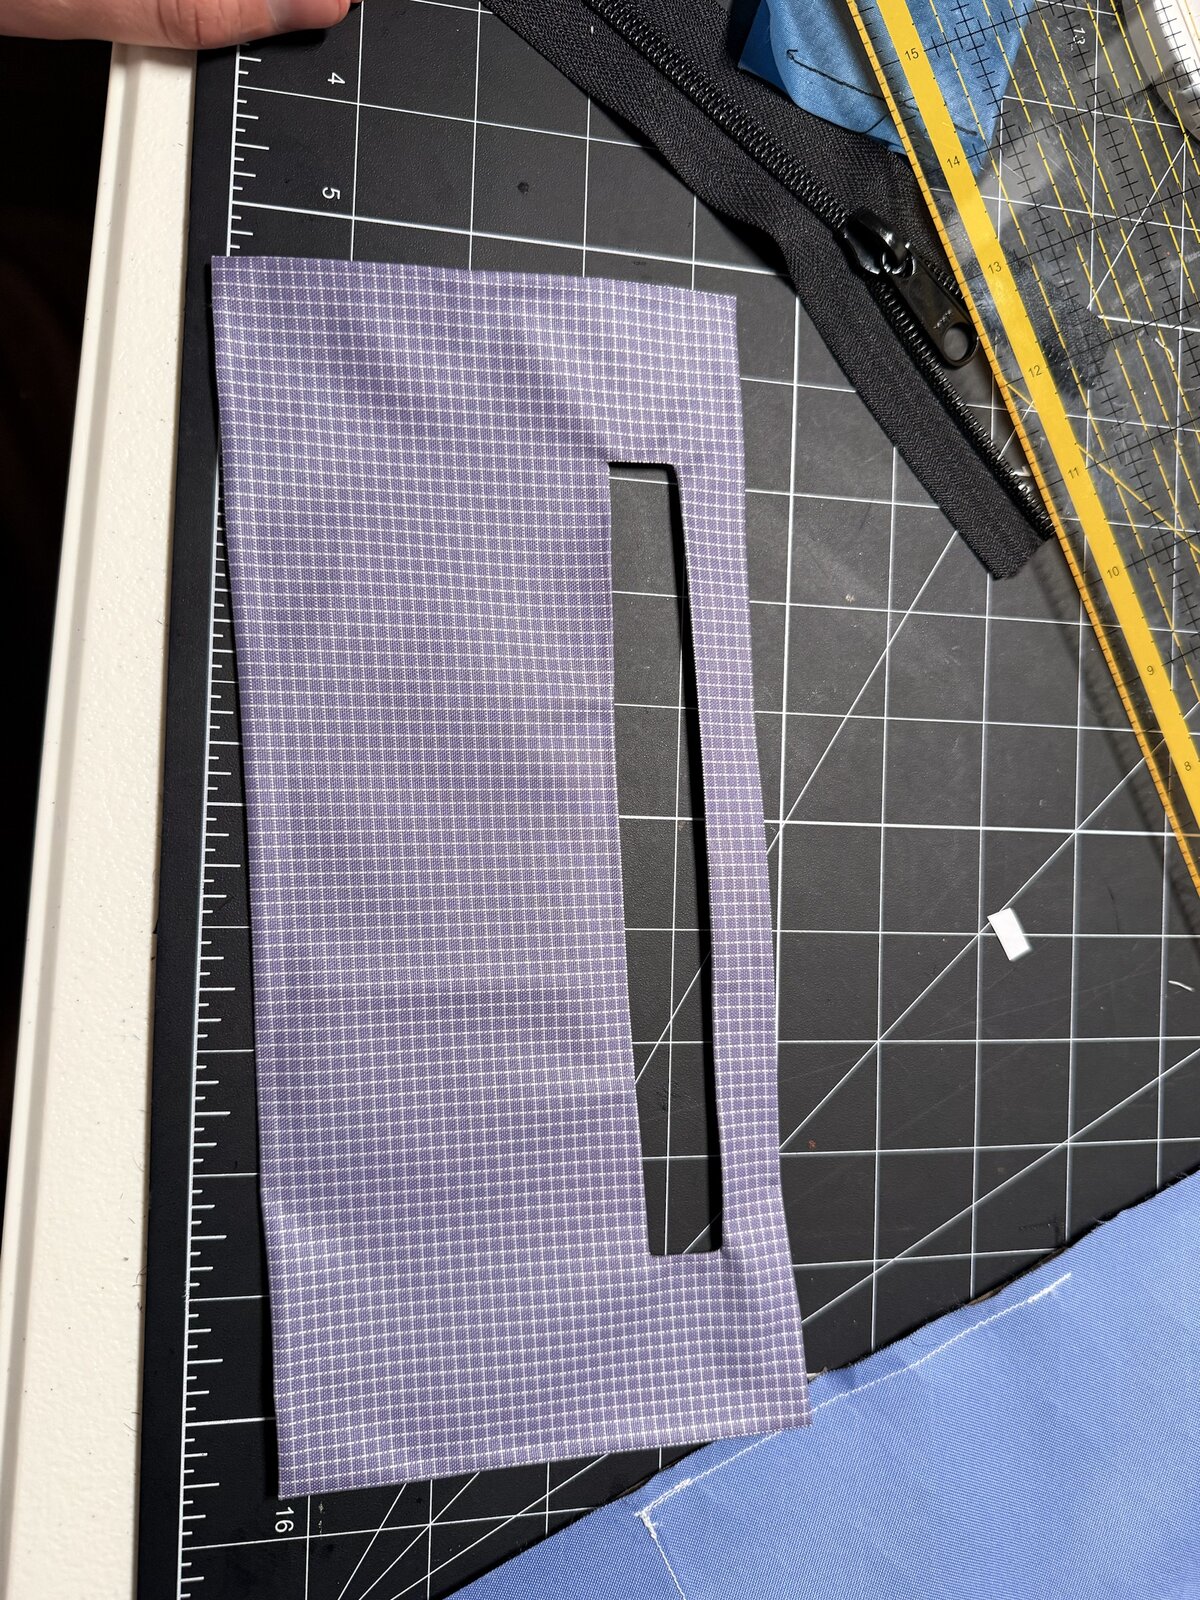
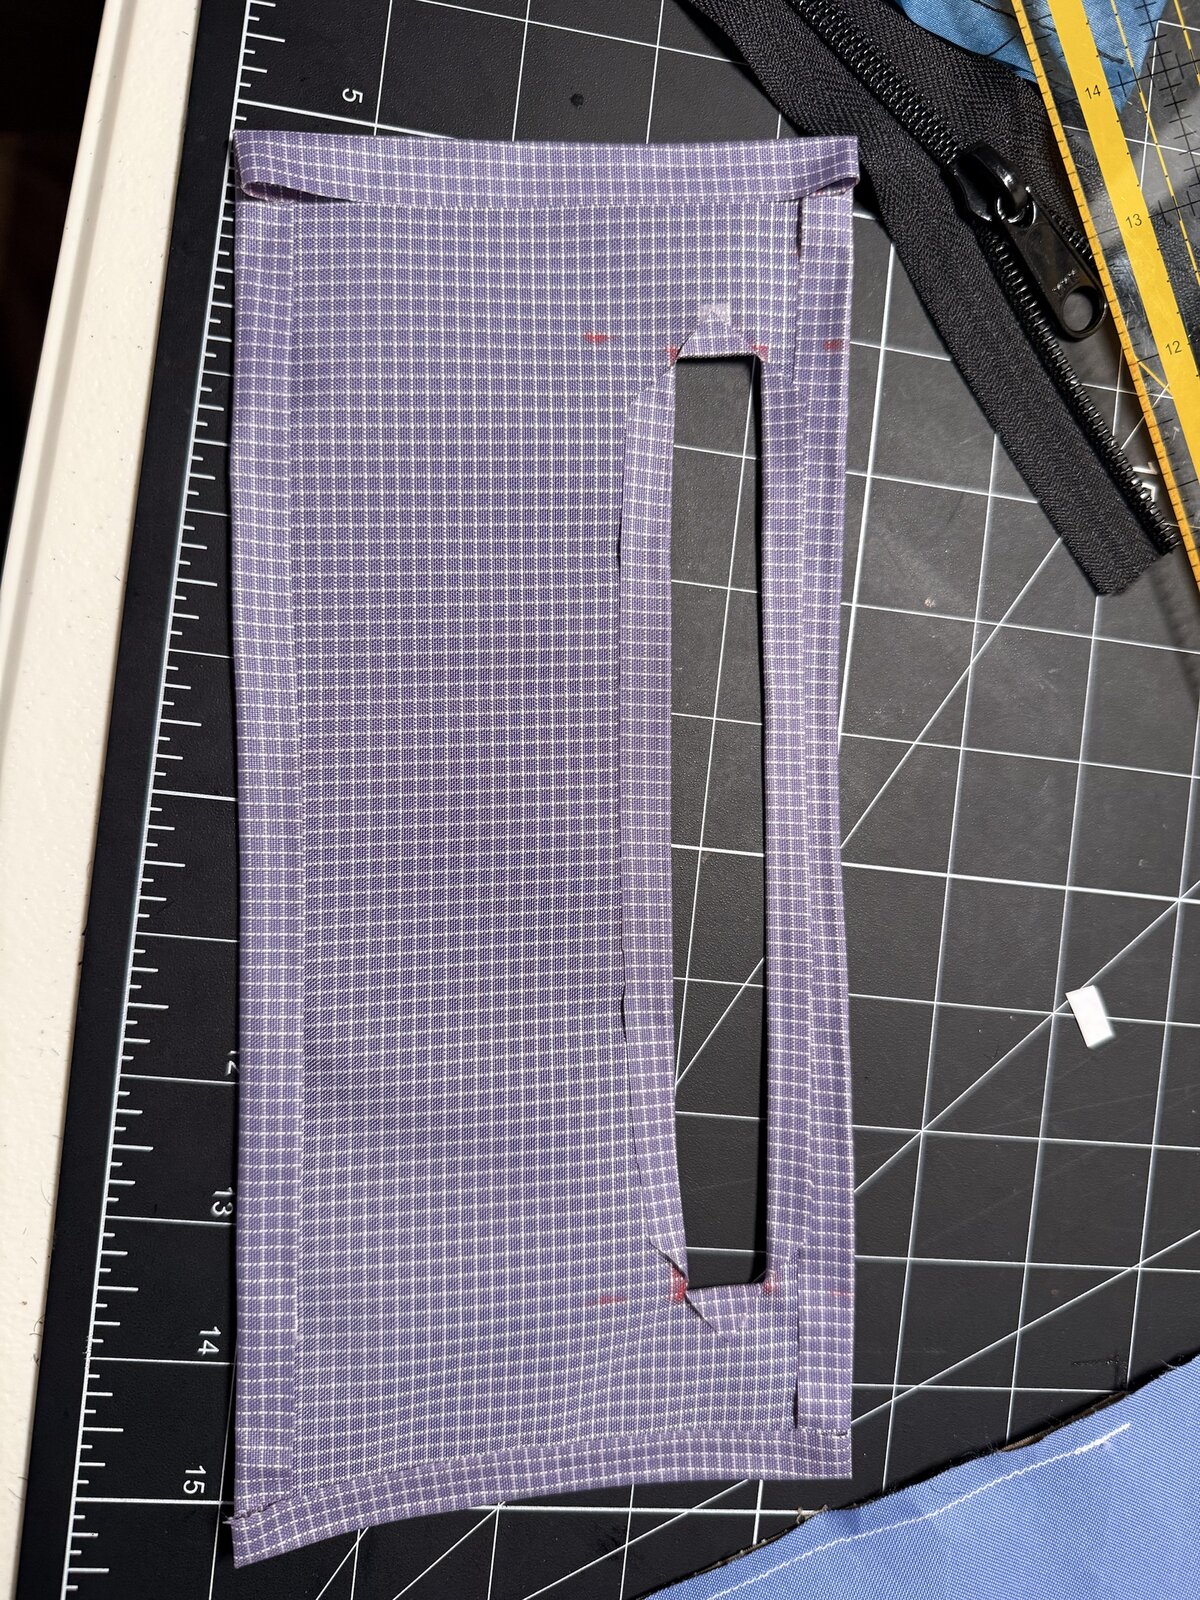
13. Turn the opening edges underneath
Fold the slit allowances and end triangles to the wrong side to form a clean window. Hold the folds with double-sided sewing tape. Keep the opening straight and the corners neat.
Install the pocket zipper
14. Center and hold the zipper
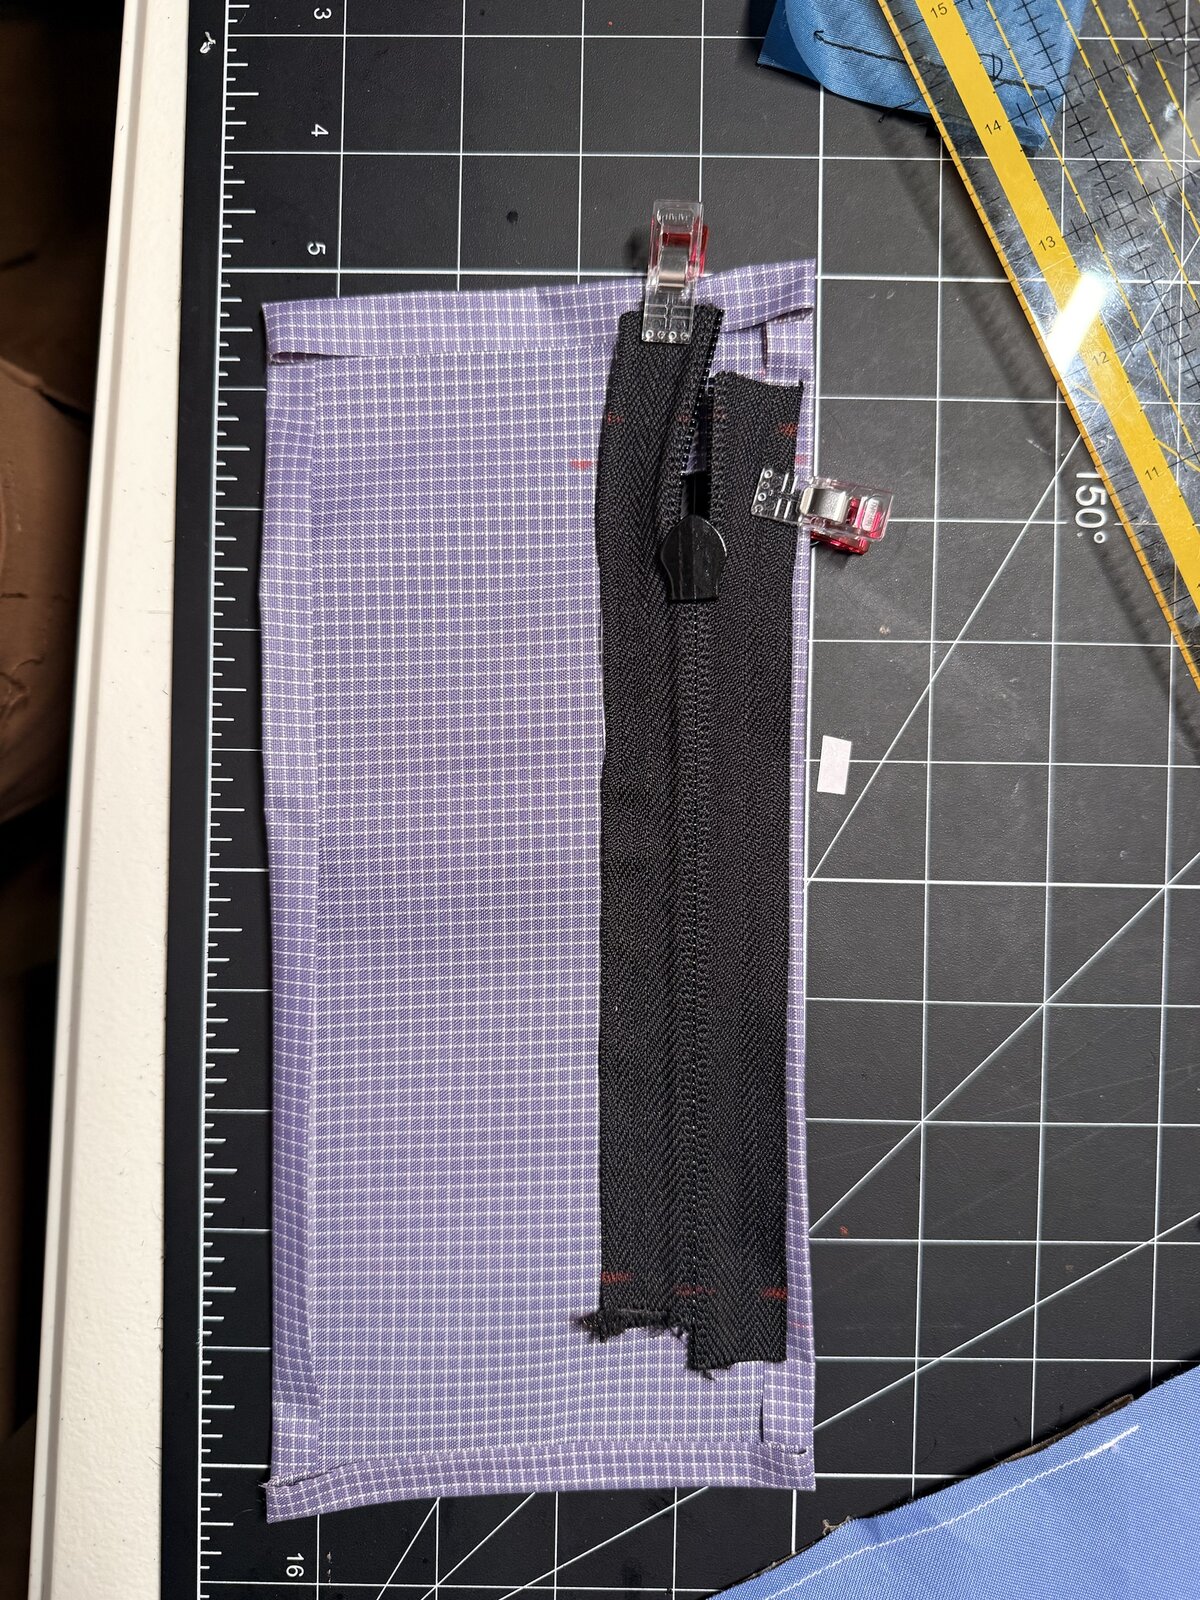
If you're using continuous zipper chain, fit the pocket slider first. Place the zipper behind the window with the slider body facing outward, so the pull will face outward. Use double-sided sewing tape to hold the folded window edges against the zipper's fabric edge, and add clips as needed. Keep the slider within the opening and check that the fabric edge extends behind every edge. A 9″ length of zipper chain gives about ½″ of overlap beyond each end of an 8″ window, which is enough to hold securely.
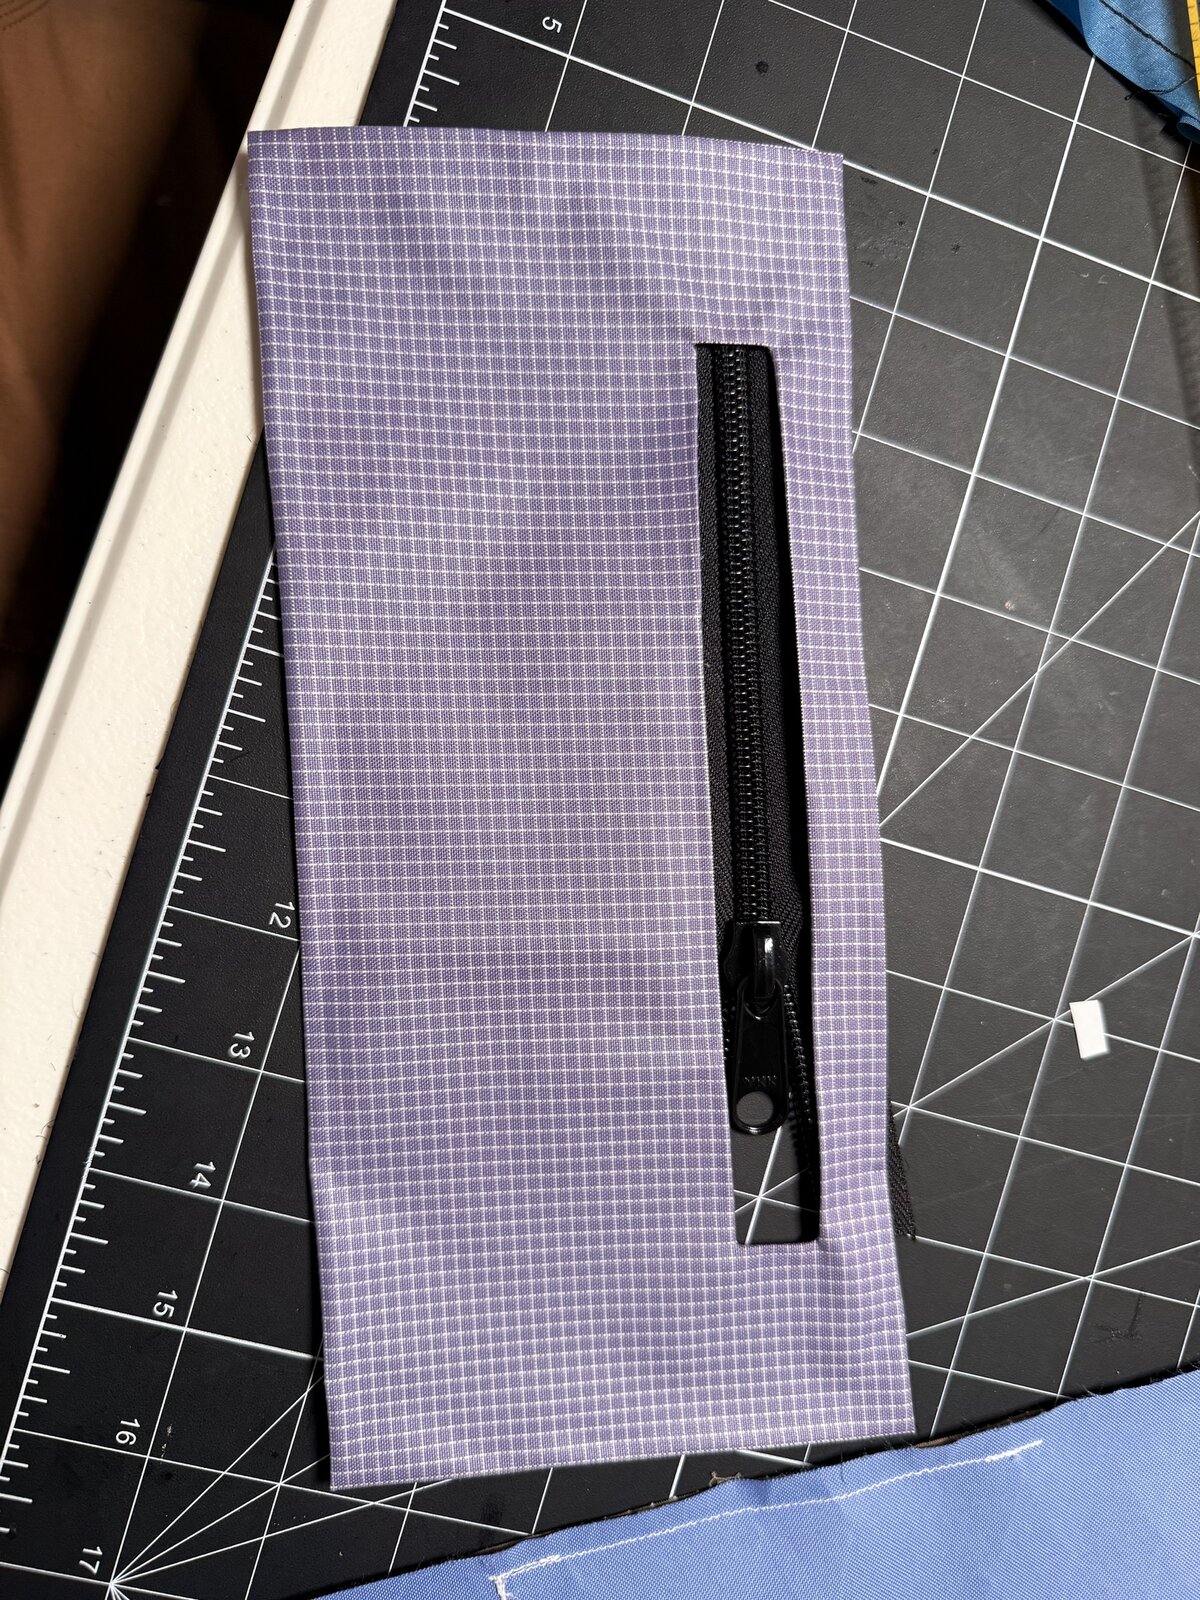
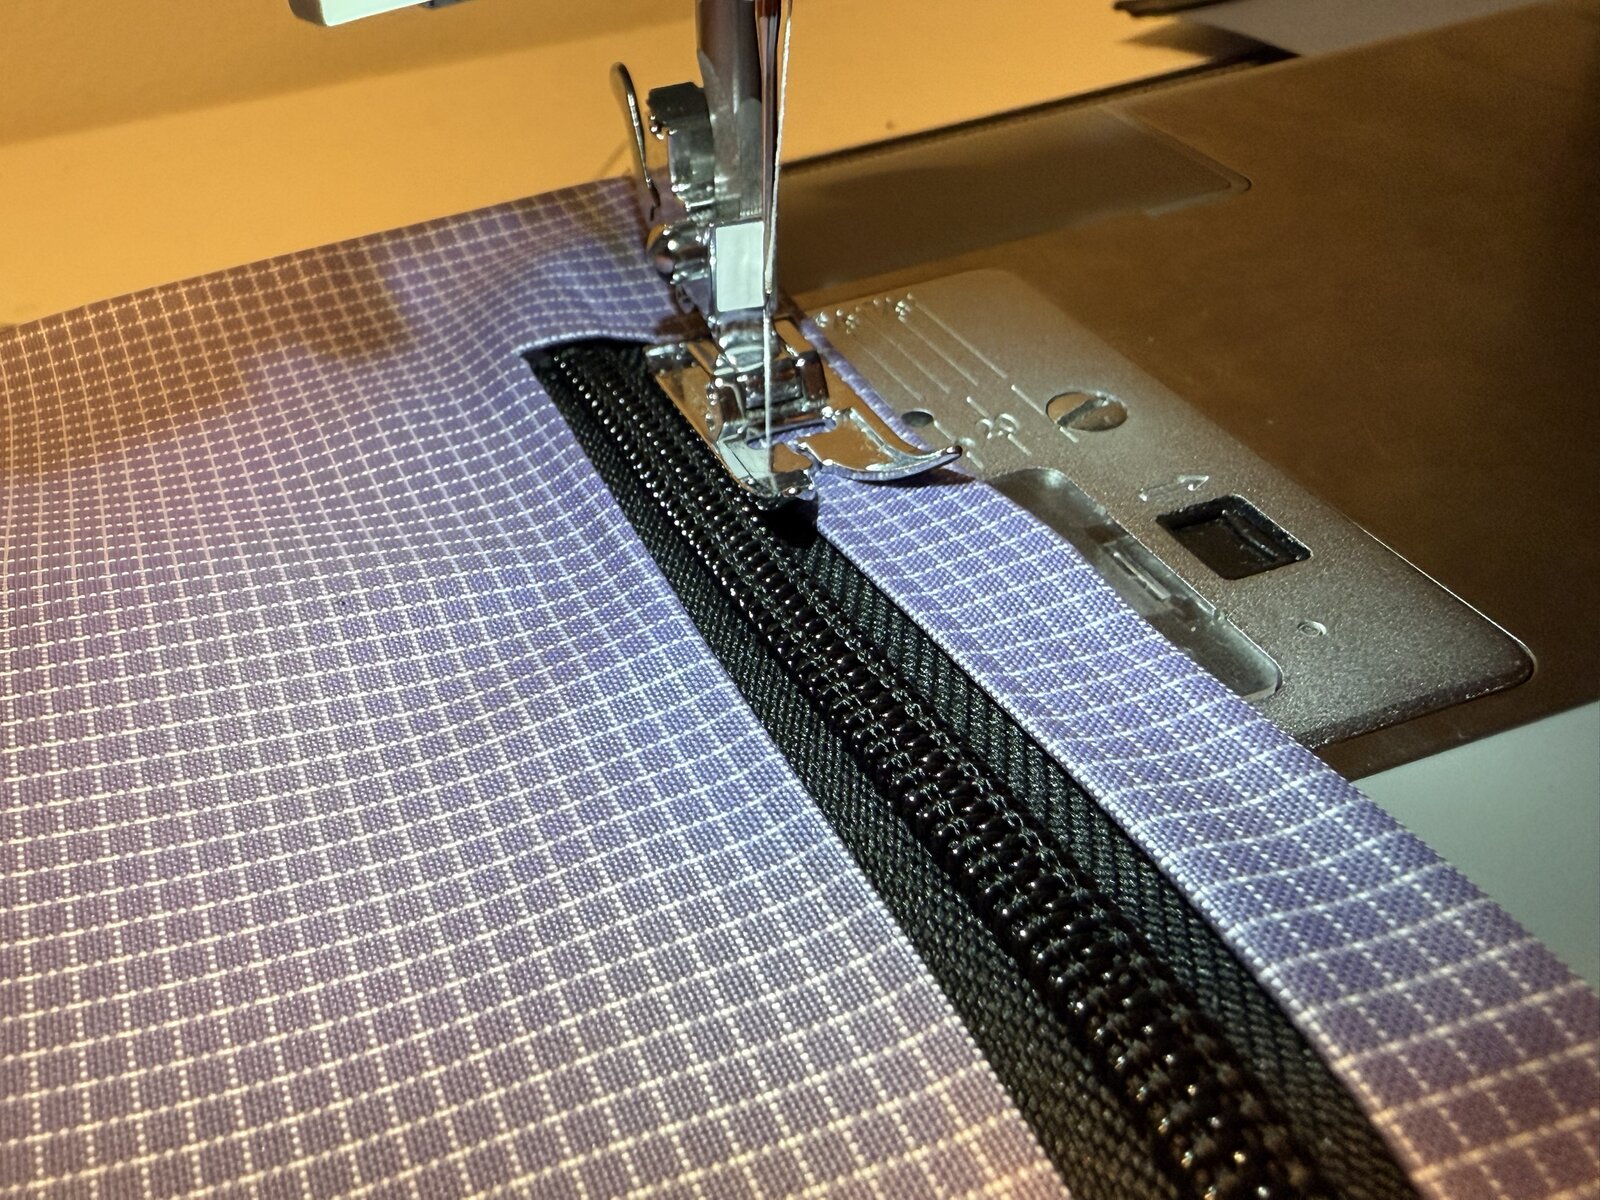
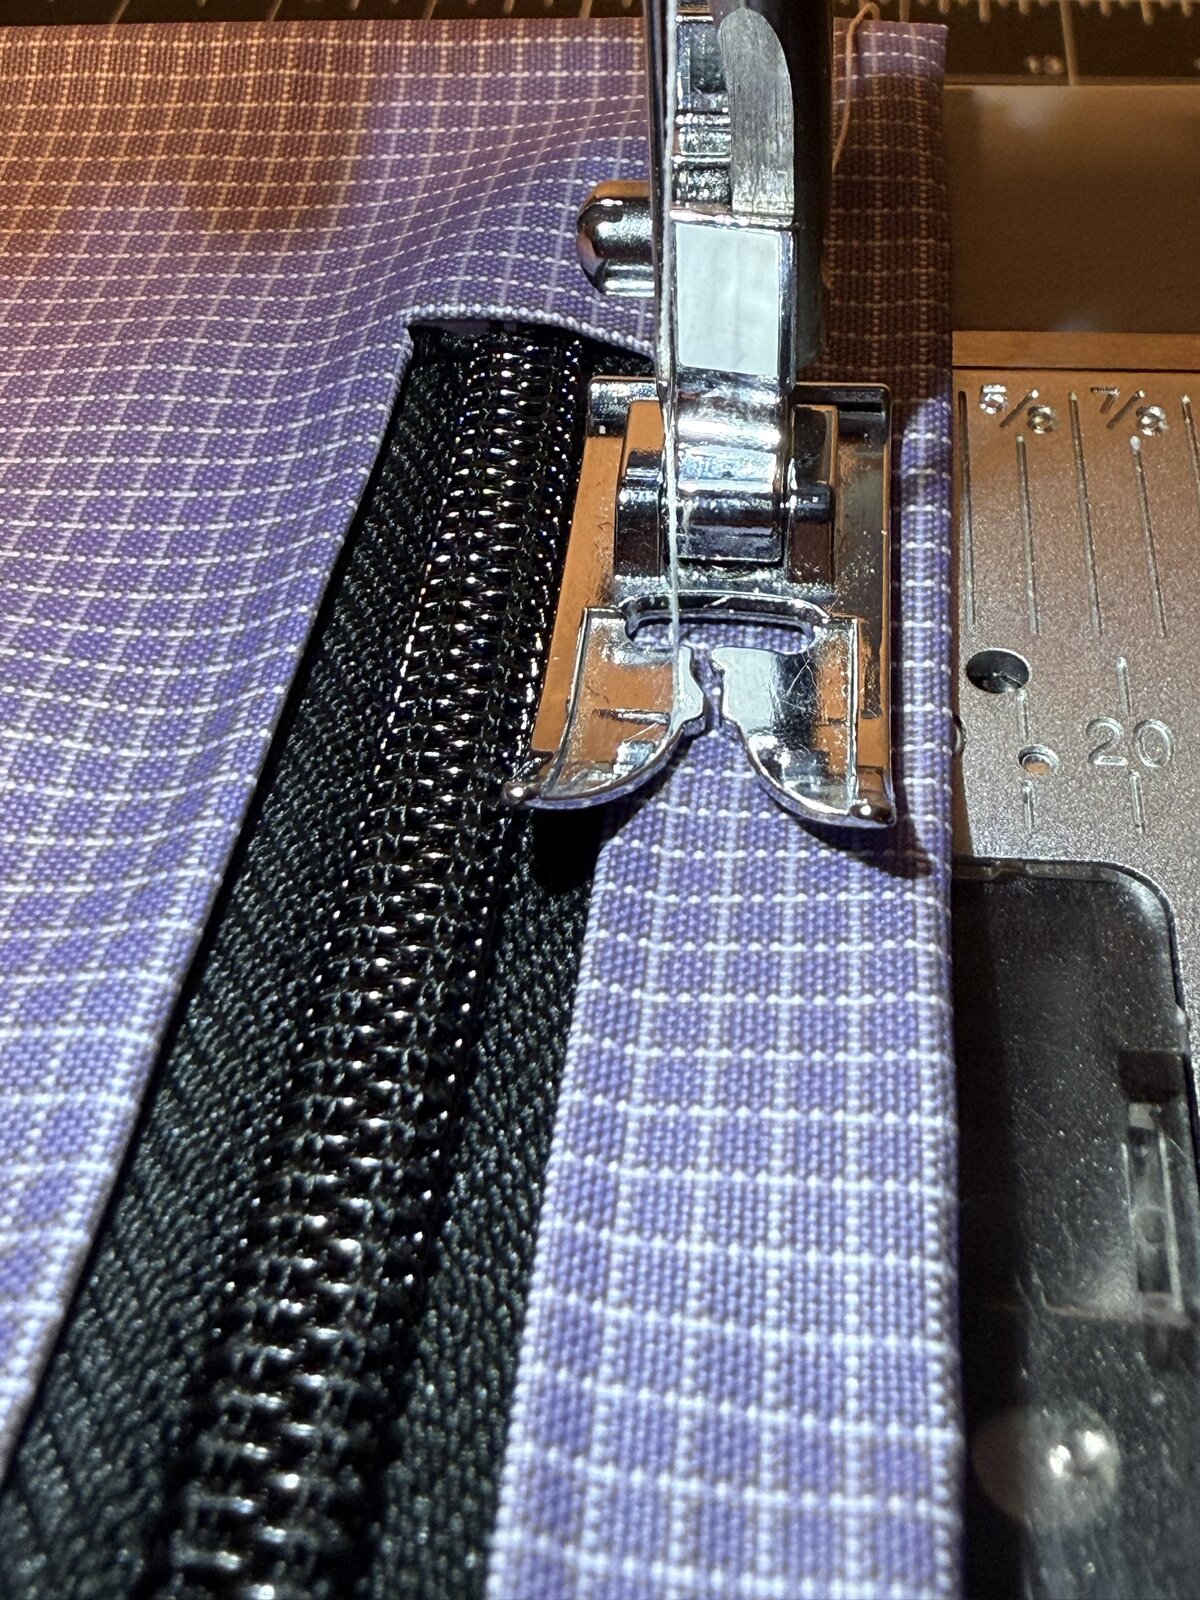
15. Topstitch the window
With the patch still separate from the RX30, stitch around all four sides of the window through the Gridstop and the zipper's fabric edge. At the corners, stop needle-down, lift the foot and pivot. Move the slider clear of the foot as needed, and avoid metal stops. Test the zipper before moving on.
Attach the exterior pocket
16. Position the patch
Lay the RX30 plain blue face up, working on the outside of the same back wall that carries the mesh on the inside. Place the patch over the mesh pocket stitching, with its zipper toward the orange center loop. Keep the perimeter allowances tucked under, then hold the patch with double-sided sewing tape and clip it square to the body. Make sure the top edge of the patch lands above the top of the mesh pocket inside. If it lands lower, the perimeter topstitching in the next step will sew the mesh pocket shut.
Clearance note: This version is tight. The mesh opening is about 4¾″ above the bottom crease, and the folded patch is about 5″ tall, so there's only about ¼″ of margin if their bottom edges line up. Don't fix that by lowering the patch. On a remake, make the patch taller by adding height at the top (for example, cut the Gridstop 11″ × 6″), then recheck the clearance around the orange loop and the main zipper.
17. Stitch all four outer edges
Topstitch the entire folded perimeter. The zipper is the way into the pocket, so the upper edge gets sewn down too. Keep the body flat and check the mesh underneath as you sew so you don't catch an interior-pocket opening. The RX30 forms the back wall of the exterior pocket.
Shape & close the pouch
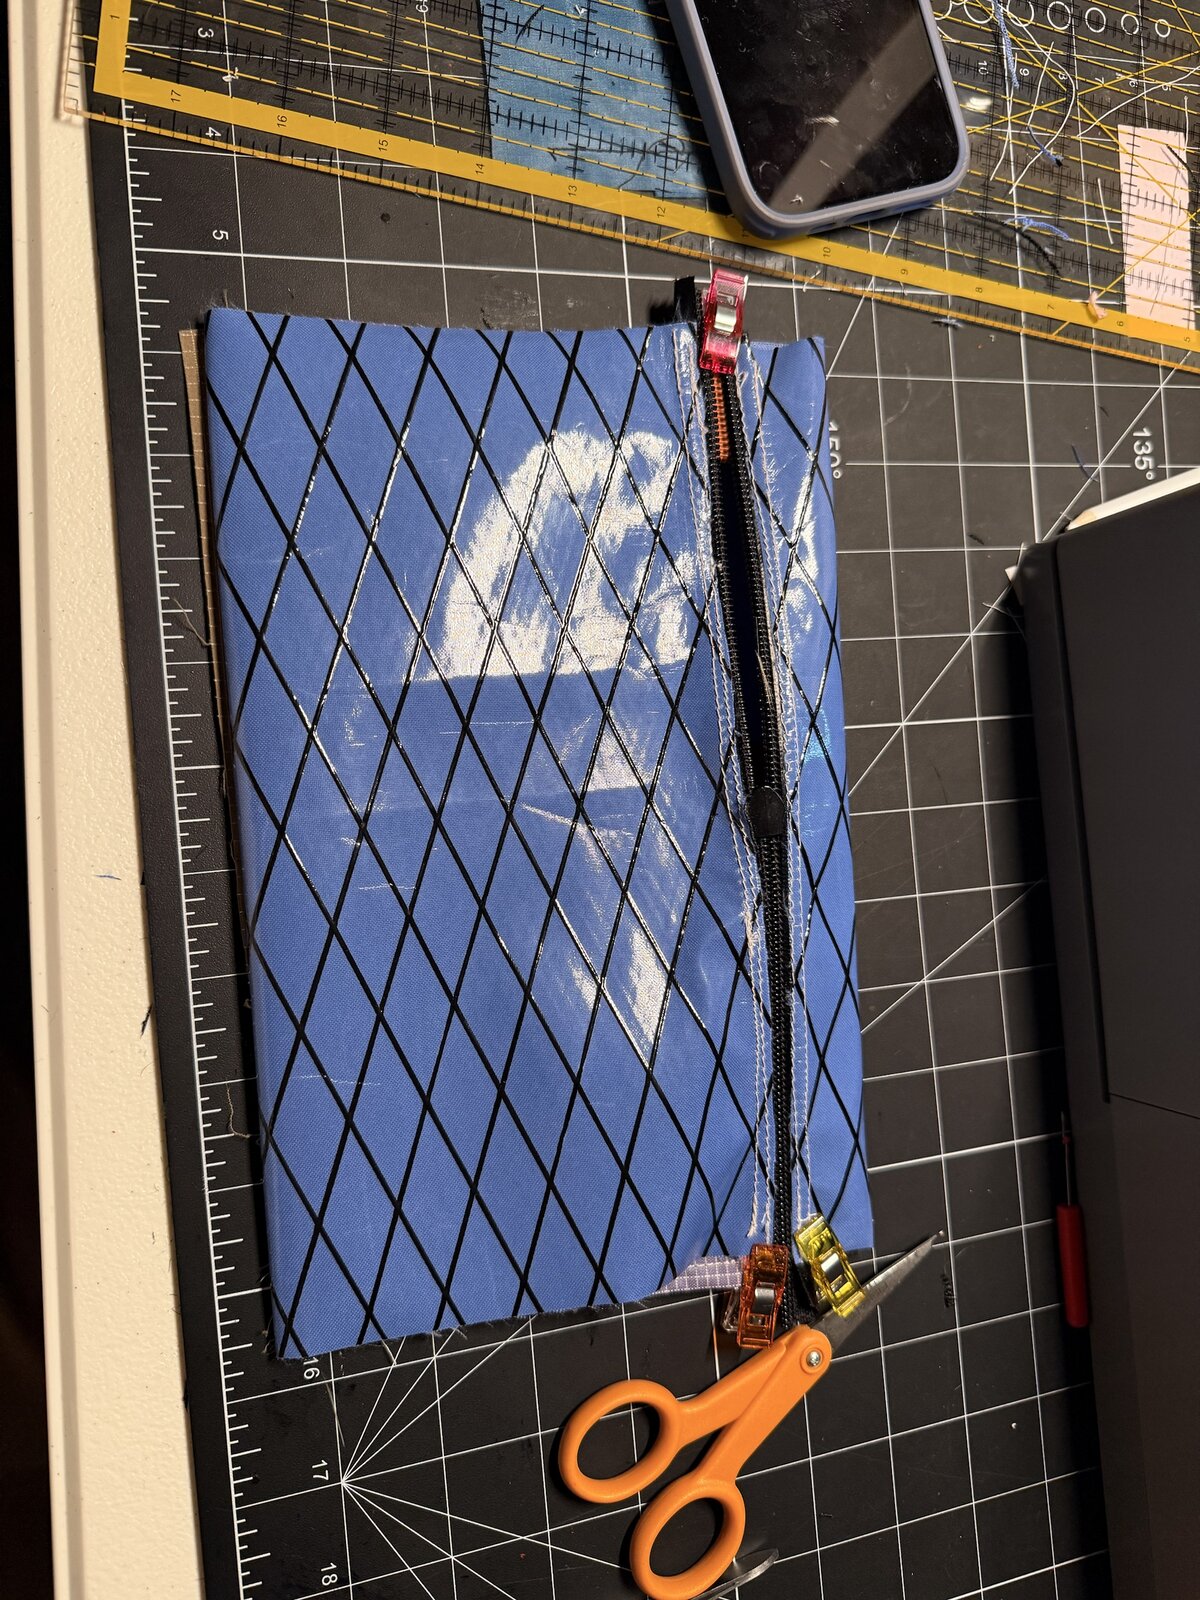
18. Arrange the body inside out
Install the main zipper slider now, right before sewing the sides. Join the zipper halves and leave the zipper partly open so you can turn the pouch later. Flatten the body with the exterior faces inward and the main zipper about 1″ below the top fold. I placed it by eye on this build; check that both sides sit evenly before clipping the side seams.
19. Insert the two side loops
Make two more orange grosgrain loops, each about 3″ long before folding. Hide their rough ends. Place one at each end of the zipper, between the body layers, with the loop pointing inward and its base caught in the side seam. Keep the center and black loops out of the way.
20. Sew both sides
Align and clip the side edges. Sew both side seams, securing the ends and reinforcing the loop bases. Use a consistent ⅜″ seam allowance.
Bind, turn & finish
21. Trim and bind the side seams
Trim the seam allowances evenly, but not so close that you weaken the stitching. Cut two lengths of 1″-wide bias tape a little longer than the side seam, about 7″ each. Wrap one around each trimmed edge, tuck the raw binding ends under at both ends, and clip. Sew through both sides of the binding, then trim any excess. The binding encloses the raw edges.
22. Turn and add zipper pulls
Turn the pouch right side out through the open main zipper and gently shape the corners. Add zipper pulls; I like Maxpedition pulls. Test both zippers and both interior compartments. If you included the black grosgrain loop, you can clip a carabiner through it for light-duty use.
Notes
Body width. The body is cut 10″ wide and finishes at about 9¼″ wide with ⅜″ side seams.
Patch-pocket folds. The ½″ side folds and ¼″ top and bottom folds are approximate. Dry-fit the patch and check where its edges meet the body side seams before topstitching.
Zippers. Use #5 chain and matching #5 sliders throughout. The pocket zipper needs 9″ of chain for an 8″ window. Cut the main zipper chain to the 10″ body edge.
Weatherproofing. Weatherproof doesn't mean submersible or waterproof. Needle holes, seams and the standard-coil pocket zipper can all let water in.
Ideas for the next version
- Leave out the black grosgrain loop. It takes up room and isn't needed.
- Move the orange center tag up. Placing it a little higher on the bag leaves room for a bigger exterior pocket.
- Make the patch pocket taller. Add height at the top so the top of the patch clears the mesh-pocket opening by more than the roughly ¼″ margin in this version.
- Add darted corners to the patch pocket. Darting its bottom corners would give the exterior pocket more volume.